


Curve Card Review. All your cards in one and a real travel money saver
If you are reading this you likely already know what Curve is, but I’ll give it a brief intro just in case you aren’t sure what exactly the Curve card is. The Curve card is a card that allows you to use almost any card from your wallet but carry just the Curve card with you. You can connect your credit and debit cards to your Curve app and then select which card you would like to use. When you use the Curve card in a store or online the card you selected in the app will be billed.
I’ve been using Curve since the BETA stage and have come to use it daily for both business and personal expenses. After a few years of use, I thought I’d do a review of my experiences with Curve.
The perfect card for Worldwide use
I’ll begin with what I love about Curve. I used to carry around 4 cards, 2 for personal and 2 for business. Curve was inviting as you only have to remember one pin number, although to me I only really used 2 of the 4 cards on a regular basis. And remembering pins wasn’t usually an issue. So where did Curve have its benefits for me? I spend a lot of time away from the UK and my bank charges stupid foreign exchange rates, Curve charges just 1% per transacting and has a flat £2 fee plus 1% for cash withdrawals while abroad. Although it’s not free to use abroad, unless you have a good travel credit card it will likely save you a load of money if you are out of the UK enough.
Curve does have a few drawbacks while abroad. You likely won’t have data on your mobile or often won’t be able to get a good connection as I find. In this case, you can’t switch your payment card in the Curve app so any transactions you make will be billed to the last card you used in Curve. This is no longer much of a problem as Curve introduced a feature that allows you to change the card that was used for a transaction within 14 days of making it. This is a truly awesome feature that saves a lot of admin work if you bill a lot of business purchases on a personal card by accident or vice versa.
Withdraw cash using a credit card and avoid any fees!
The other thing I love about Curve is the ability to withdraw cash using a credit card. Most credit cards will have a fee for withdrawing cash and will also charge interest immediately. With Curve, you can withdraw cash and it will show on the credit card as any other transaction would. If you have a credit card that doesn’t charge for foreign transactions then you can switch the currency of your card in Curve to withdraw cash in a local currency and avoid all fees. This currently only applies to Curves supported currencies so if you are in a country that doesn’t have a supported currency you will get charged the standard rate by Curve. Curve also has other benefits while abroad such as safety. You don’t have to carry your debit card with you at all so the worry of card cloning isn’t so much of a worry. I tend to just carry my Curve card, Amex and another Mastercard. This serves me well both in the UK and anywhere else. I can withdraw from any debit card that is on my Curve app and I also have a backup card if needed.
No American Express support... yet
 My biggest issue with Curve is the lack of Amex support. In the early days of Curve they supported Amex and some would say this is what gave Curve some serious attention. The ability to use your Amex anywhere a Mastercard is accepted. In the UK where Amex isn’t accepted in many places, this was a game changer. Plus getting to use your Amex abroad without the high FX fees. However, Curve no longer supports Amex so you will have to use your Amex outside of Curve.
When it comes to business Curve has as much value when making online payments for services, etc. Most of my business expenses are in USD which incurs a lot of bank charges, Curve drastically reduces these fees as we get charged the flat 1% fee on all FX transactions.
The Curve App
Curves app is very good, it has come a long way since I first started using it. Given you have a connection you can instantly switch between cards and you also get instant notifications when your card is used. This tends to be more efficient in the UK that say 3rd world countries where the notification doesn’t come through until a few days later. The payment notifications are very useful as they offer a nice security insight should your card ever fall into the wrong hands. You would know if someone was using it can you can lock the card from your app instantly.
I have a few concerns with Curve such as what would happen if I lost my phone. I’ve used the Curve support a few times and on all occasions, they were very fast to answer questions and always very helpful. Touch wood, I’ve yet to require their support with a fraud claim. It is worth noting that you will lose any cover that your credit card offers if you use it through your Curve card so that is worth considering when making payments.
What I like about Curve
- The ability to use all my cards (Except Amex) but only carry one.
- Curves App, the app is very useful for locking the card and checking transactions on the go.
- You don't have to inform your bank or Curve when you travel.
- FX fees. At just 1% per transaction in foreign currencies, it is likely cheaper than your bank or credit card when using it abroad.
- Easily change a previous transaction from one card to another.
- Security. Not having to carry debit cards with me always feels safer.
- The relatively early rewards system looks like it may become more powerful in the future.
What I dislike about Curve
- They have a lot of data. All the card details you add and also the transactions you make with Curve.
- Not sure what happens if I lose my phone. How can I change my Curve cards?
- FX fees. I have a Curve Black card, I would hope that in the future that the premium card comes with Zero FX fees.
- Only a small number of currencies are supported. Meaning you can bill your card in the local currency.
If you travel frequently then Curve is a good choice for you, also if you carry more than 2 cards then Curve will certainly be useful.
Puerto Galera, Philippines a Rugged Tropical Paradise
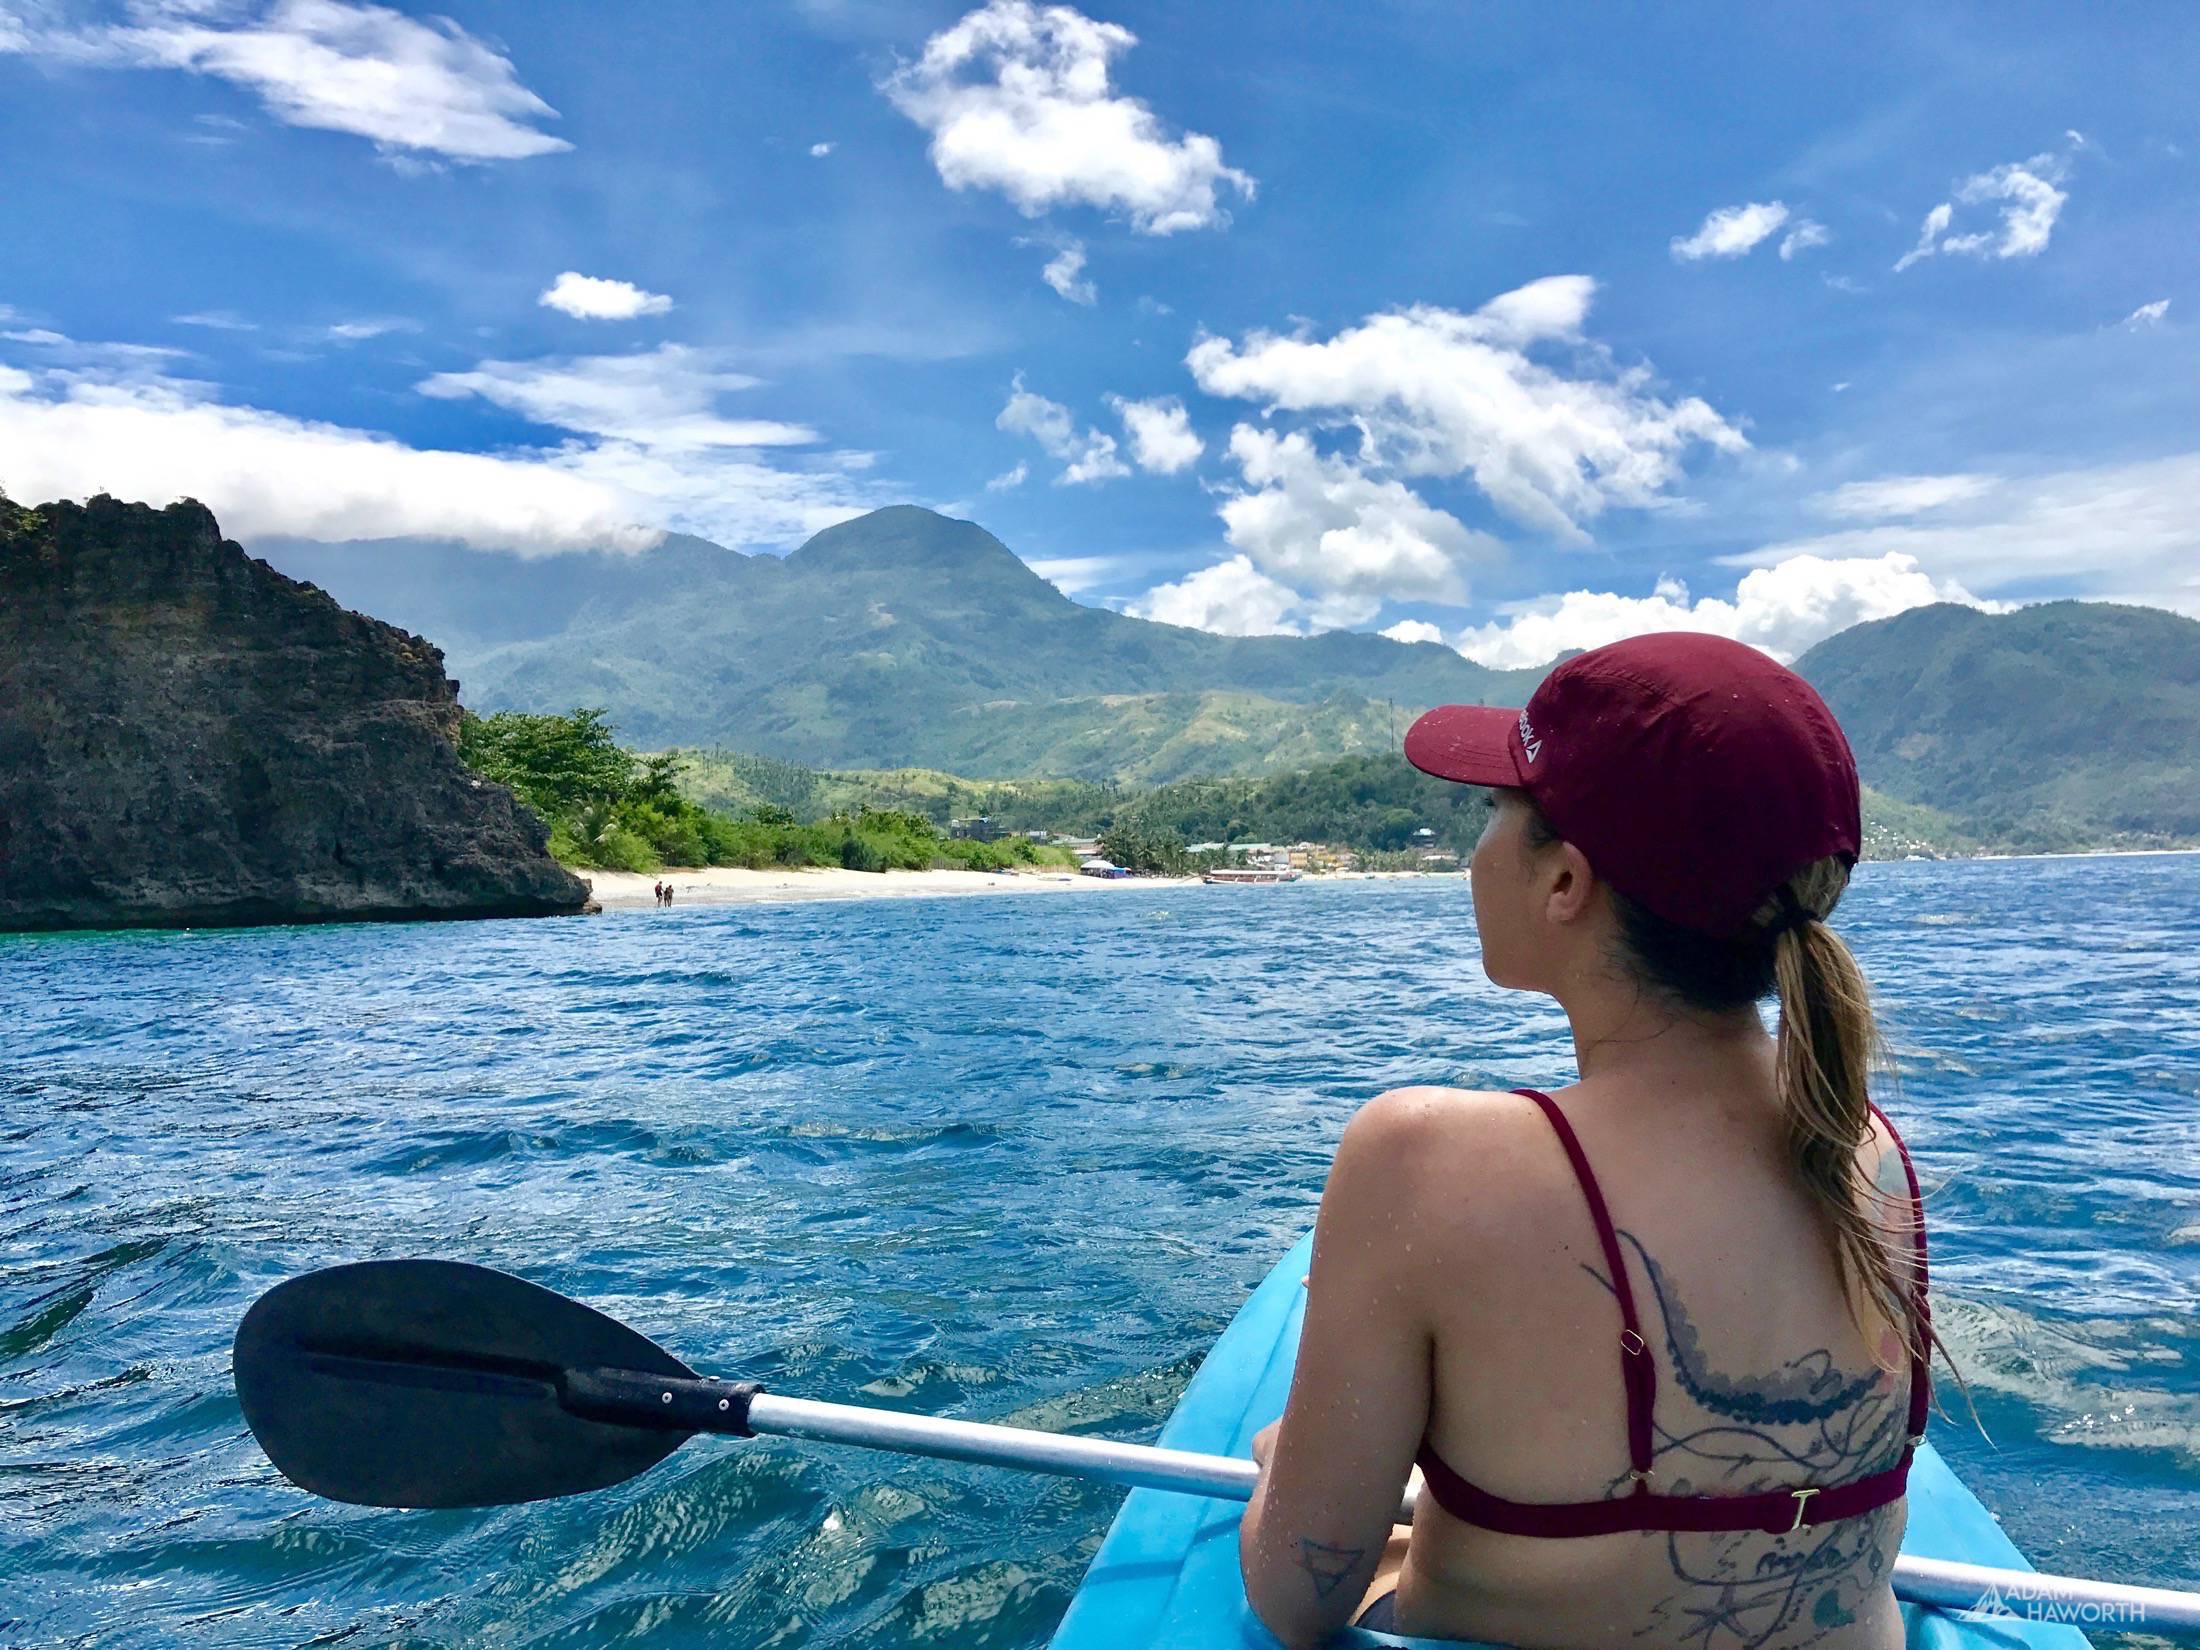
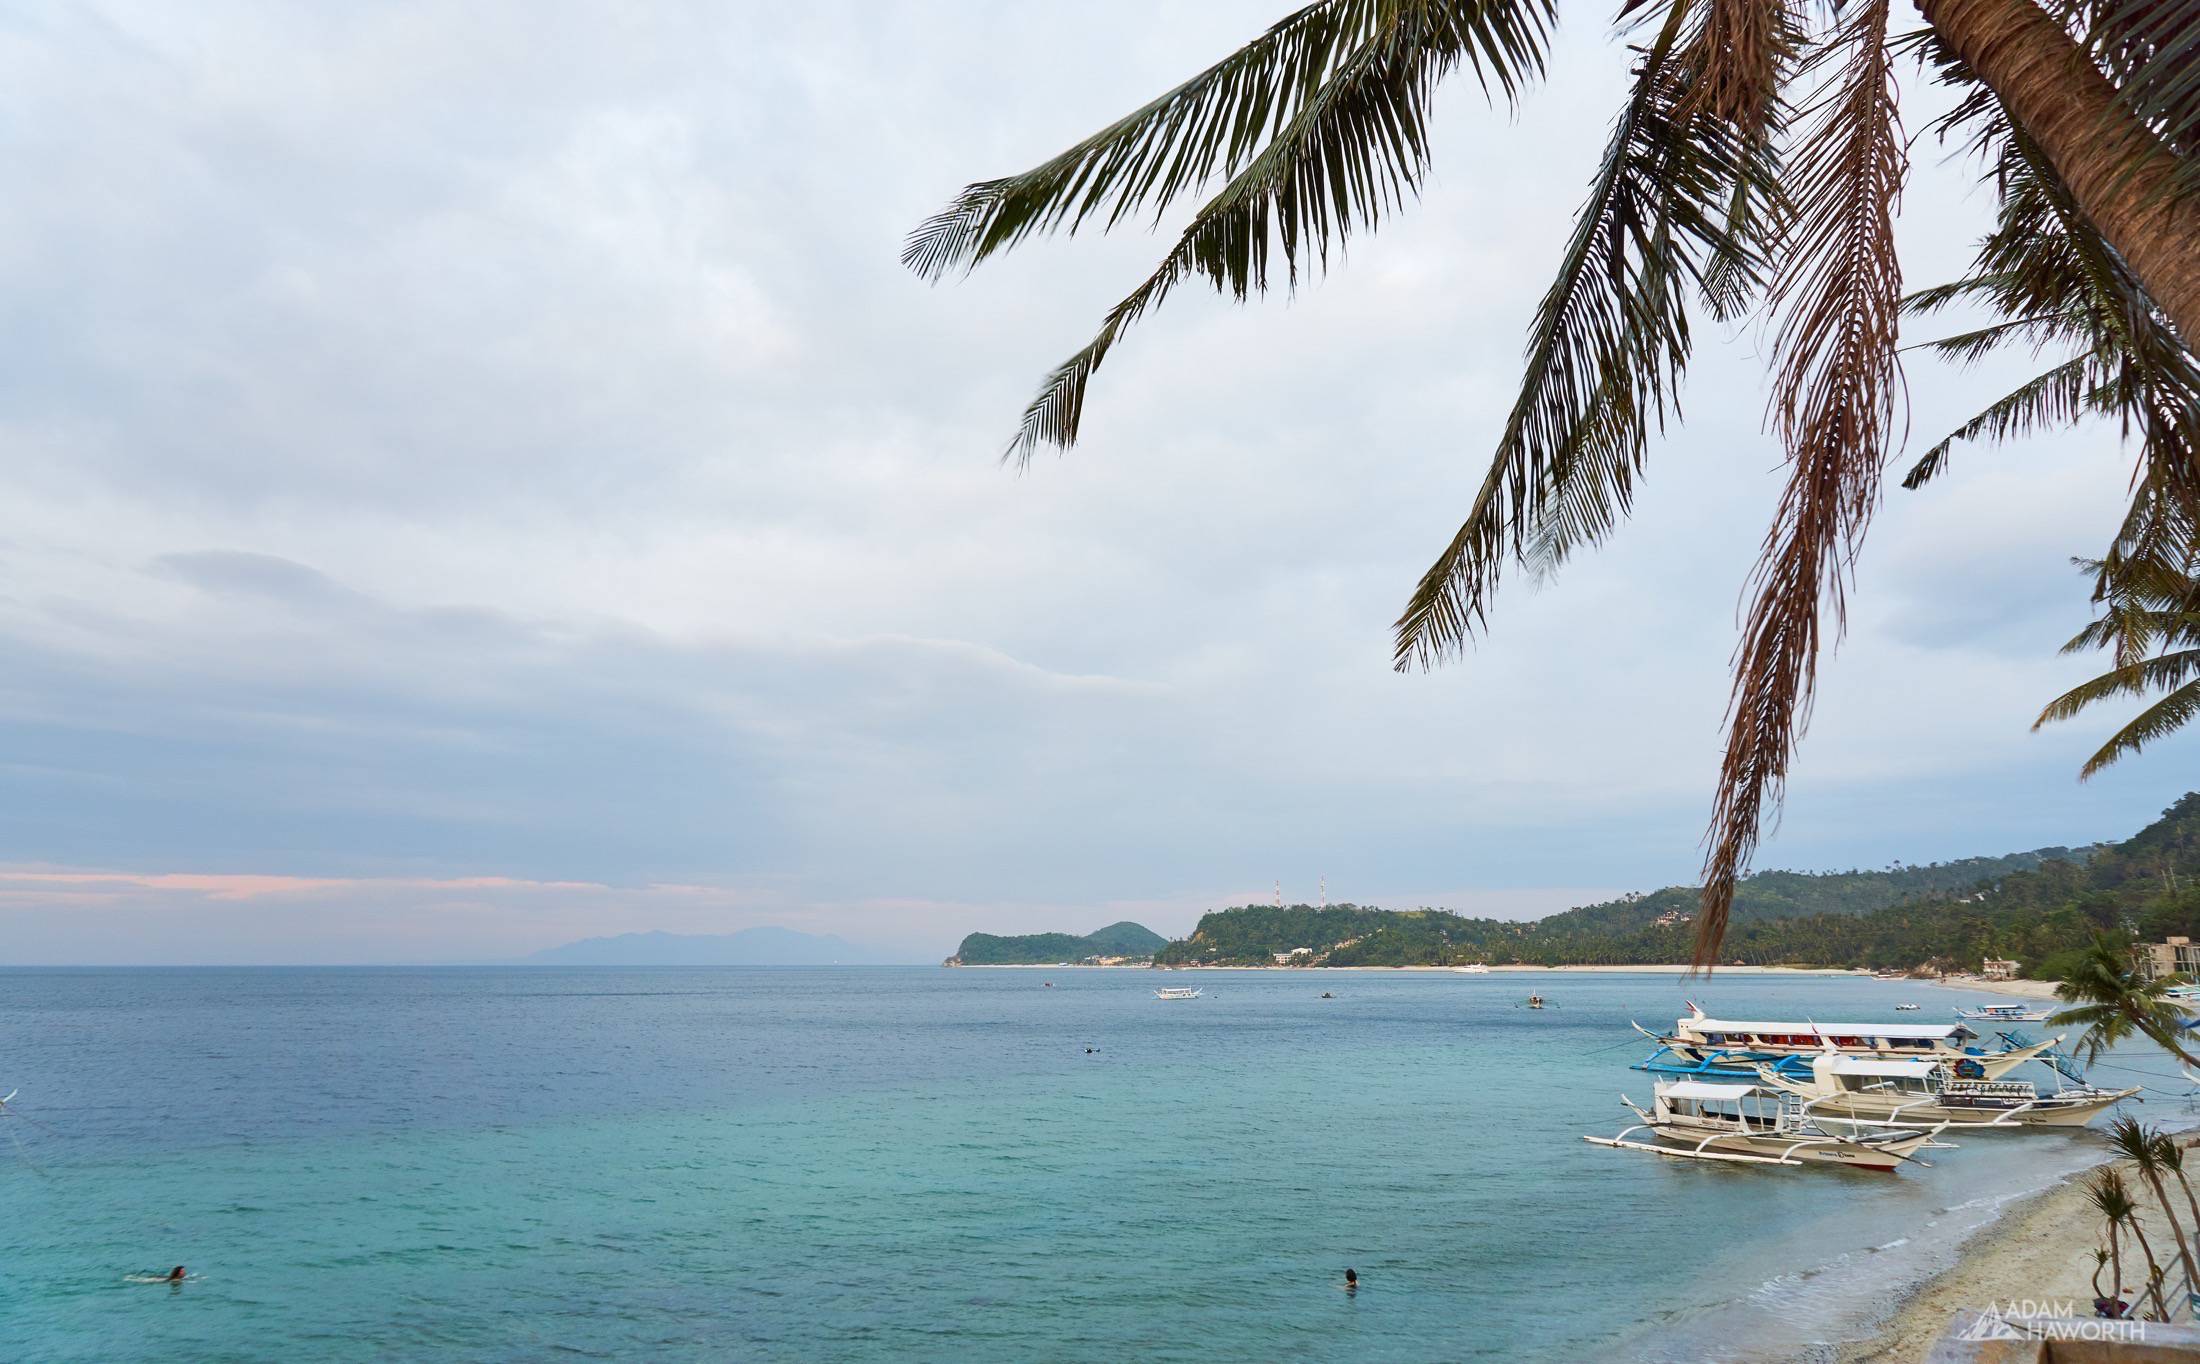
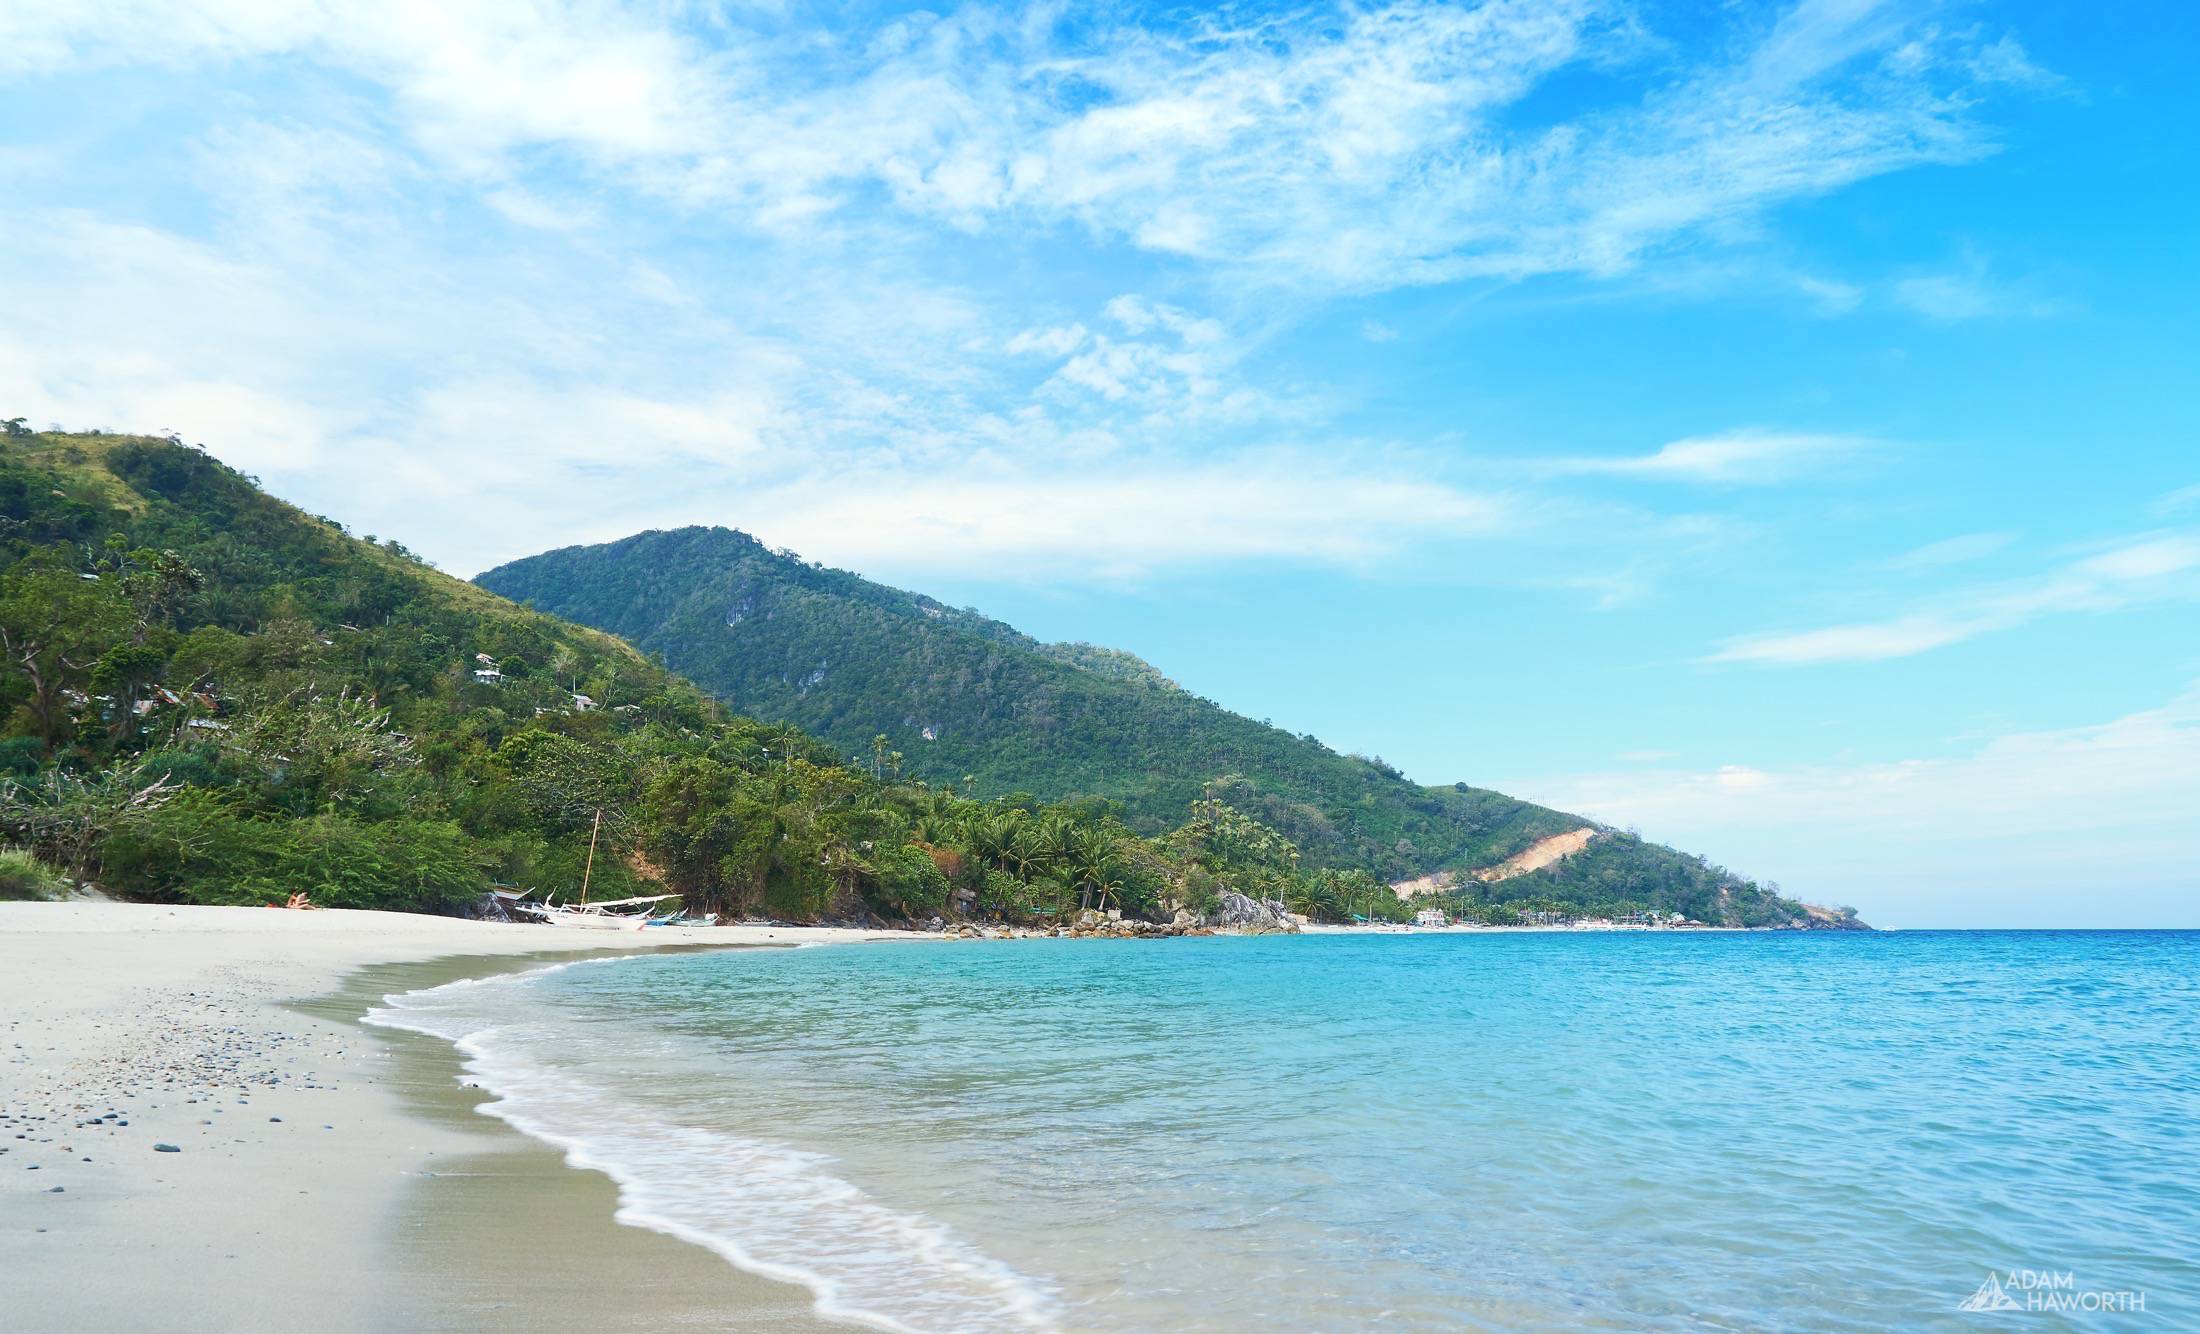
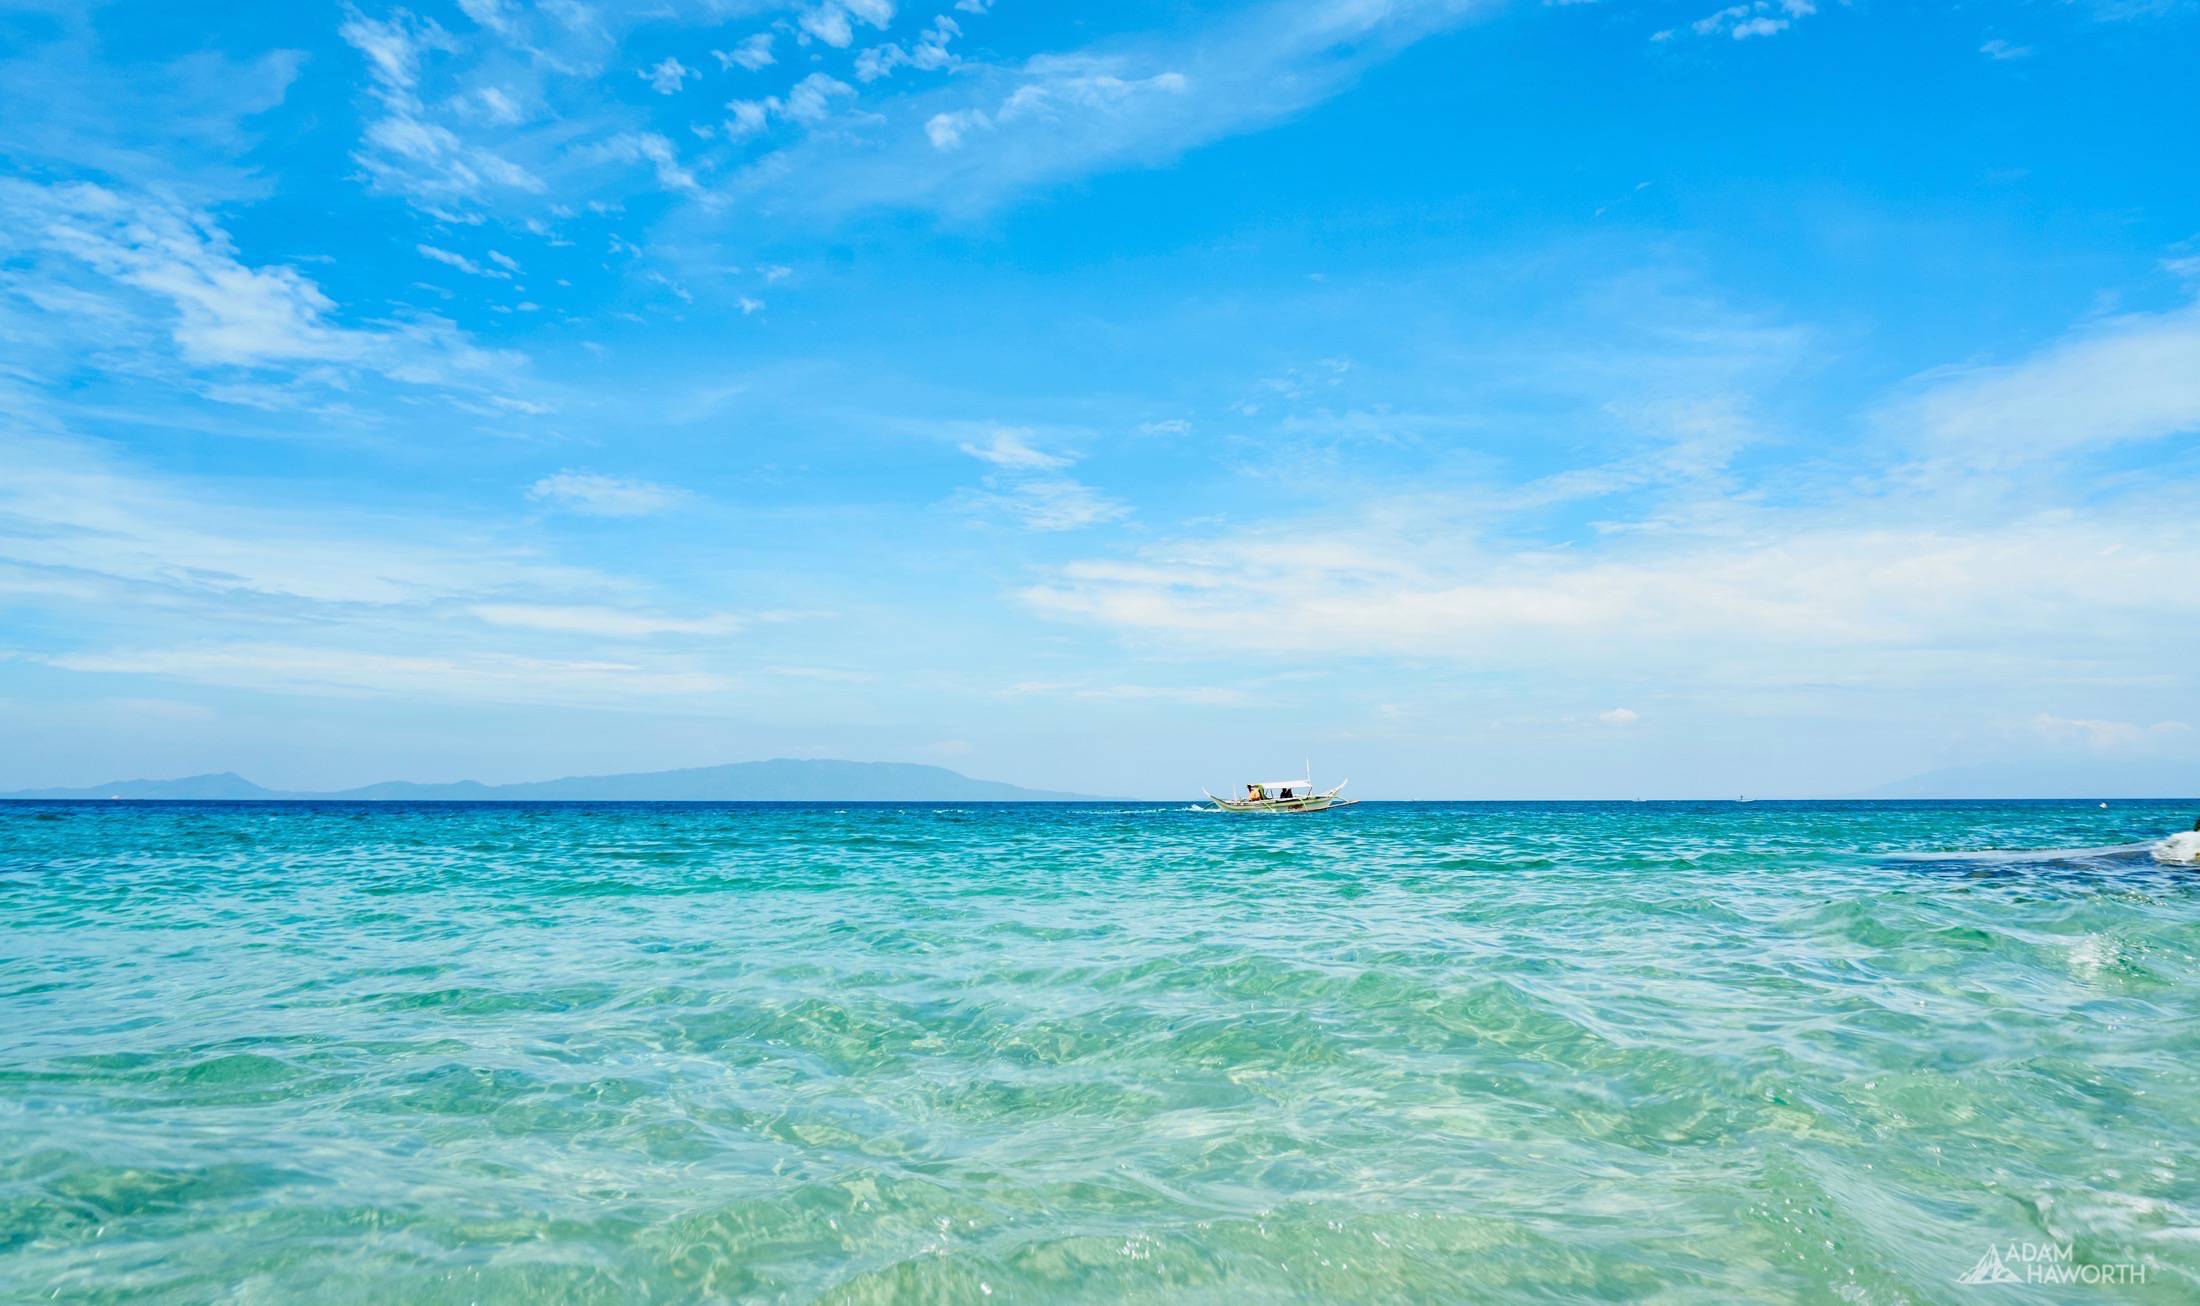
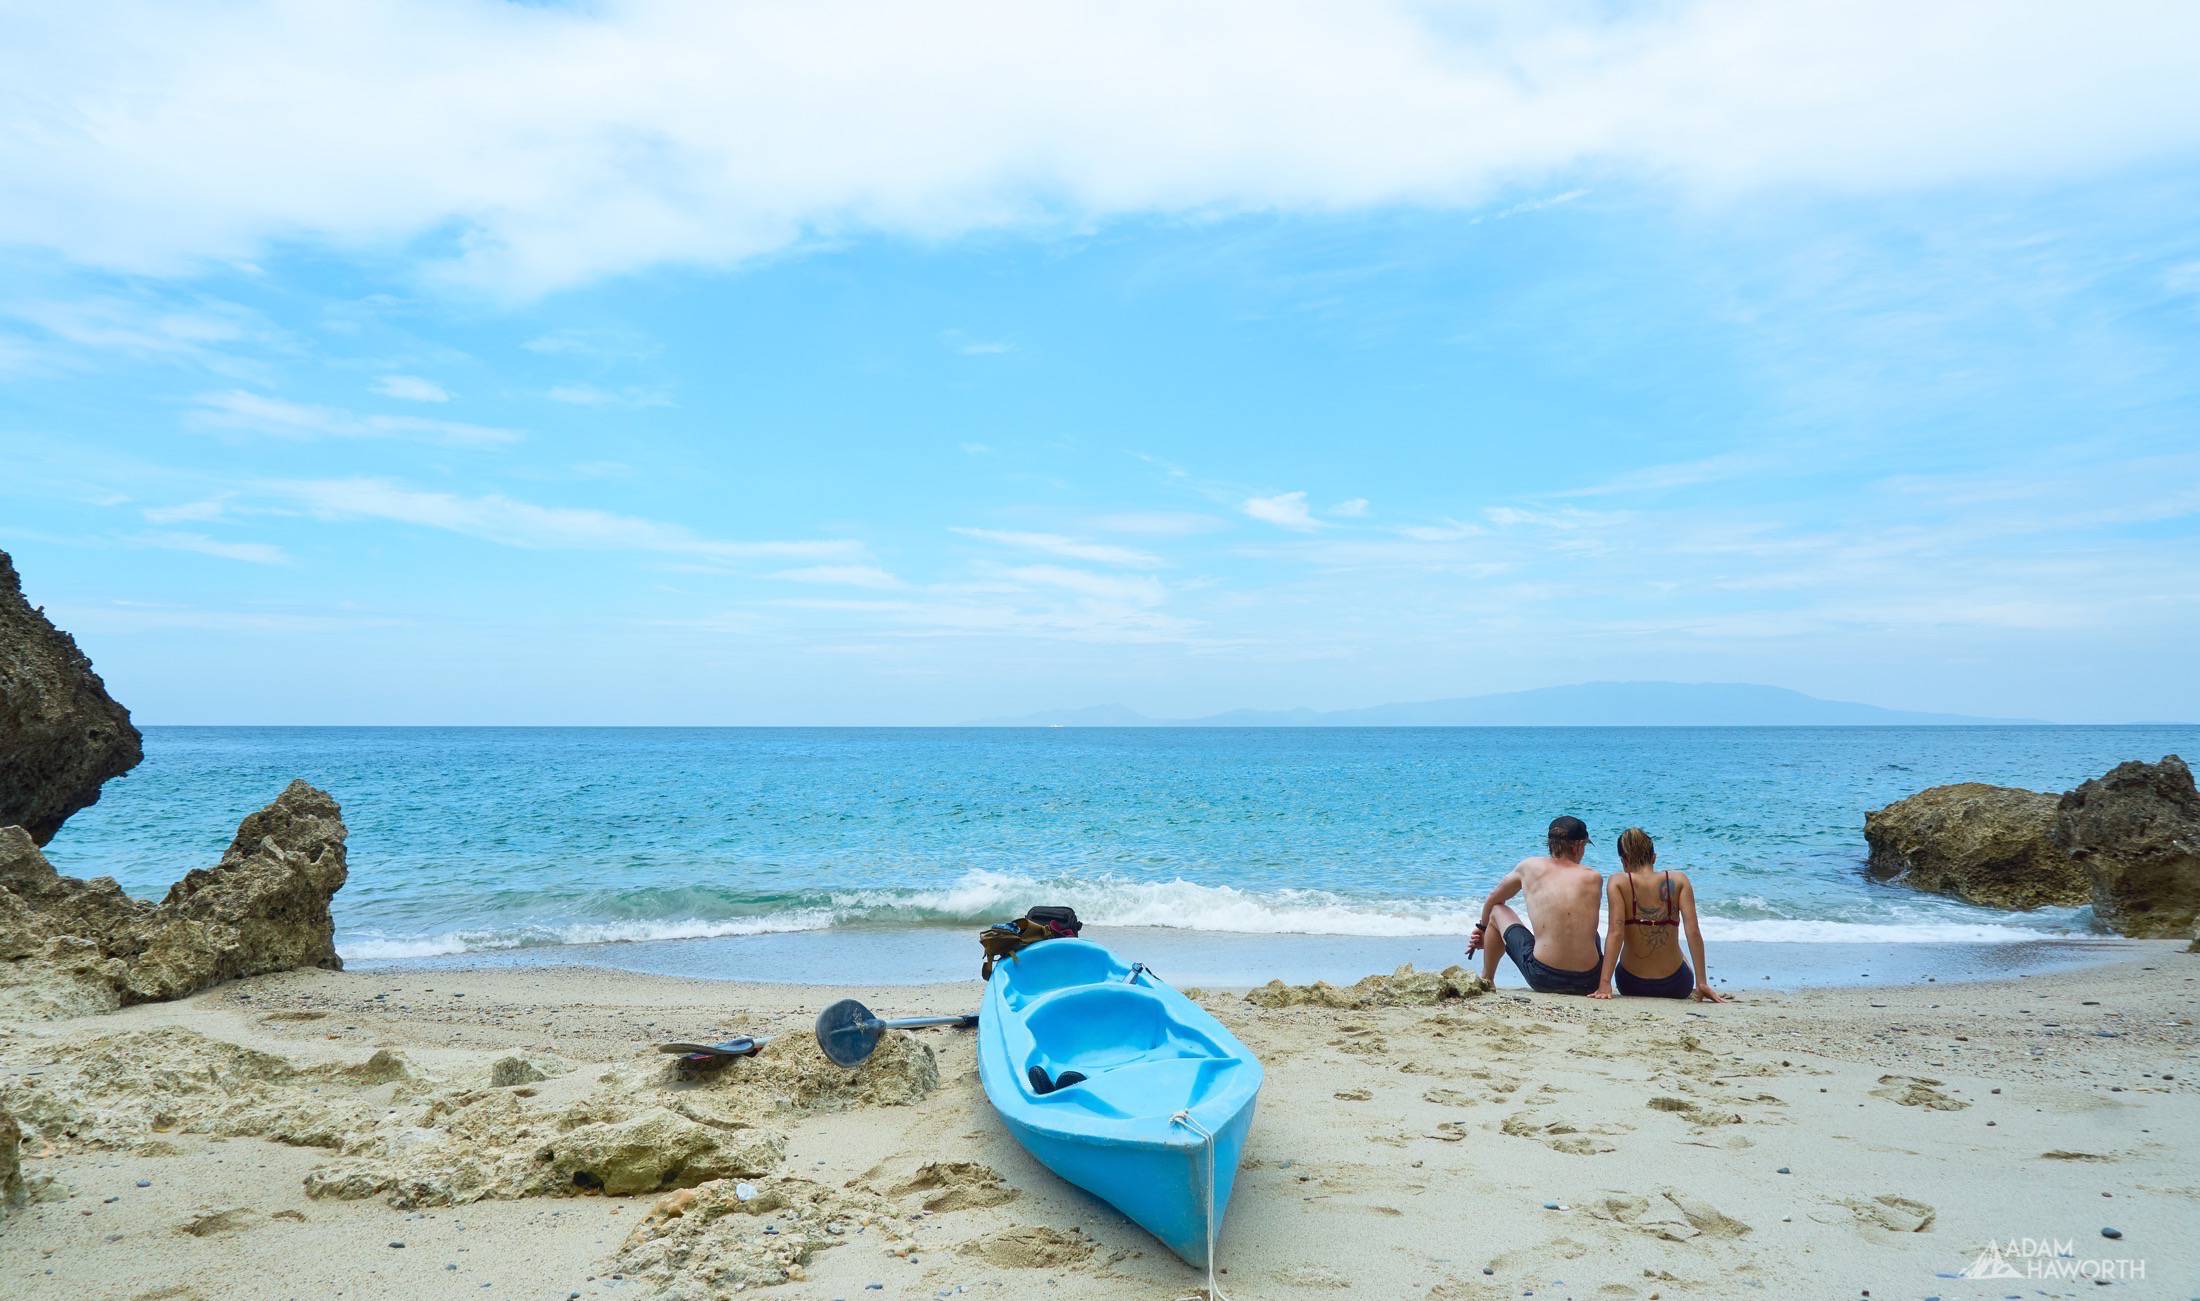
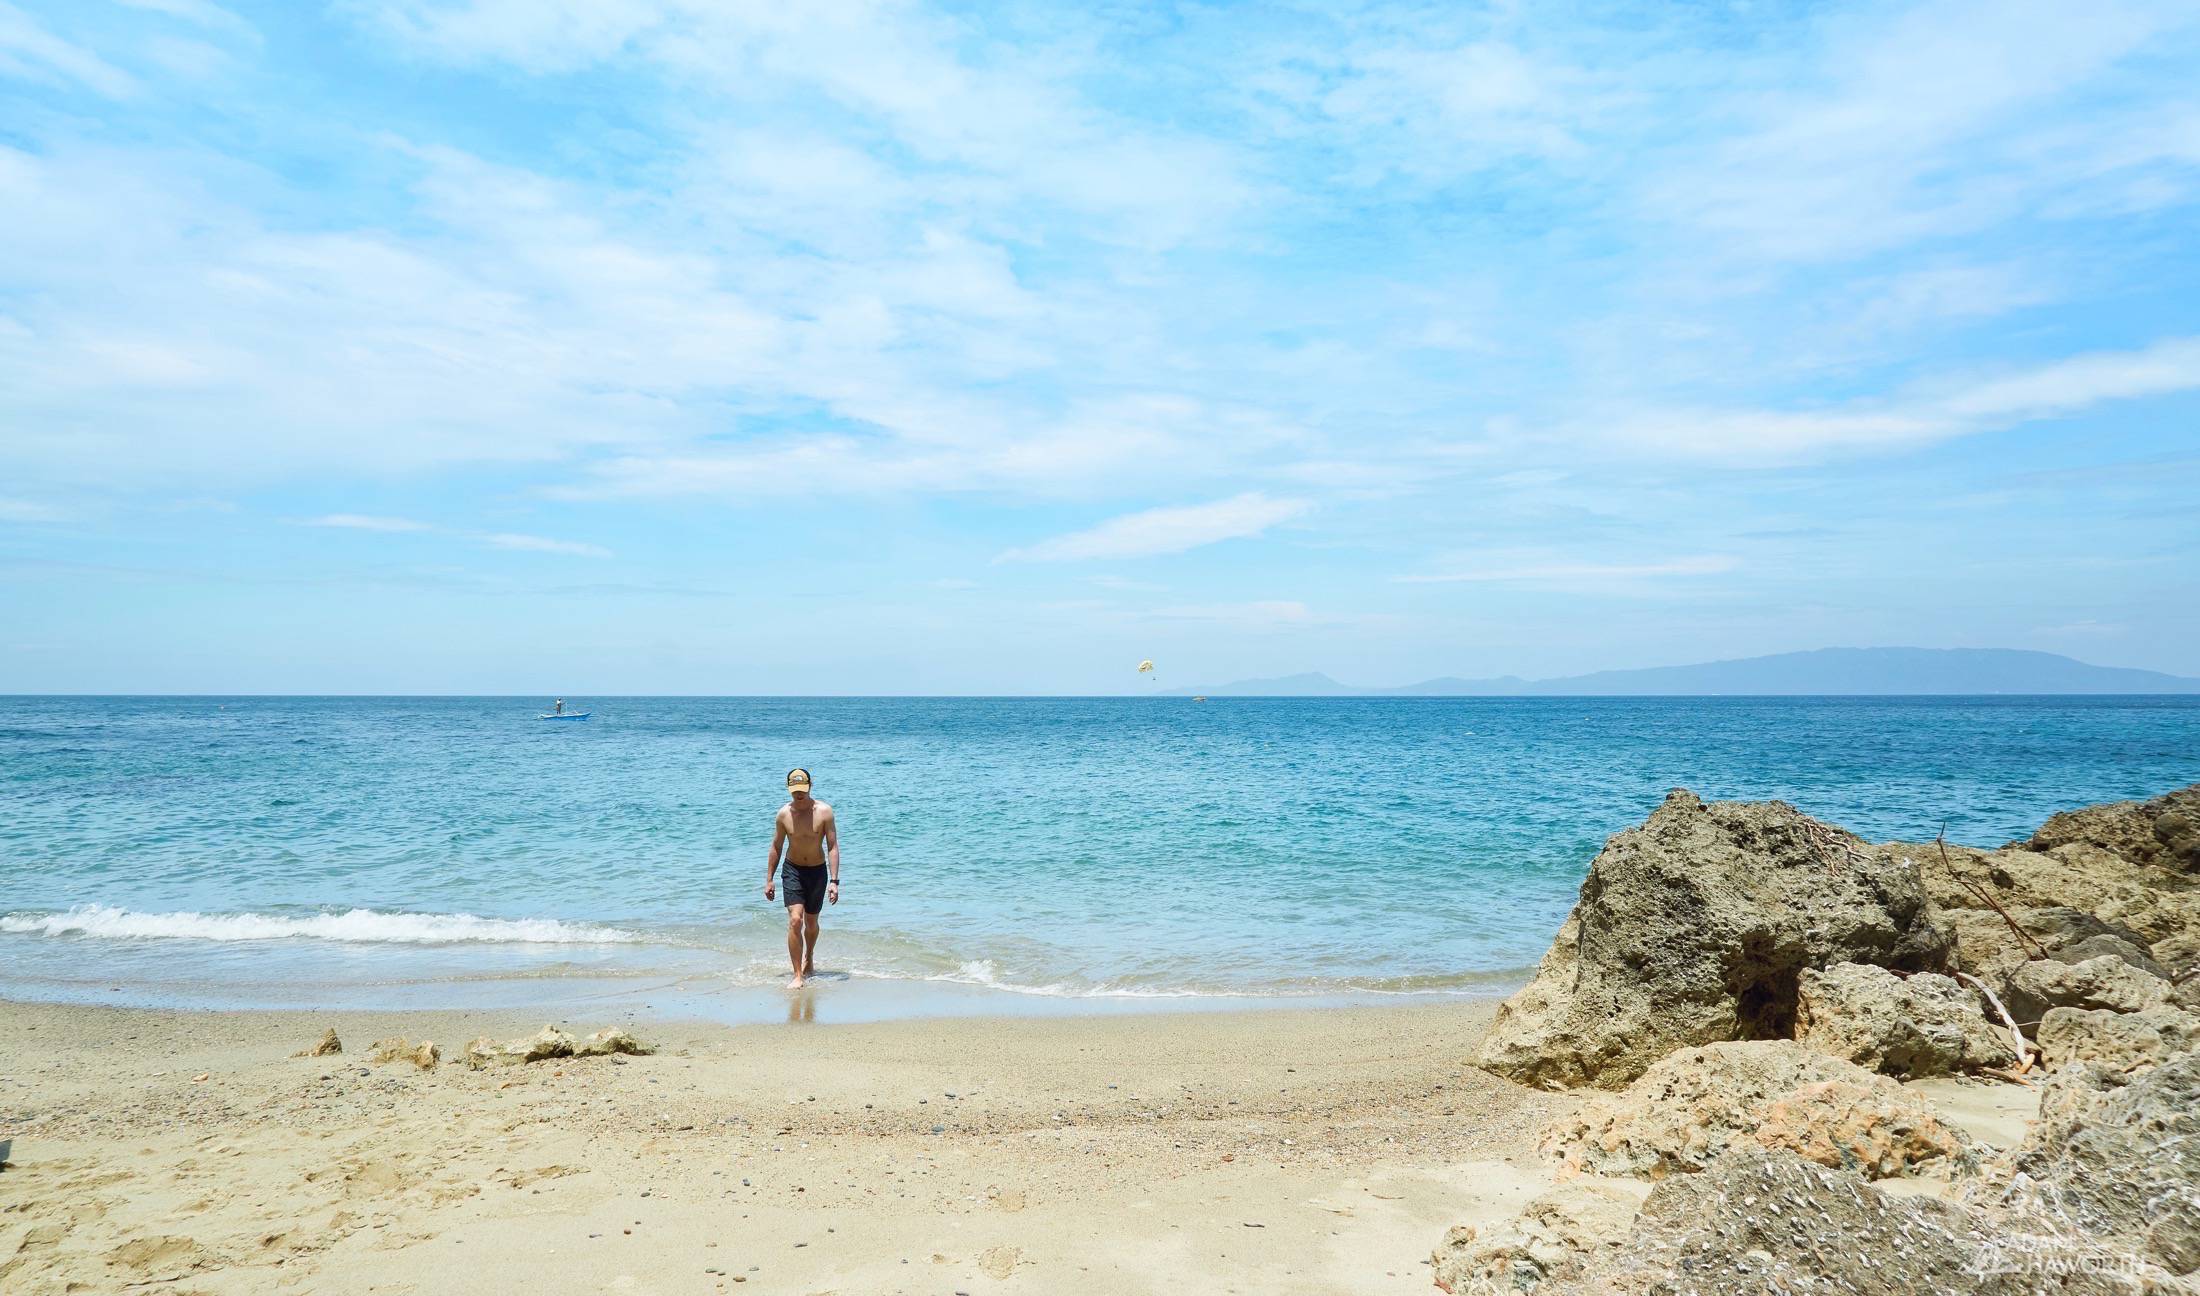
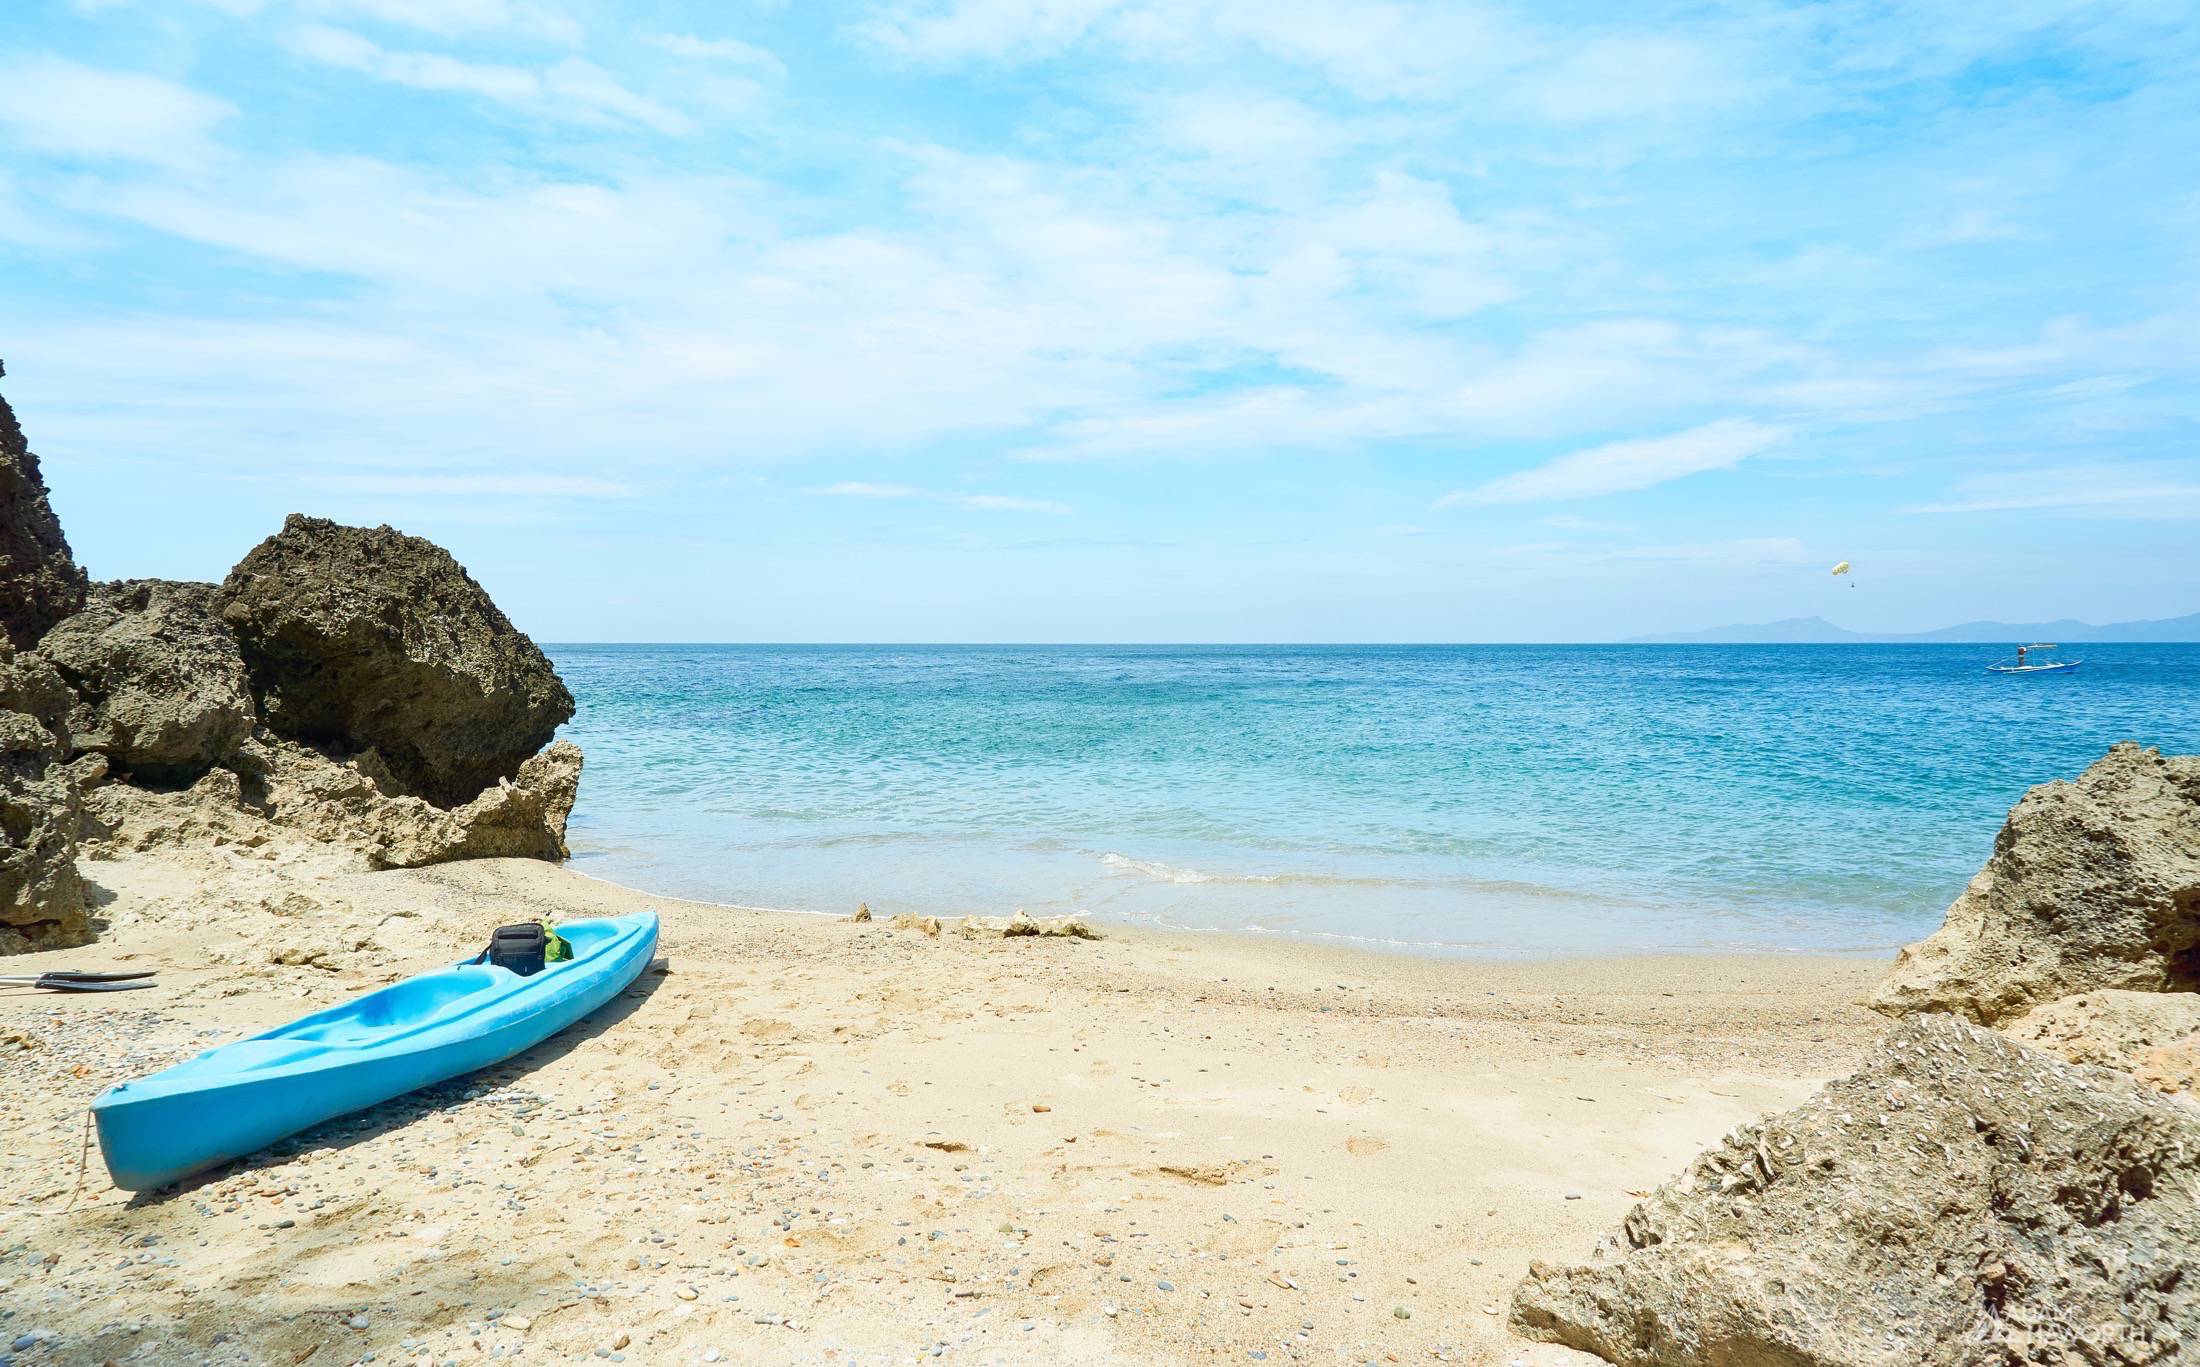
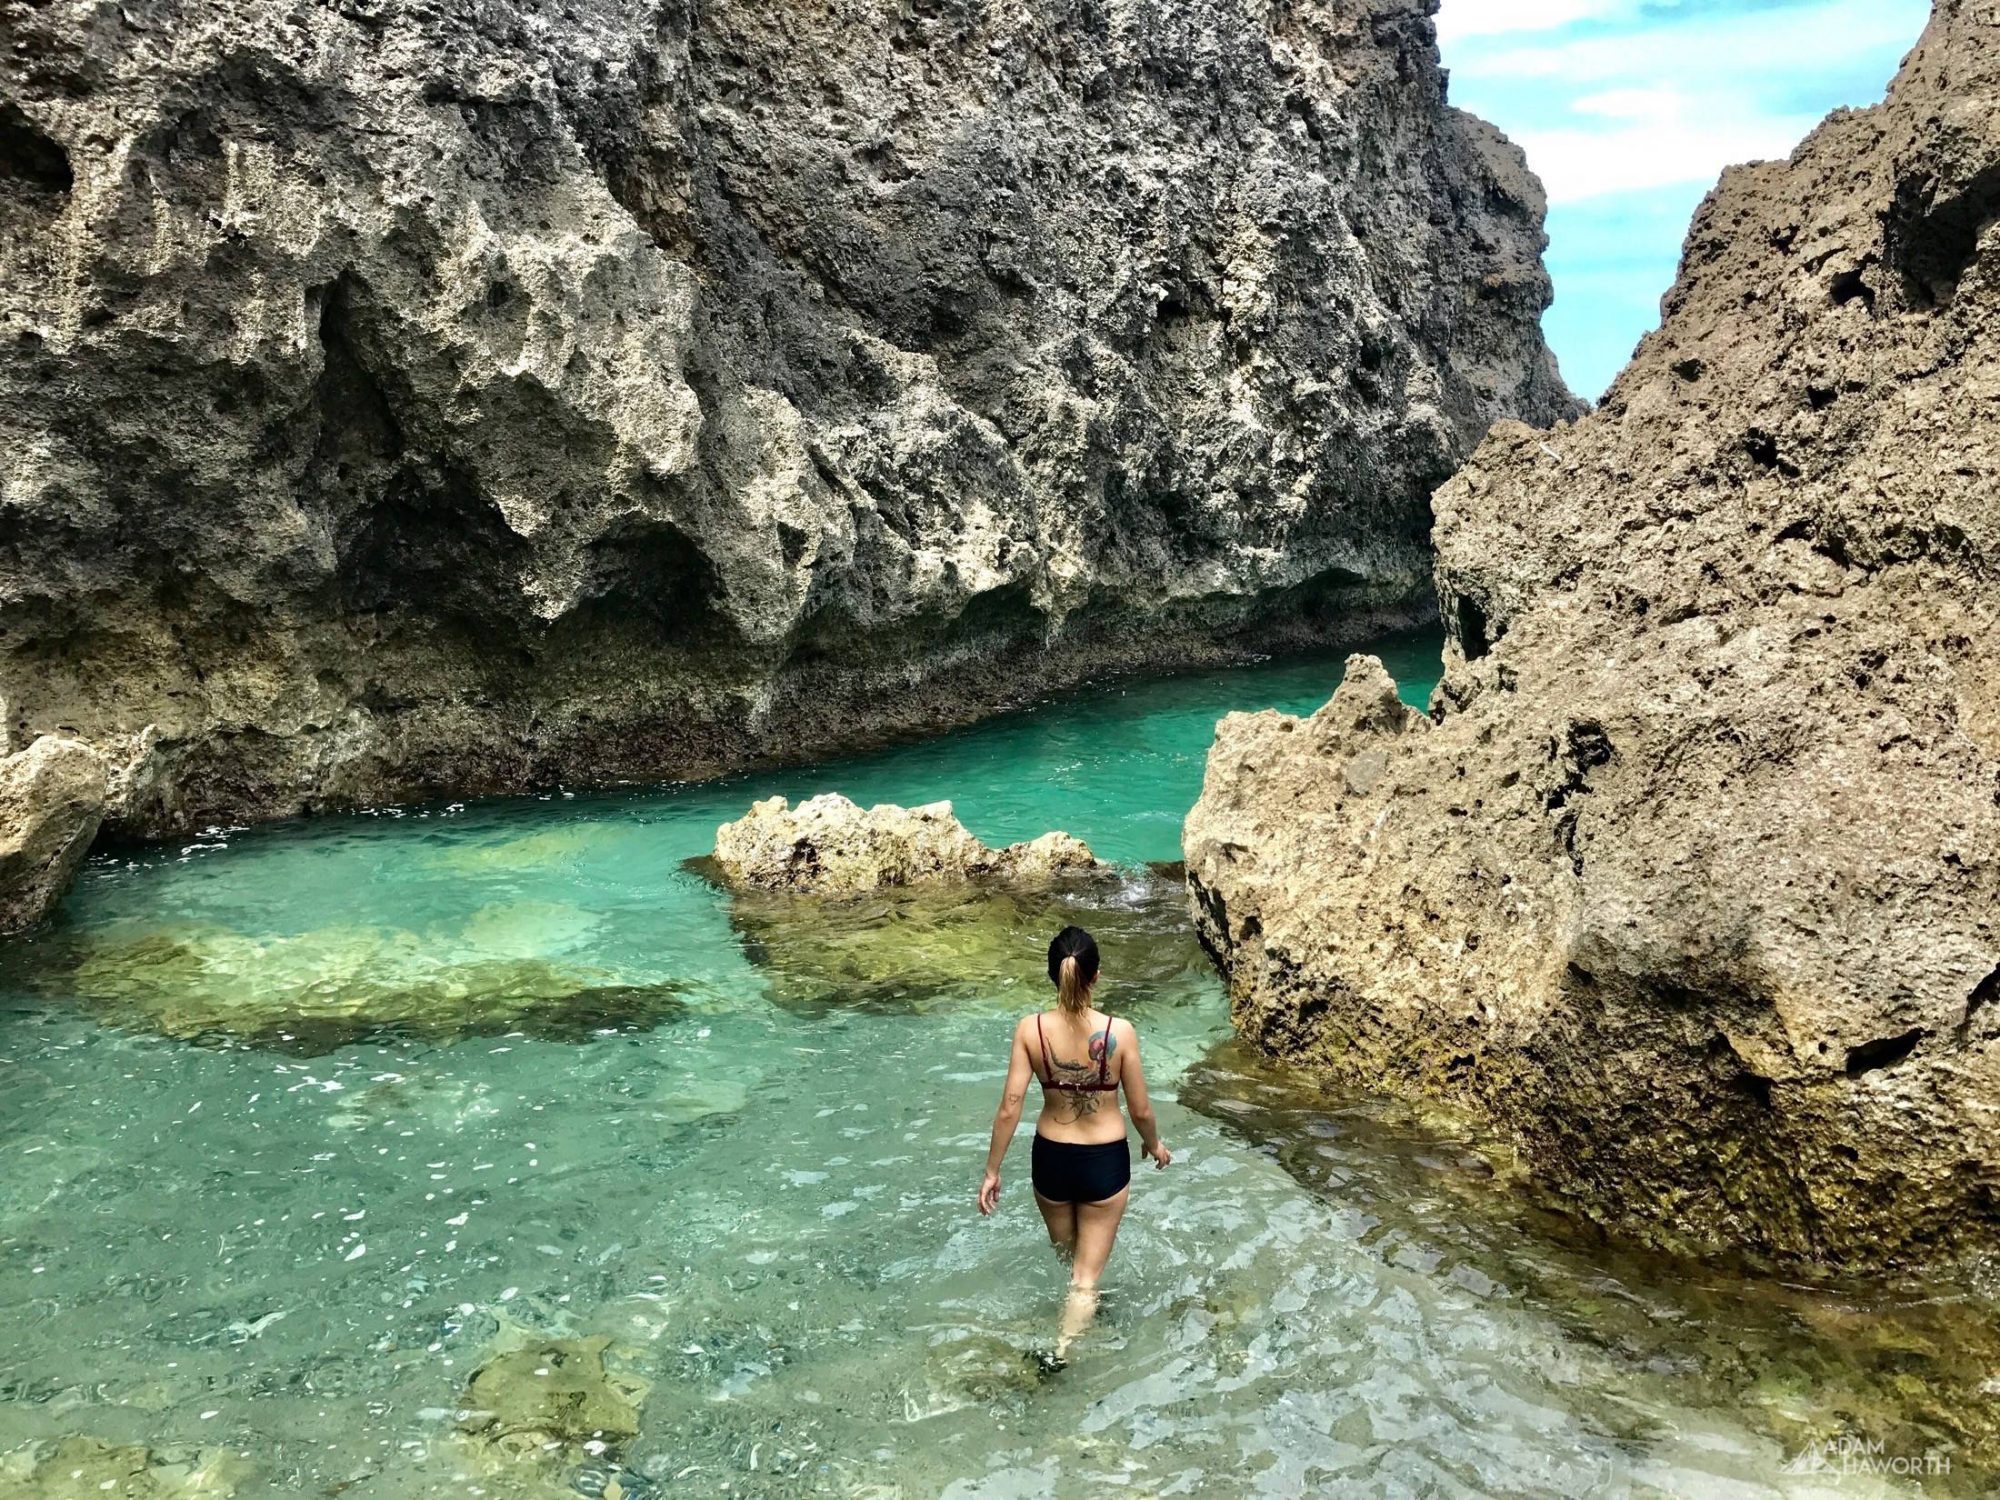
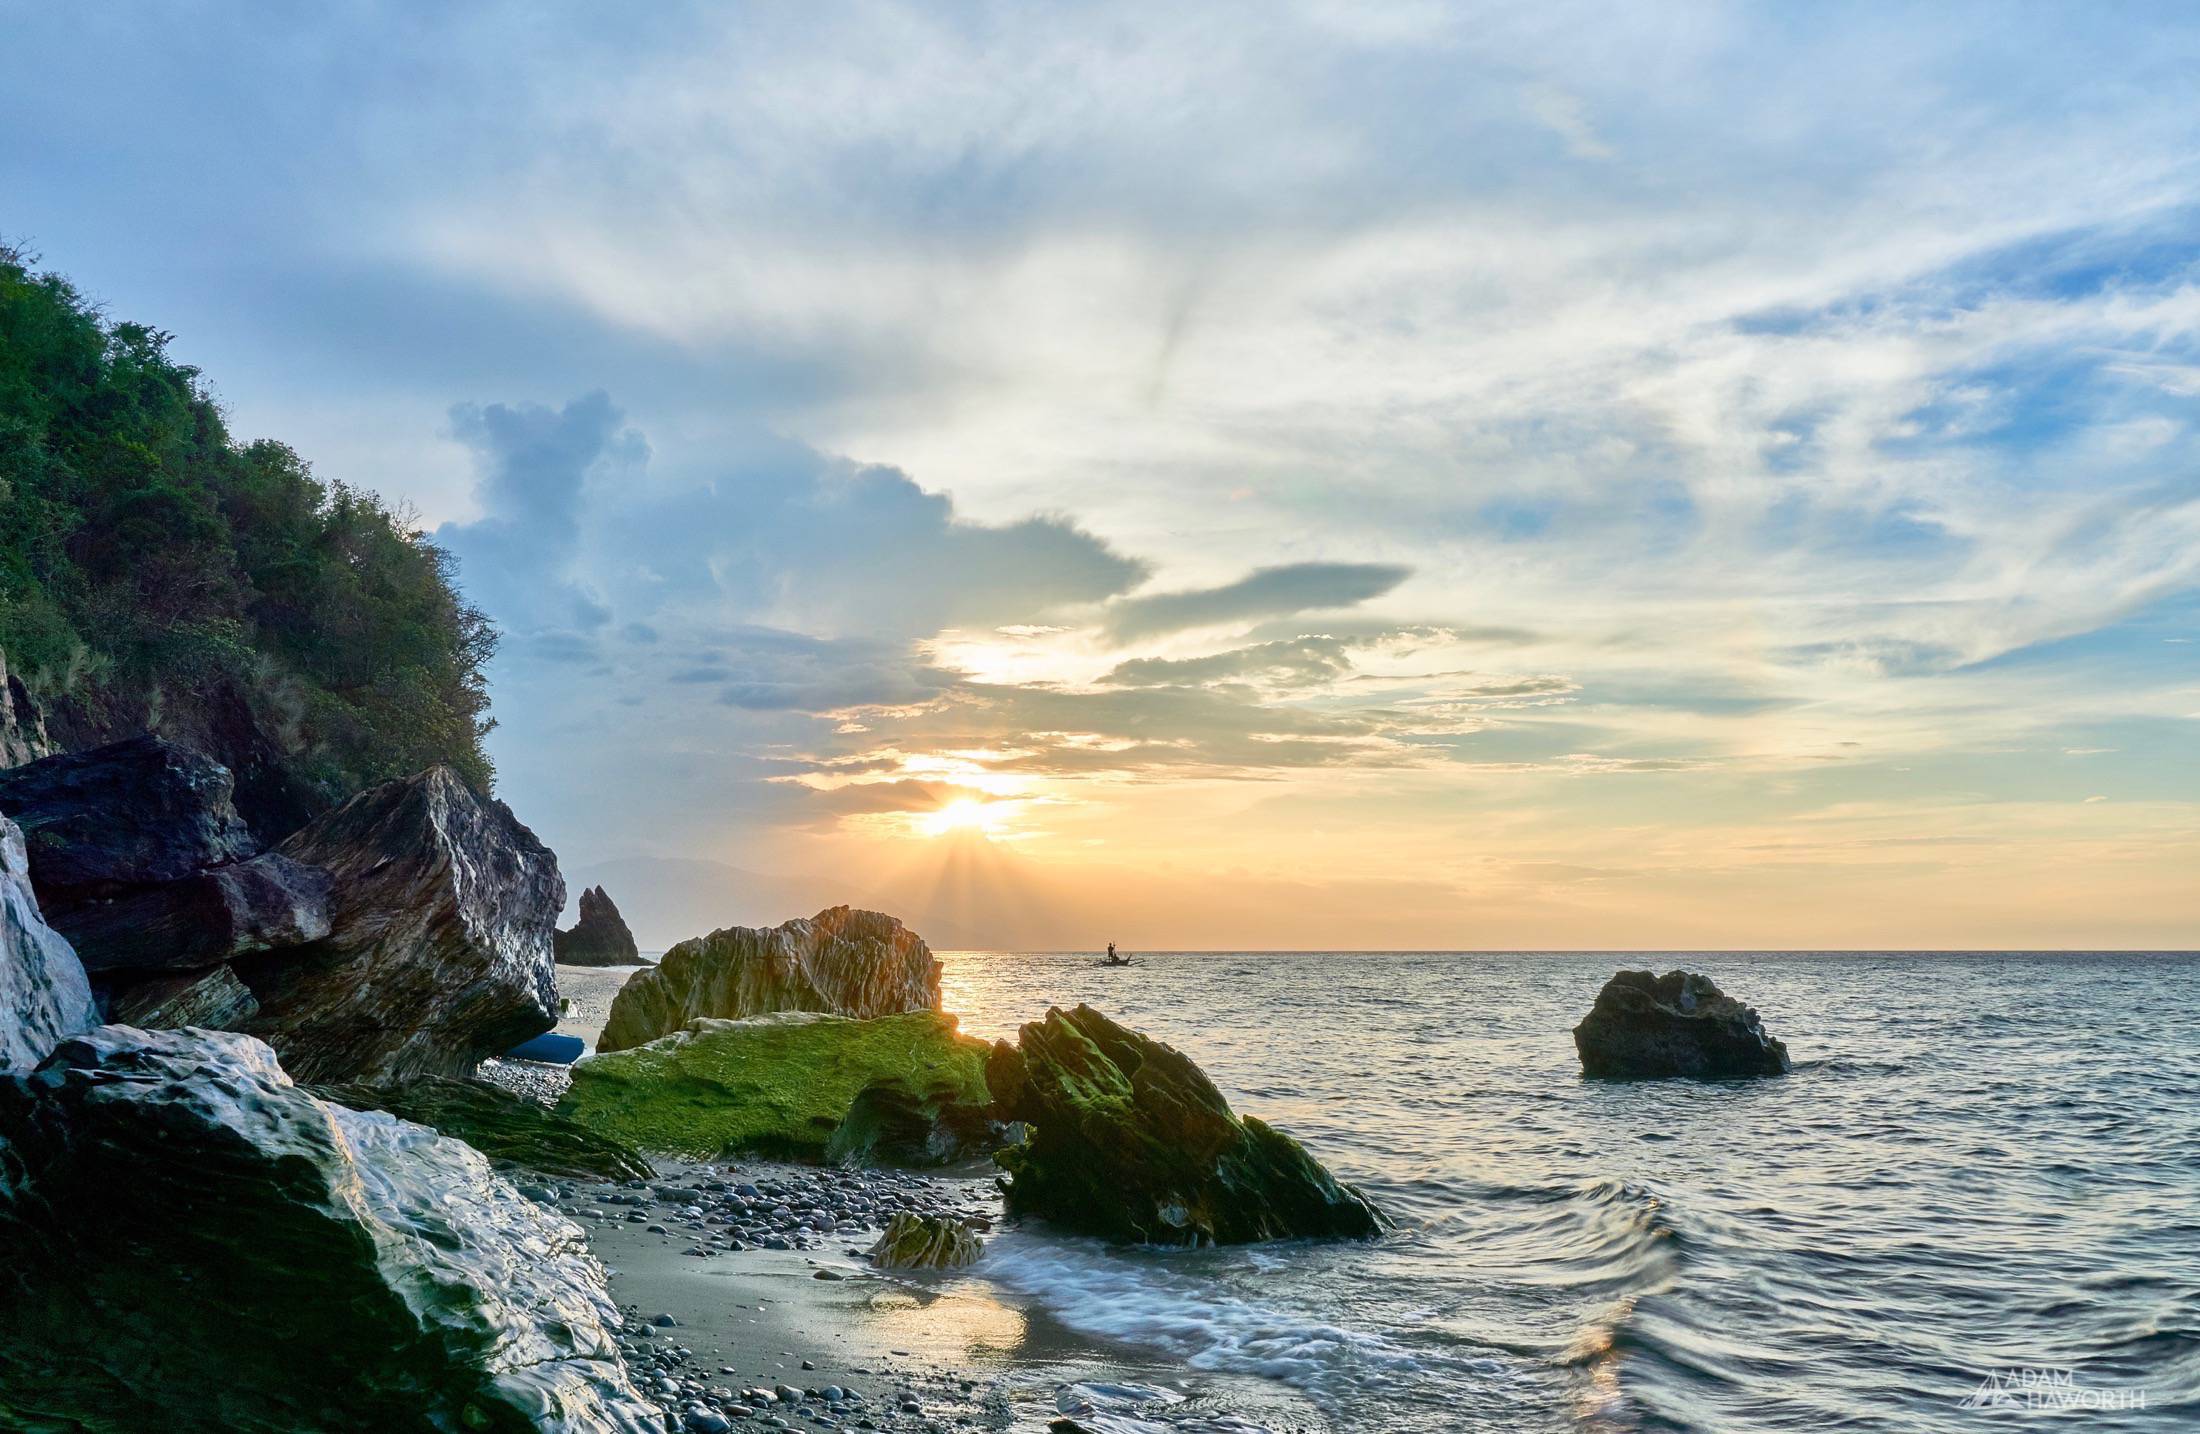
Puerto Galera is a hidden gem just a few hours drive from Manila, we decided to drive from Quezon City to Puerto Galera in March in what was planned to be a few days but turned into a week as we fell in love with the rugged tropical paradise on the first day. We stayed in the Bamboo House on Talipanan Beach which is about 30 minutes drive from the main town of Puerto Galera but it's nicely tucked away from the busy beaches and streets. The mountains truly meet the sea at Talipanan Beach, it's an incredibly scenic area that probably only going to be really appreciated if you are willing to get out and explore it.
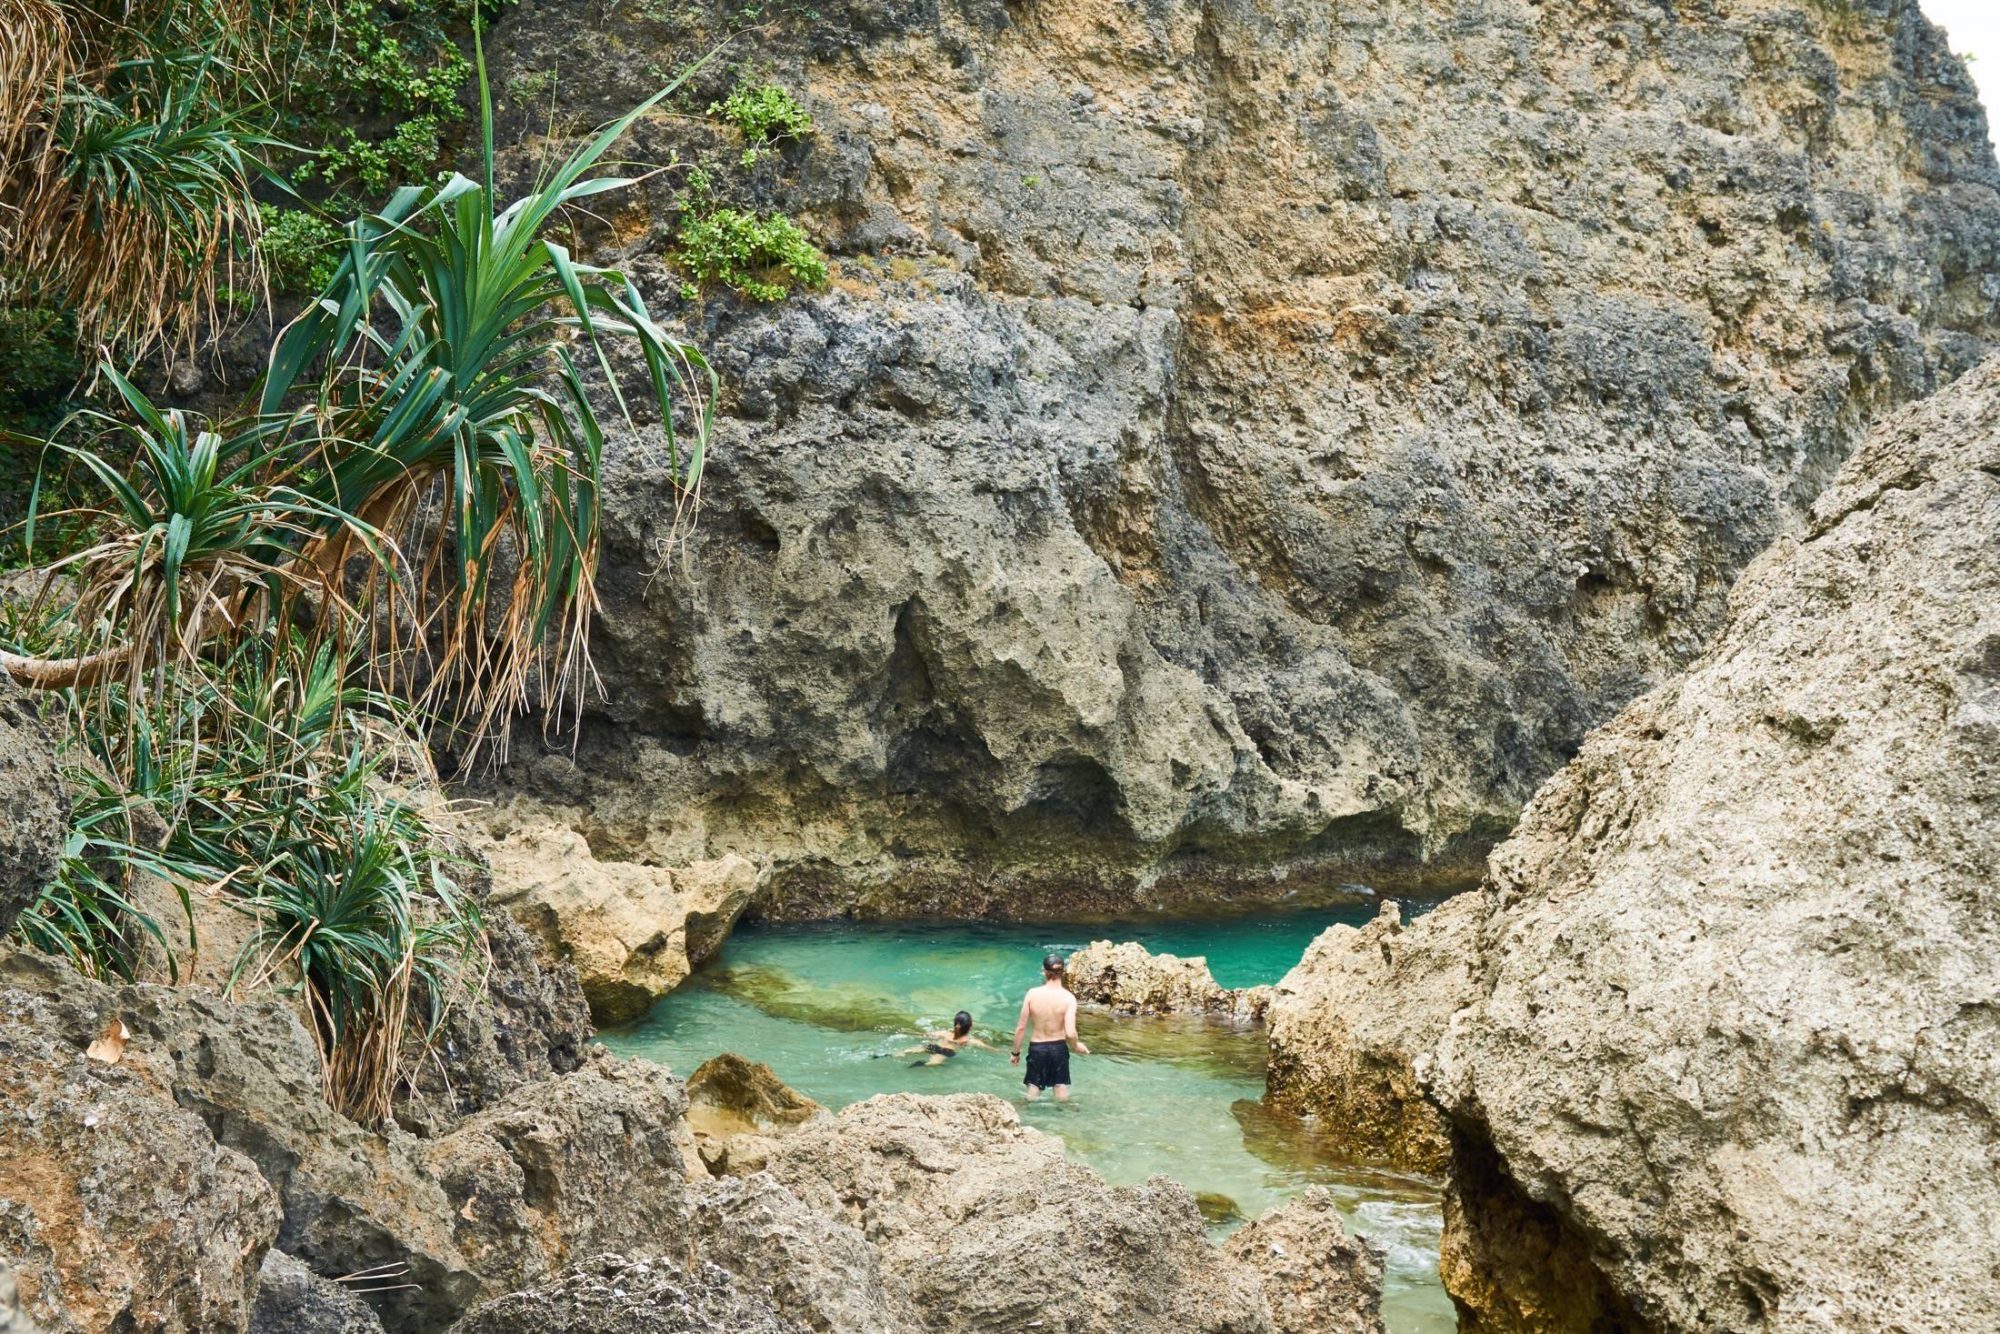
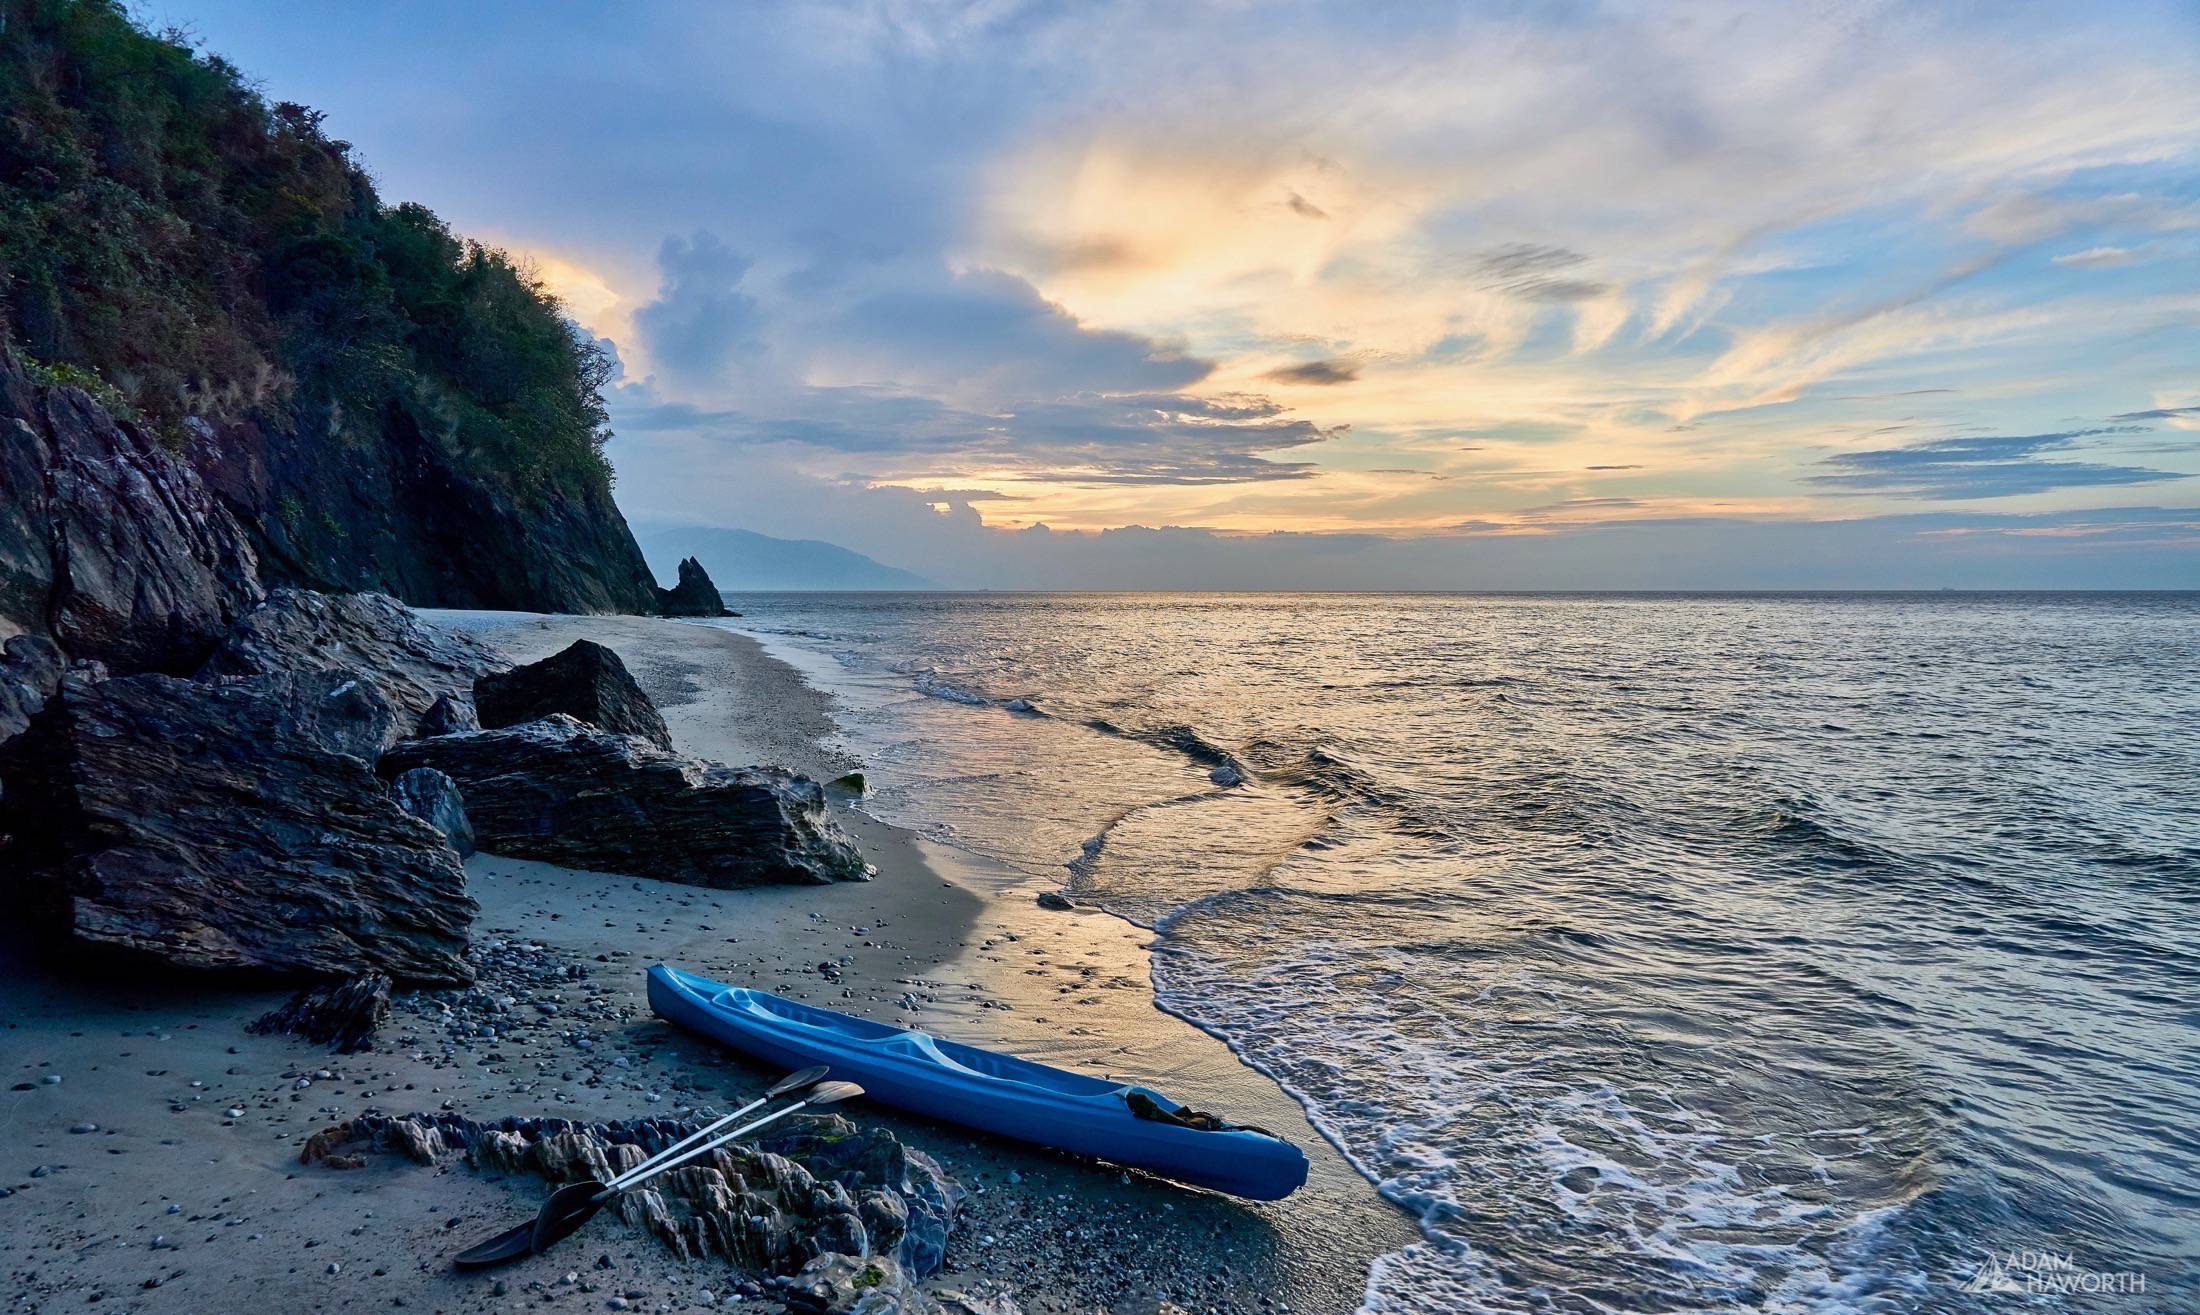
The first day we set off on the kayak that the hotel provided for free and managed to discover a secluded beach about a mile up the shore, past the main attraction of White Beach. Behind the Bamboo House Hotel is a dense rainforest with a small indigenous village, you can walk through this village upstream to a few small waterfalls, all within an hour walk from Talipanan Beach.

Manila to Puerto Galera by car
Getting from Manila to Puerto Galera by car is pretty straightforward and doesn't take too long, however, you should set off pretty early to give yourself time to enjoy the evening in Puerto Galera. You will need to take a roll-on-roll-off ferry from Batangas to Calapan as the ferry to Puerto Galera is a passenger ferry only (as of March 2017 this was the case anyway), because you have to go to Calapan you will need to add 2 hours at least to your journey from Calapan to Puerto Galera.
The road from Calapan to Puerto Galera is slow and windy but can be quite scenic. Along the road from Calapan to Puerto Galera, you should make time to stop at the Tukuran Falls as you will pass by the road to there on the way to or from Puerto Galera. I will write about Tukuran Falls in a sperate post. You will also pass by the Tamaraw Falls so try and plan your drive during the day, the Tamaraw Falls is just off the road so you can actually see it from the car or you can stop before the bridge and get a better view.
There are various ferries from Batangas to Calapan such as FastCat, we just turned up at the port and managed to get a ferry within the hour. I'd recommend you check that there is a ferry beforehand though as not everyone will be as lucky!
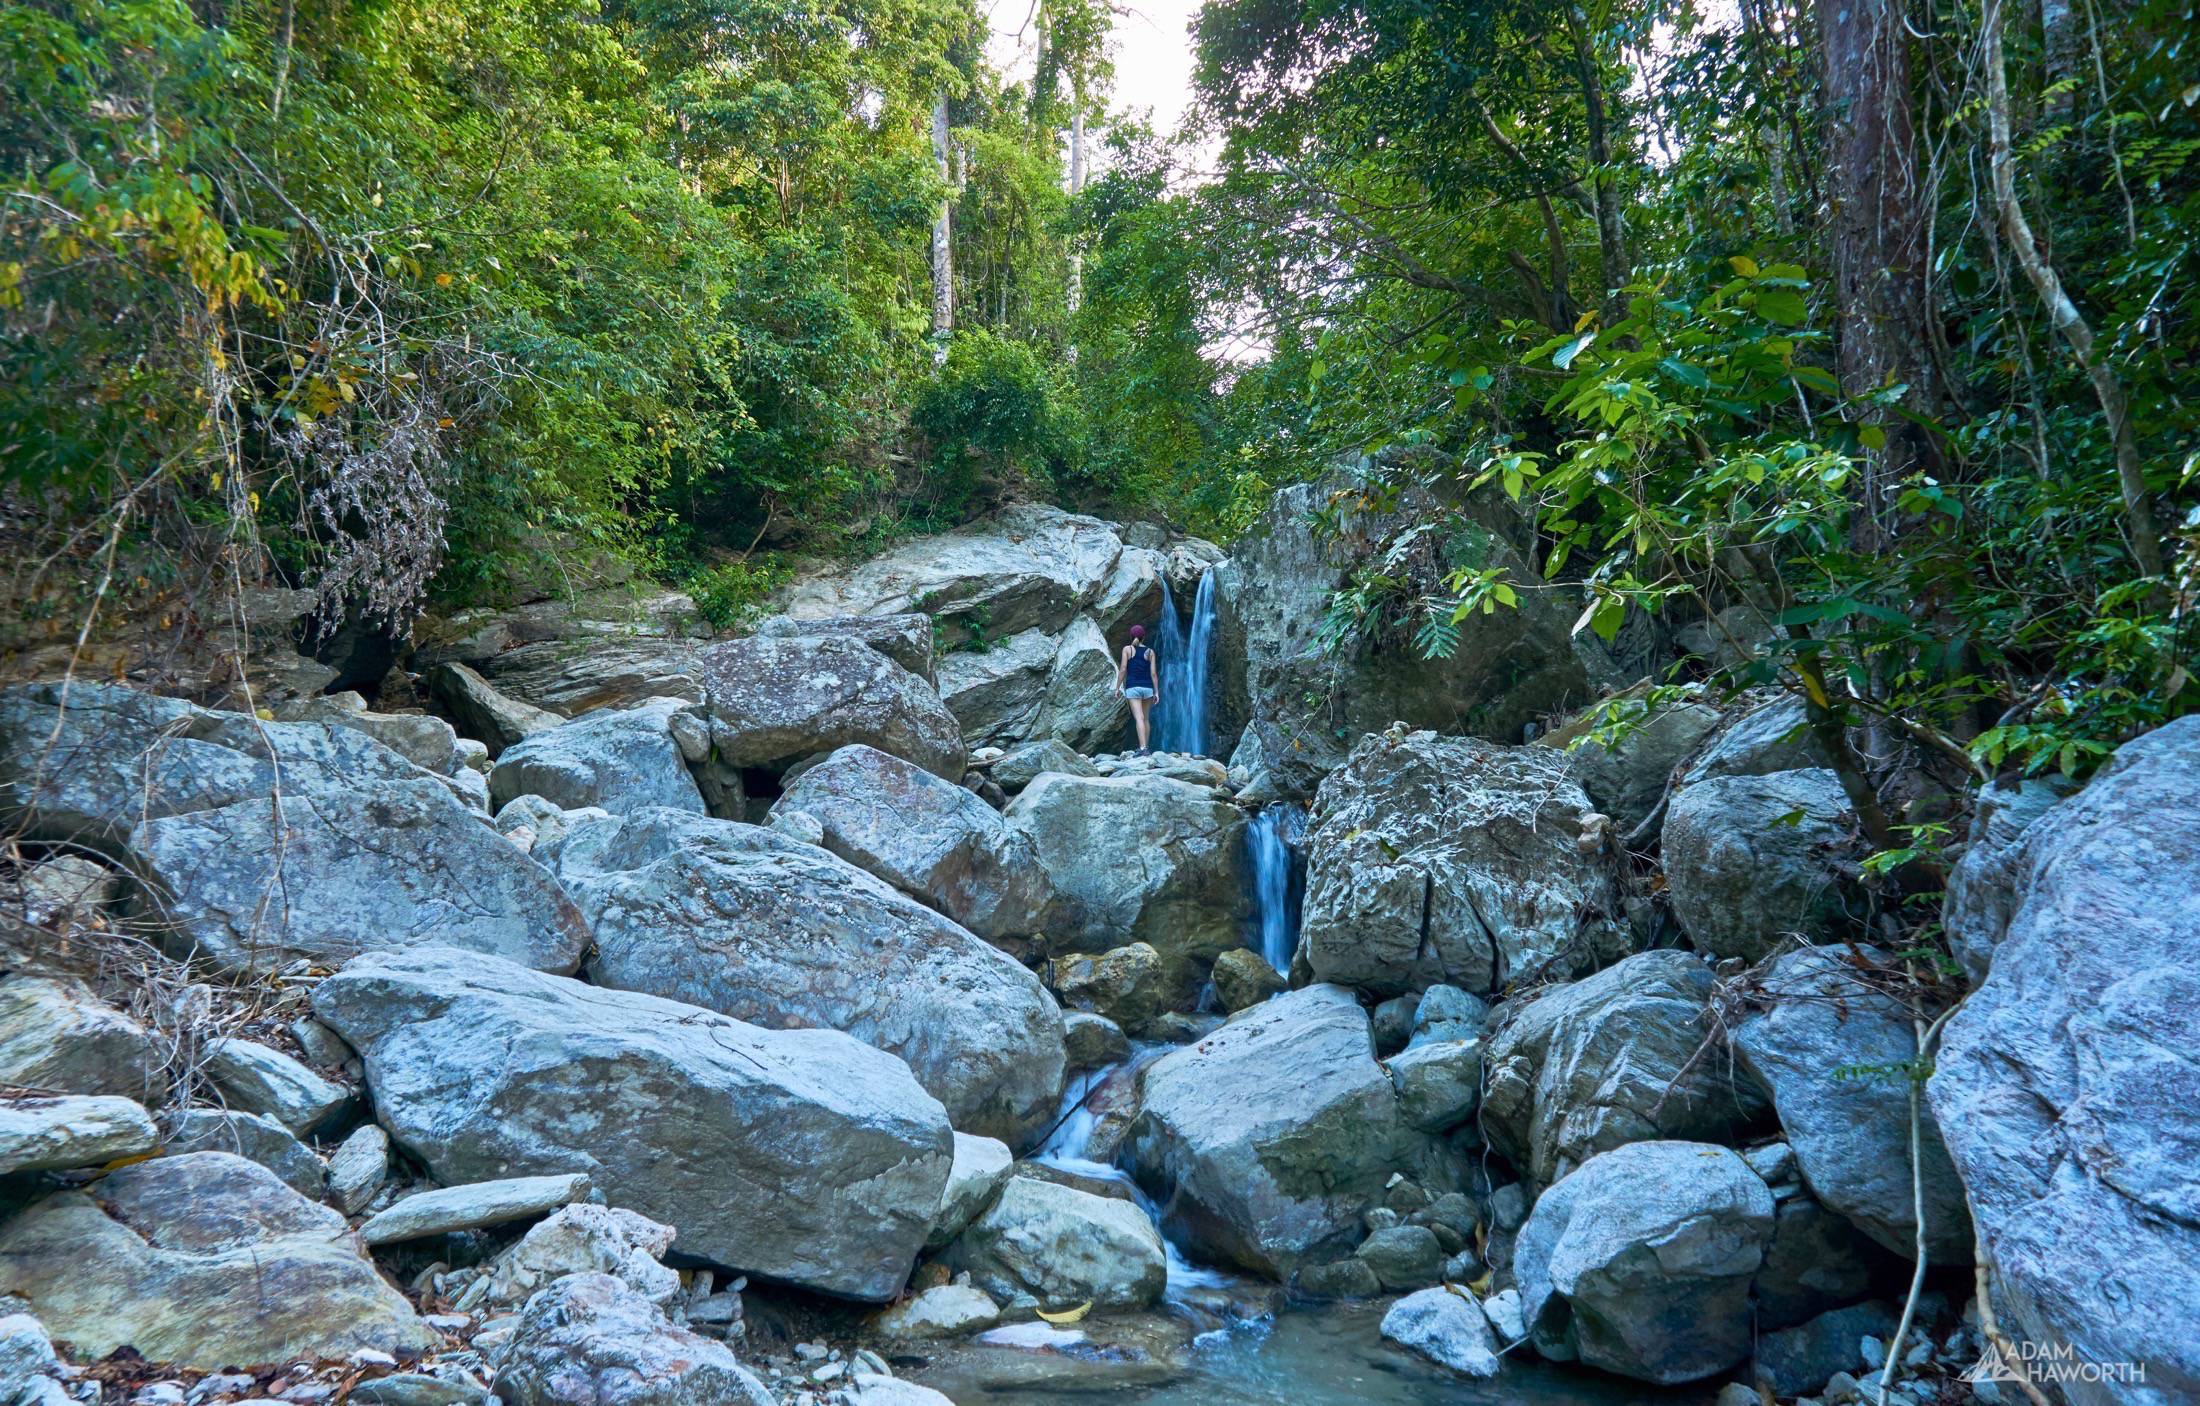

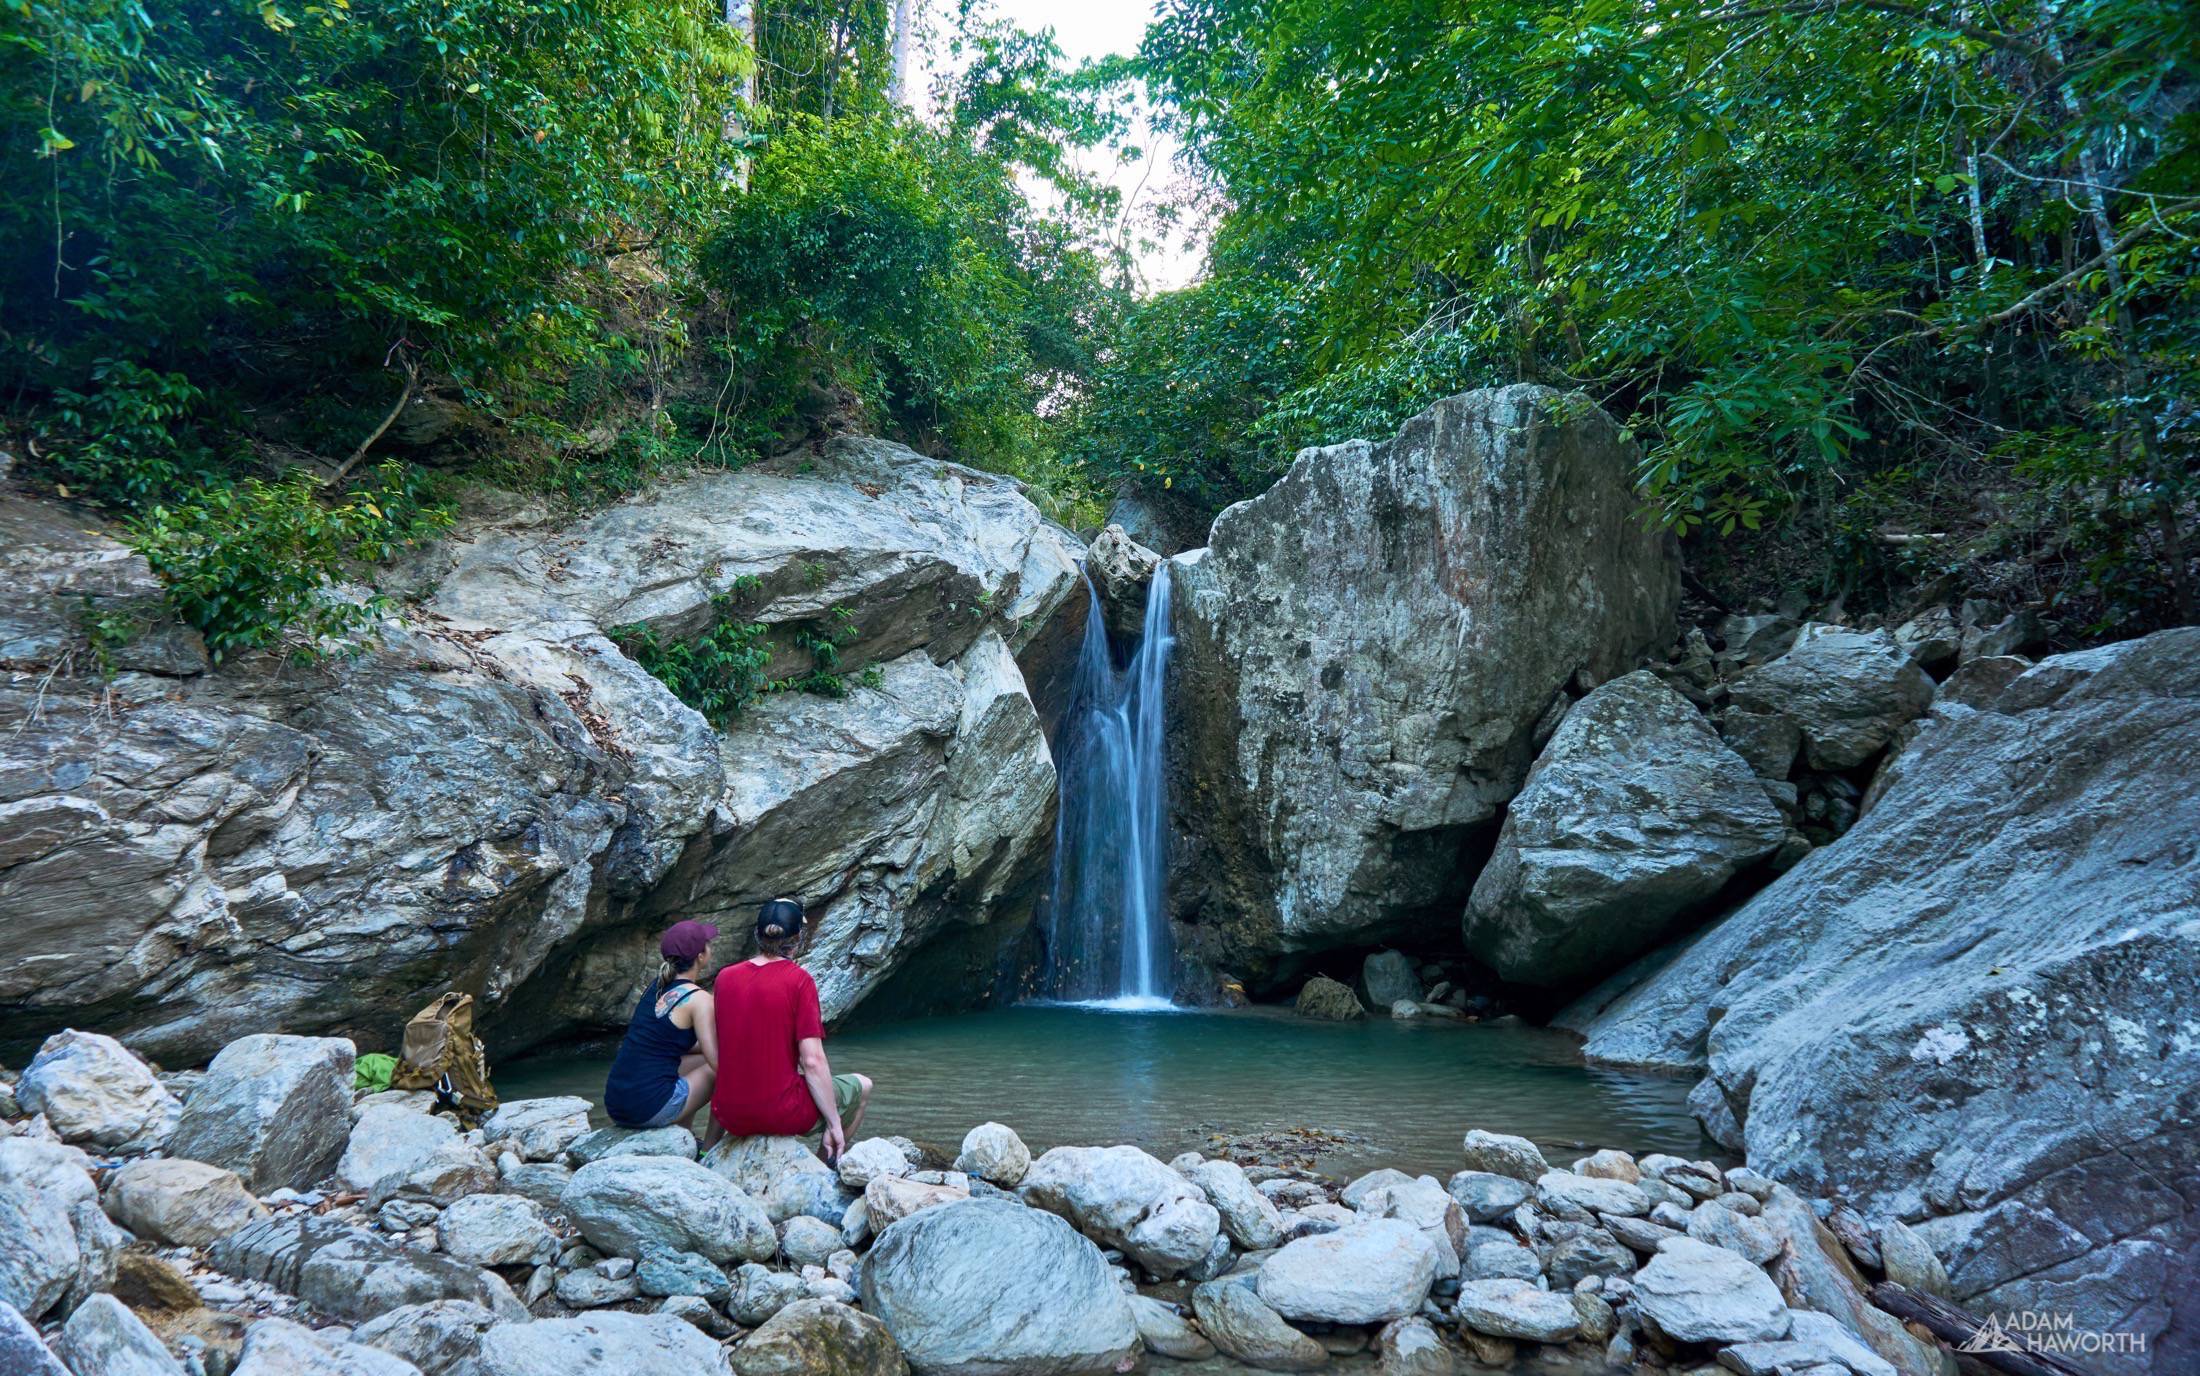
Talipanan Falls
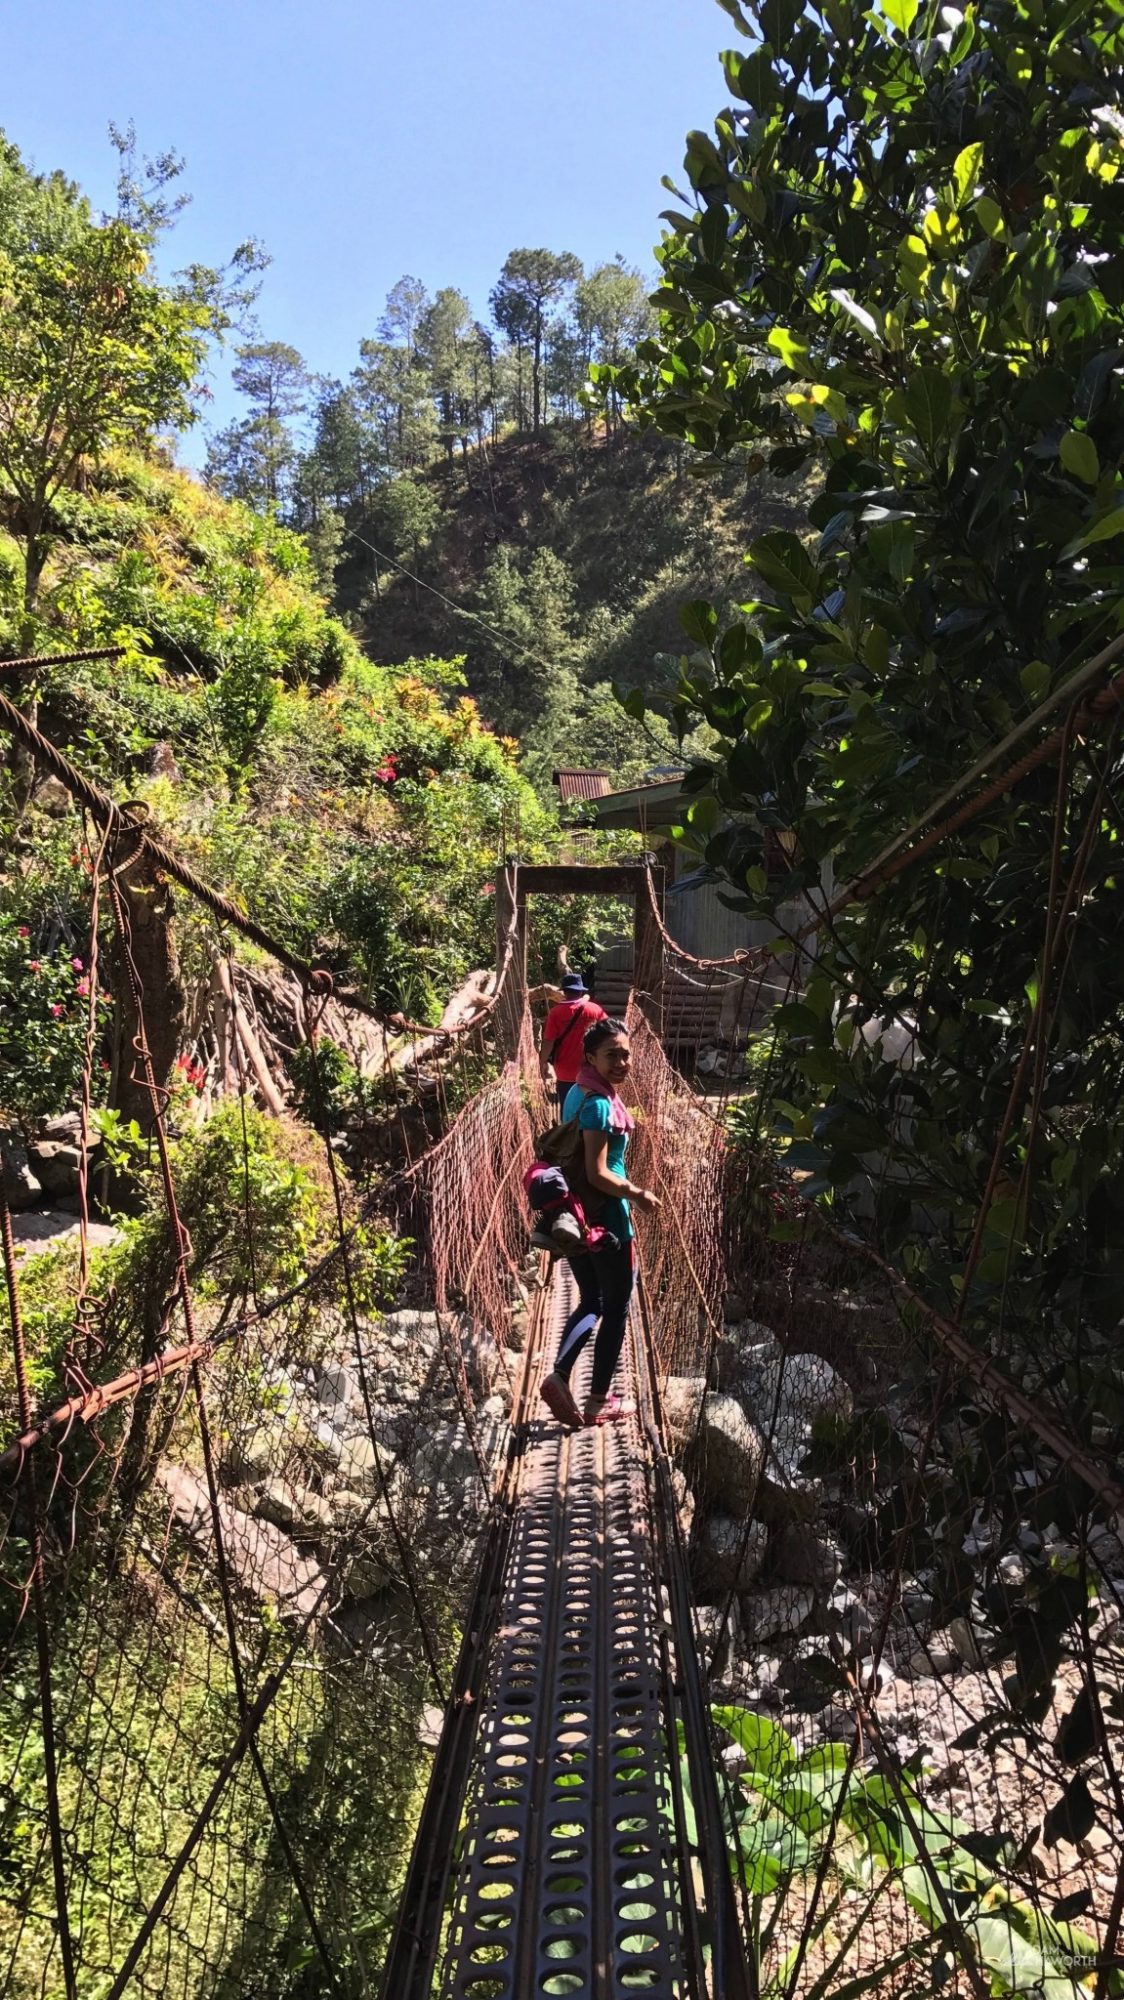
Talipanan Falls is located in the rainforest behind Talipanan Beach, you pass through the Iraya-Mangyan village that is just off the road or the end of the road when I was there. If you stay at the Bamboo House Hotel just ask about Talipanan Falls and they will explain better how to get to there, from the hotel it's about 45 minutes up the forest.
Lonely Planet recommends you get a guide Mangyan guide in the Iraya-Mangyan village, it's up to you whether you do or not but if you follow the path you don't really need one you could just buy something from the village instead to help support them.
If you do the Mt Talipanan hike - which I never got around to doing - you can also hire a guide from the Iraya-Mangyan village to show you the way.
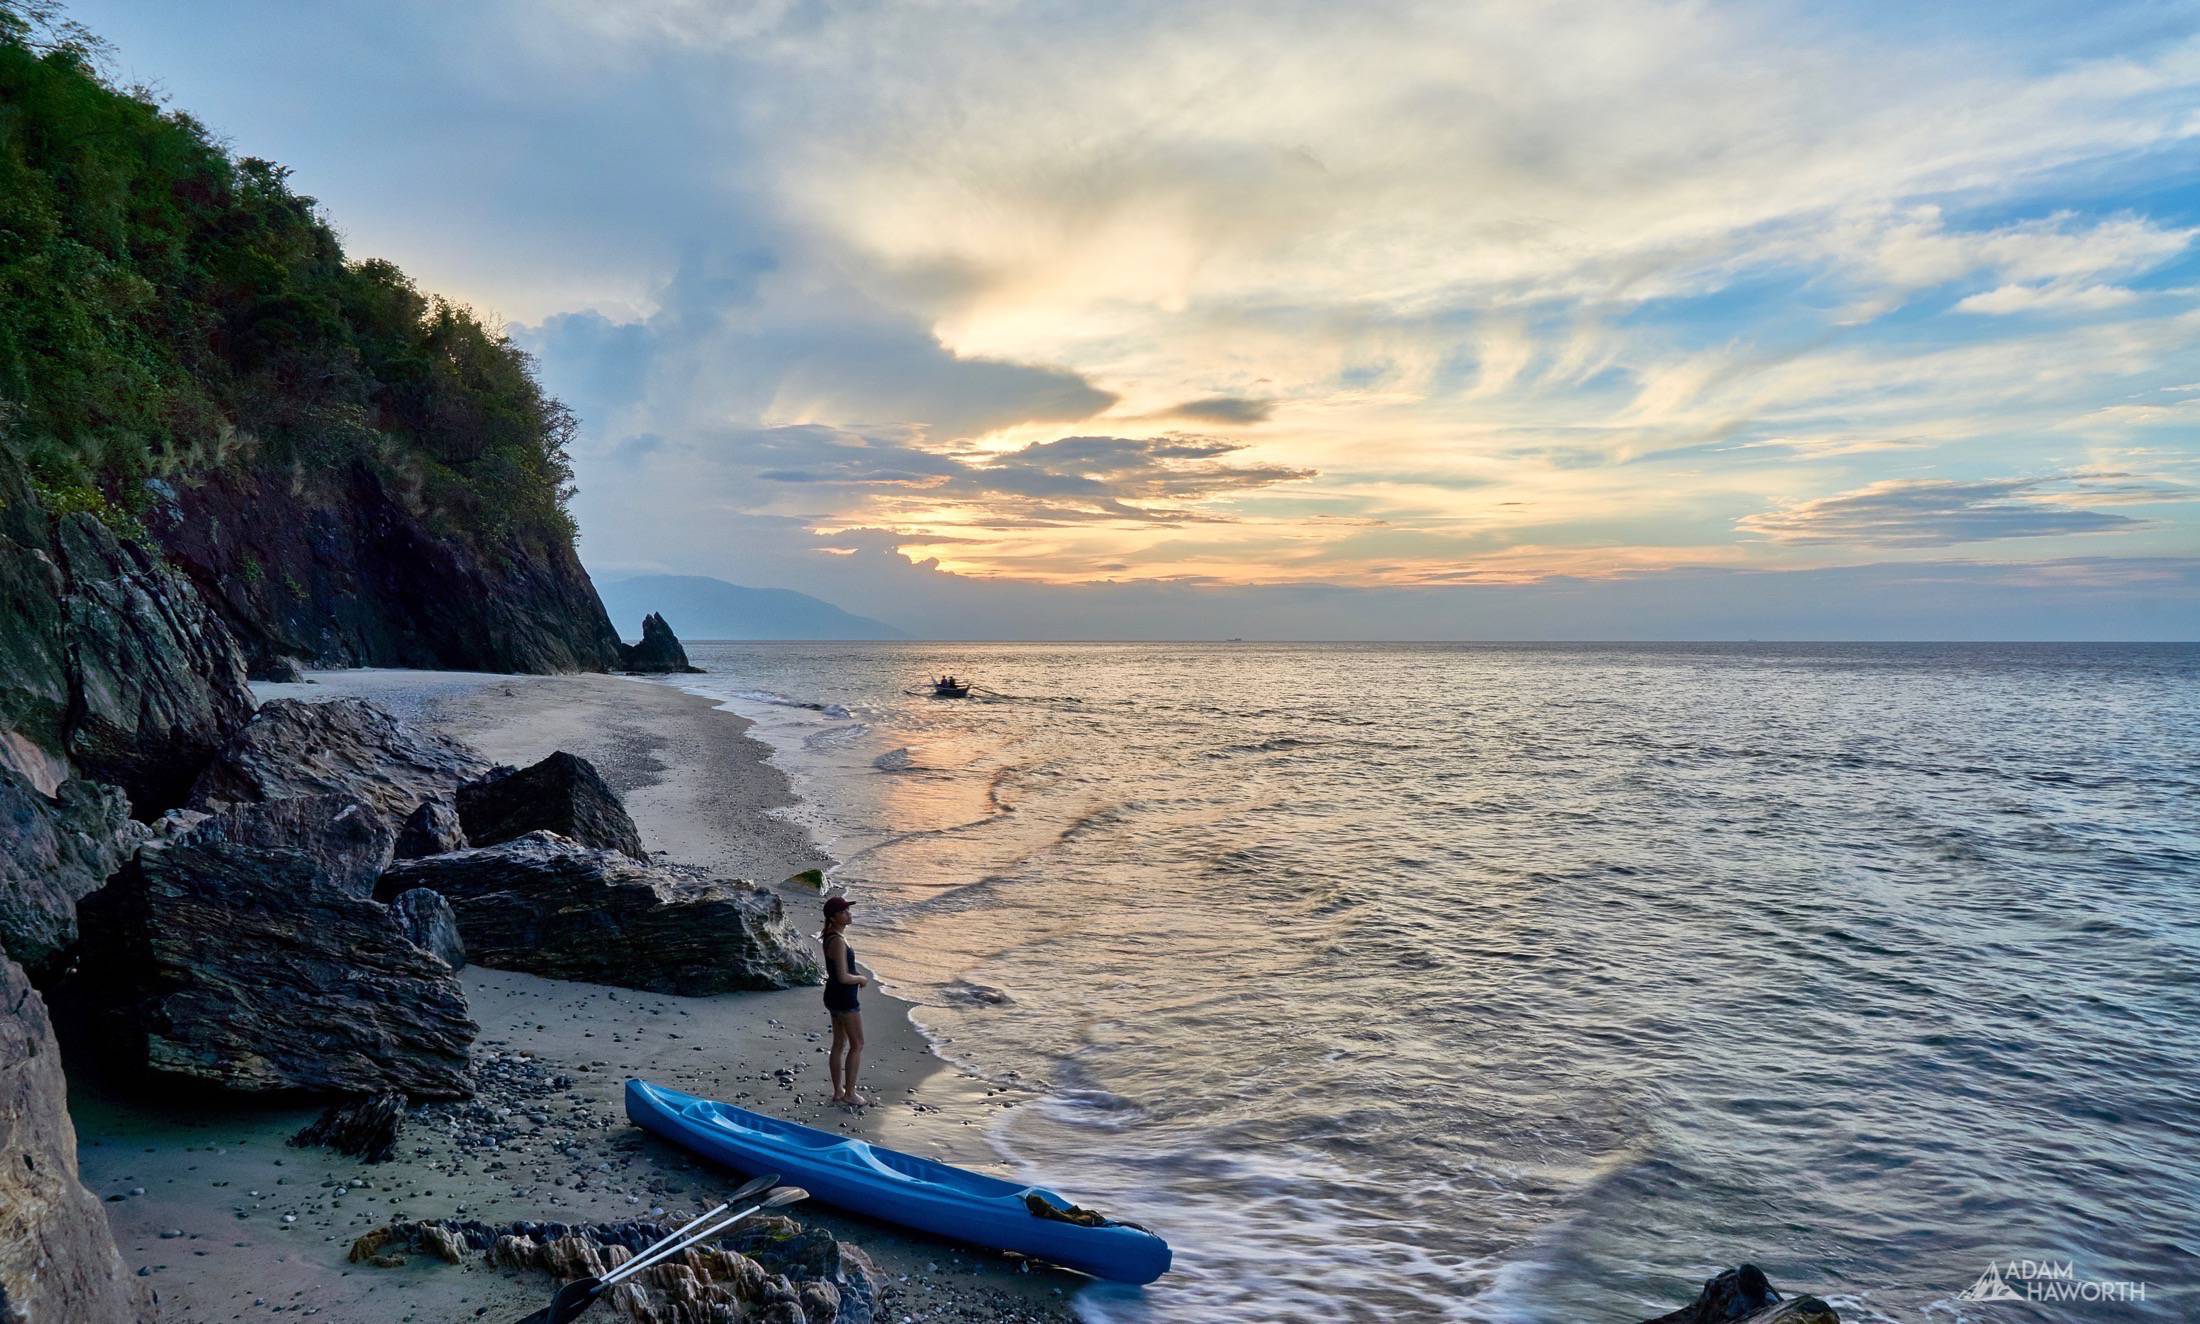
Sunset from an empty beach
After a hike to Talipanan Falls, we headed back to the hotel to pick up the Kayak and then paddled around a cove to watch the sunset from a completely empty beach, a perfect ending to what is one of my favourite destinations in the Philippines.
If you are looking for a quick break from Manila or should you happen to be travelling the Philippines be sure to add Puerto Galera to your itinerary?
Photography from Mt Ulap Philippines
This is the first photography article I've written in a while, I have been working & travelling in the Philippines since February so the change in routine has left me neglecting the photography section of my site. This will be the first of many articles that cover the recent trips I have taken across the Philippines and Indochina over the past 5 months.
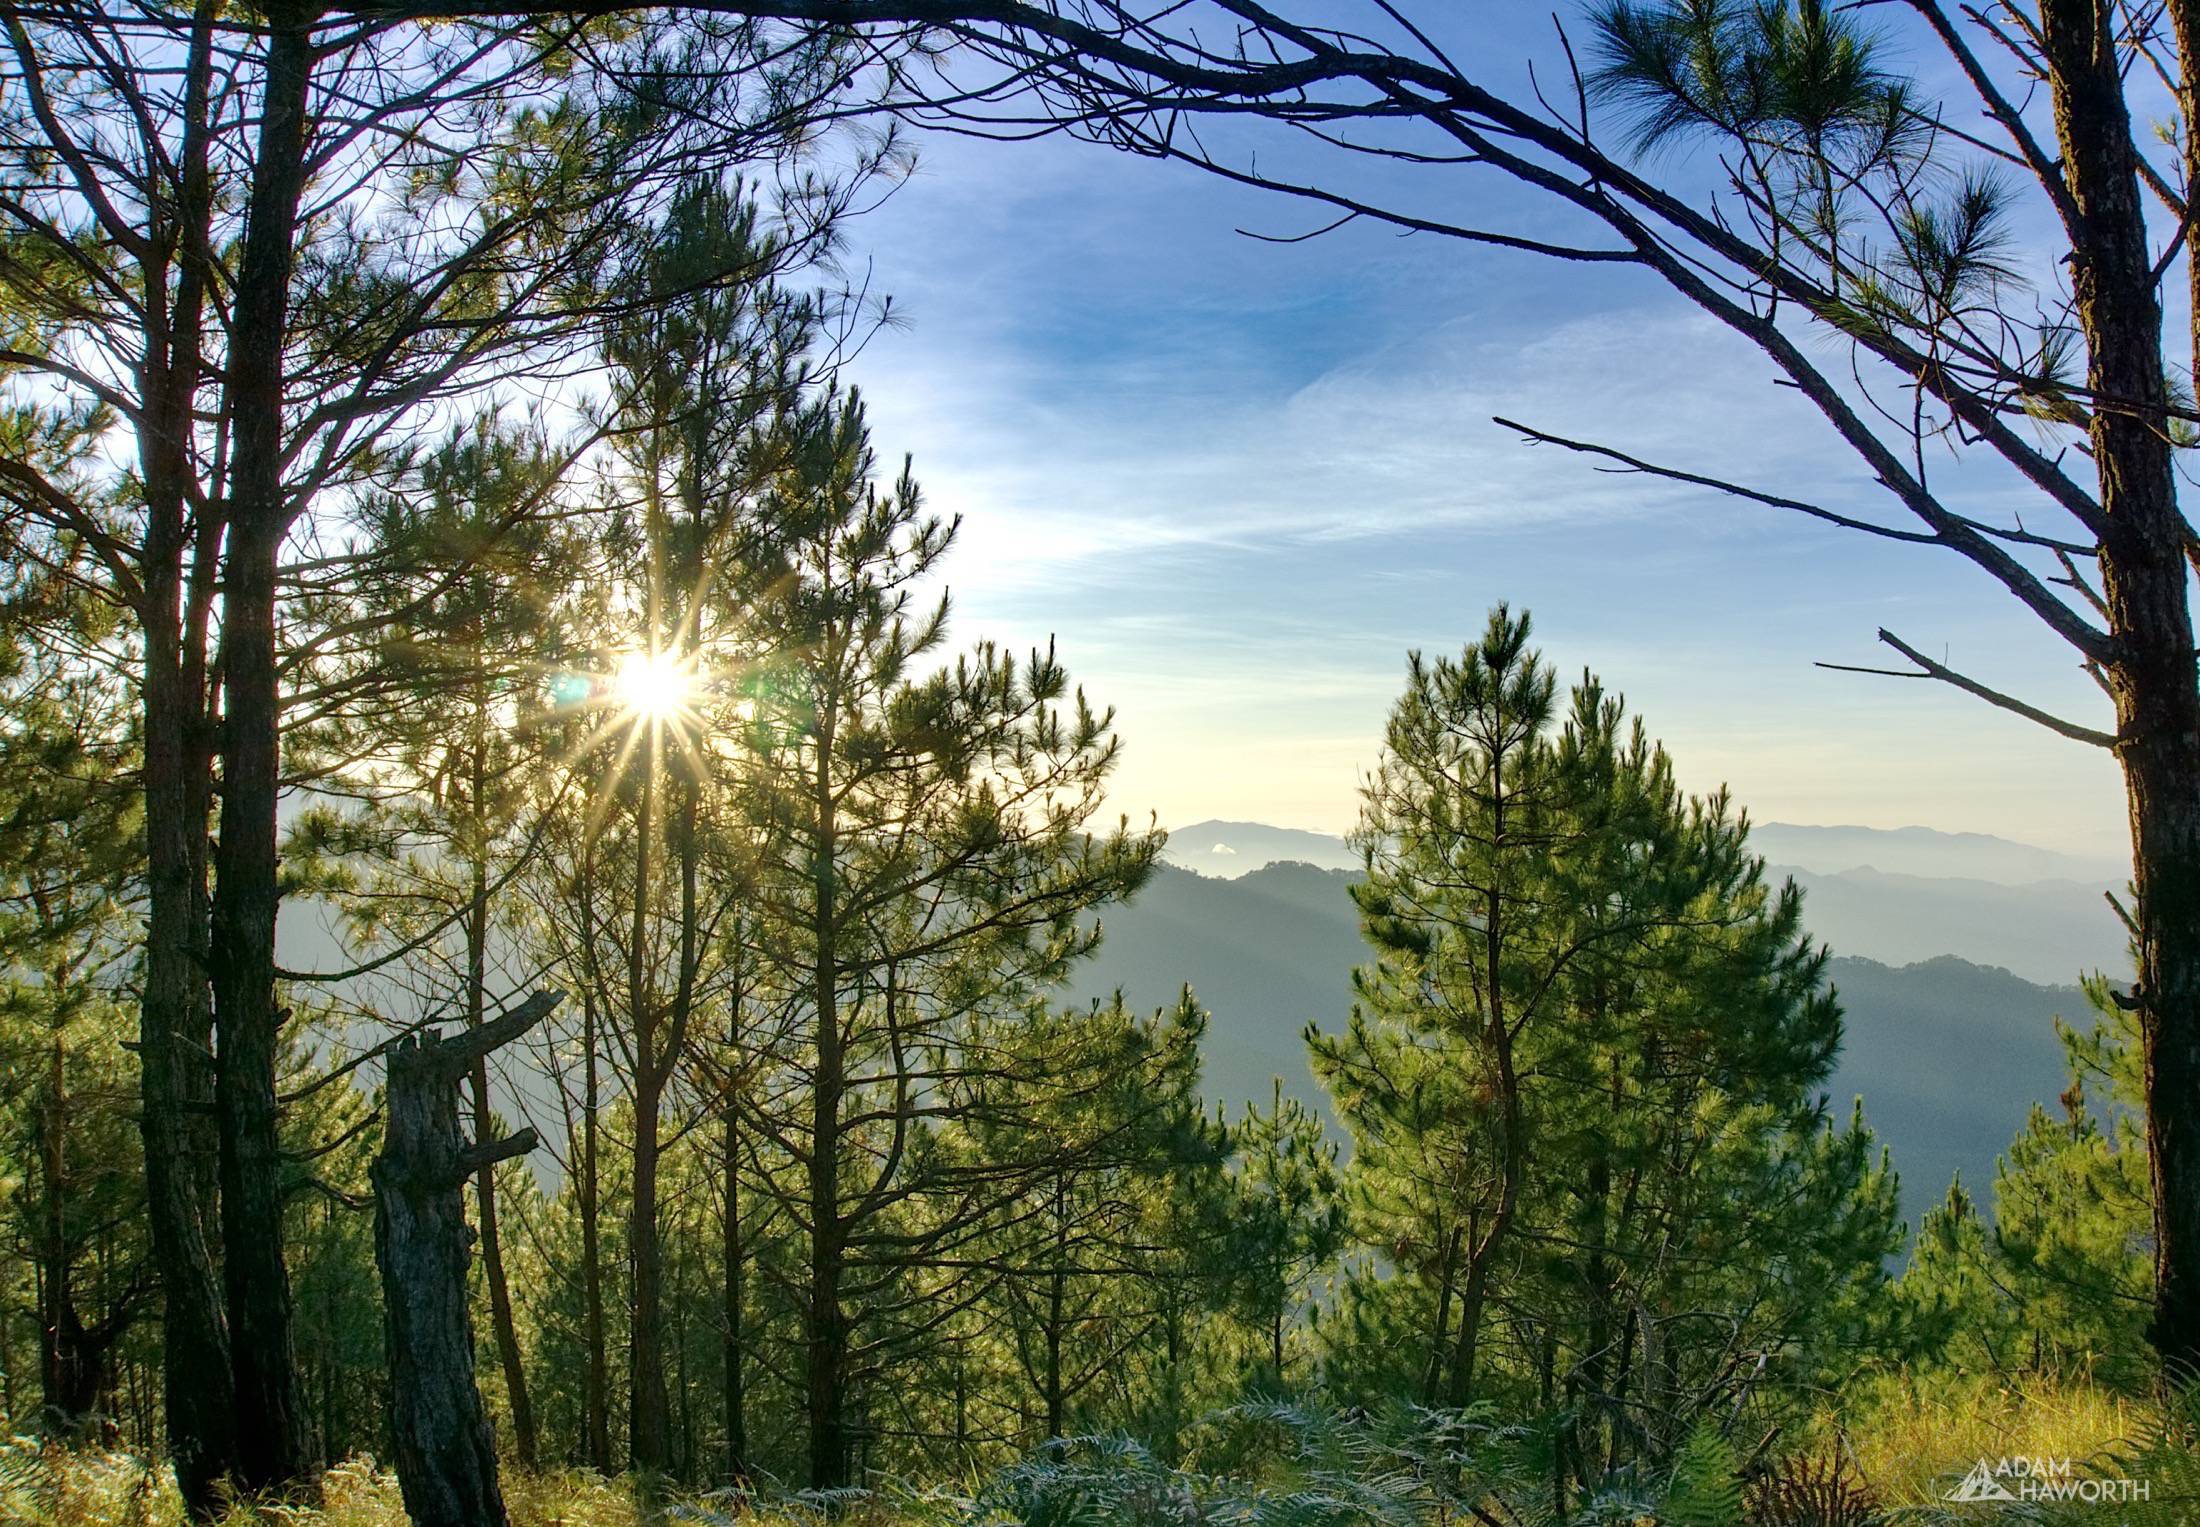
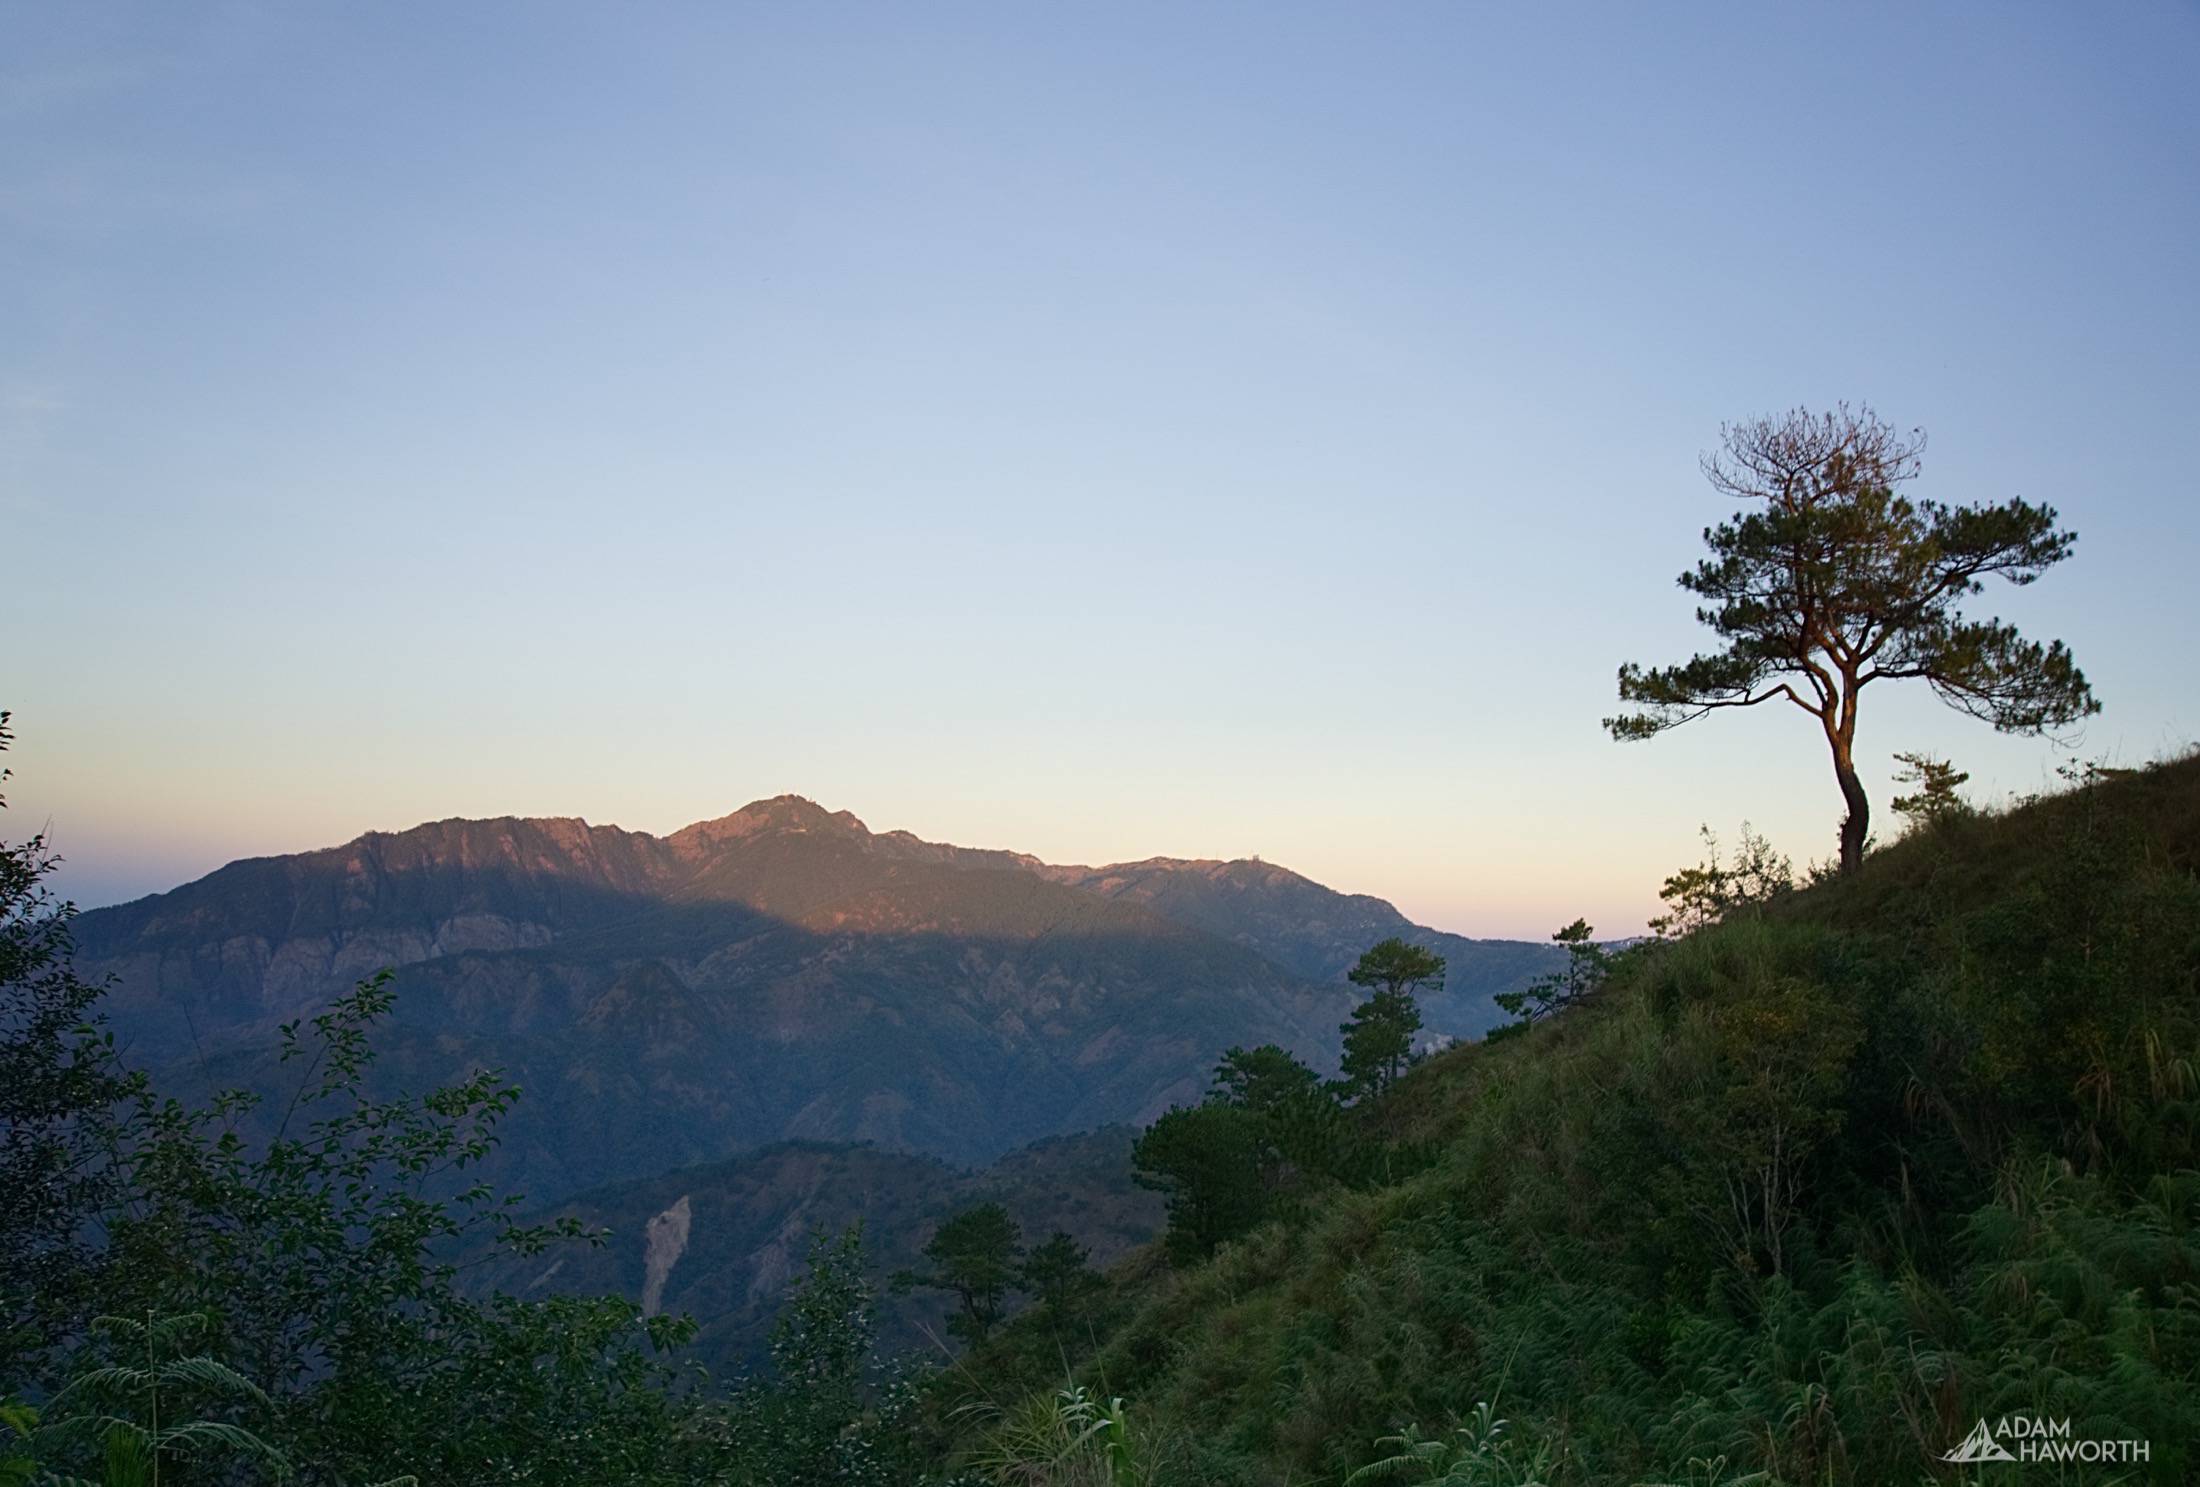
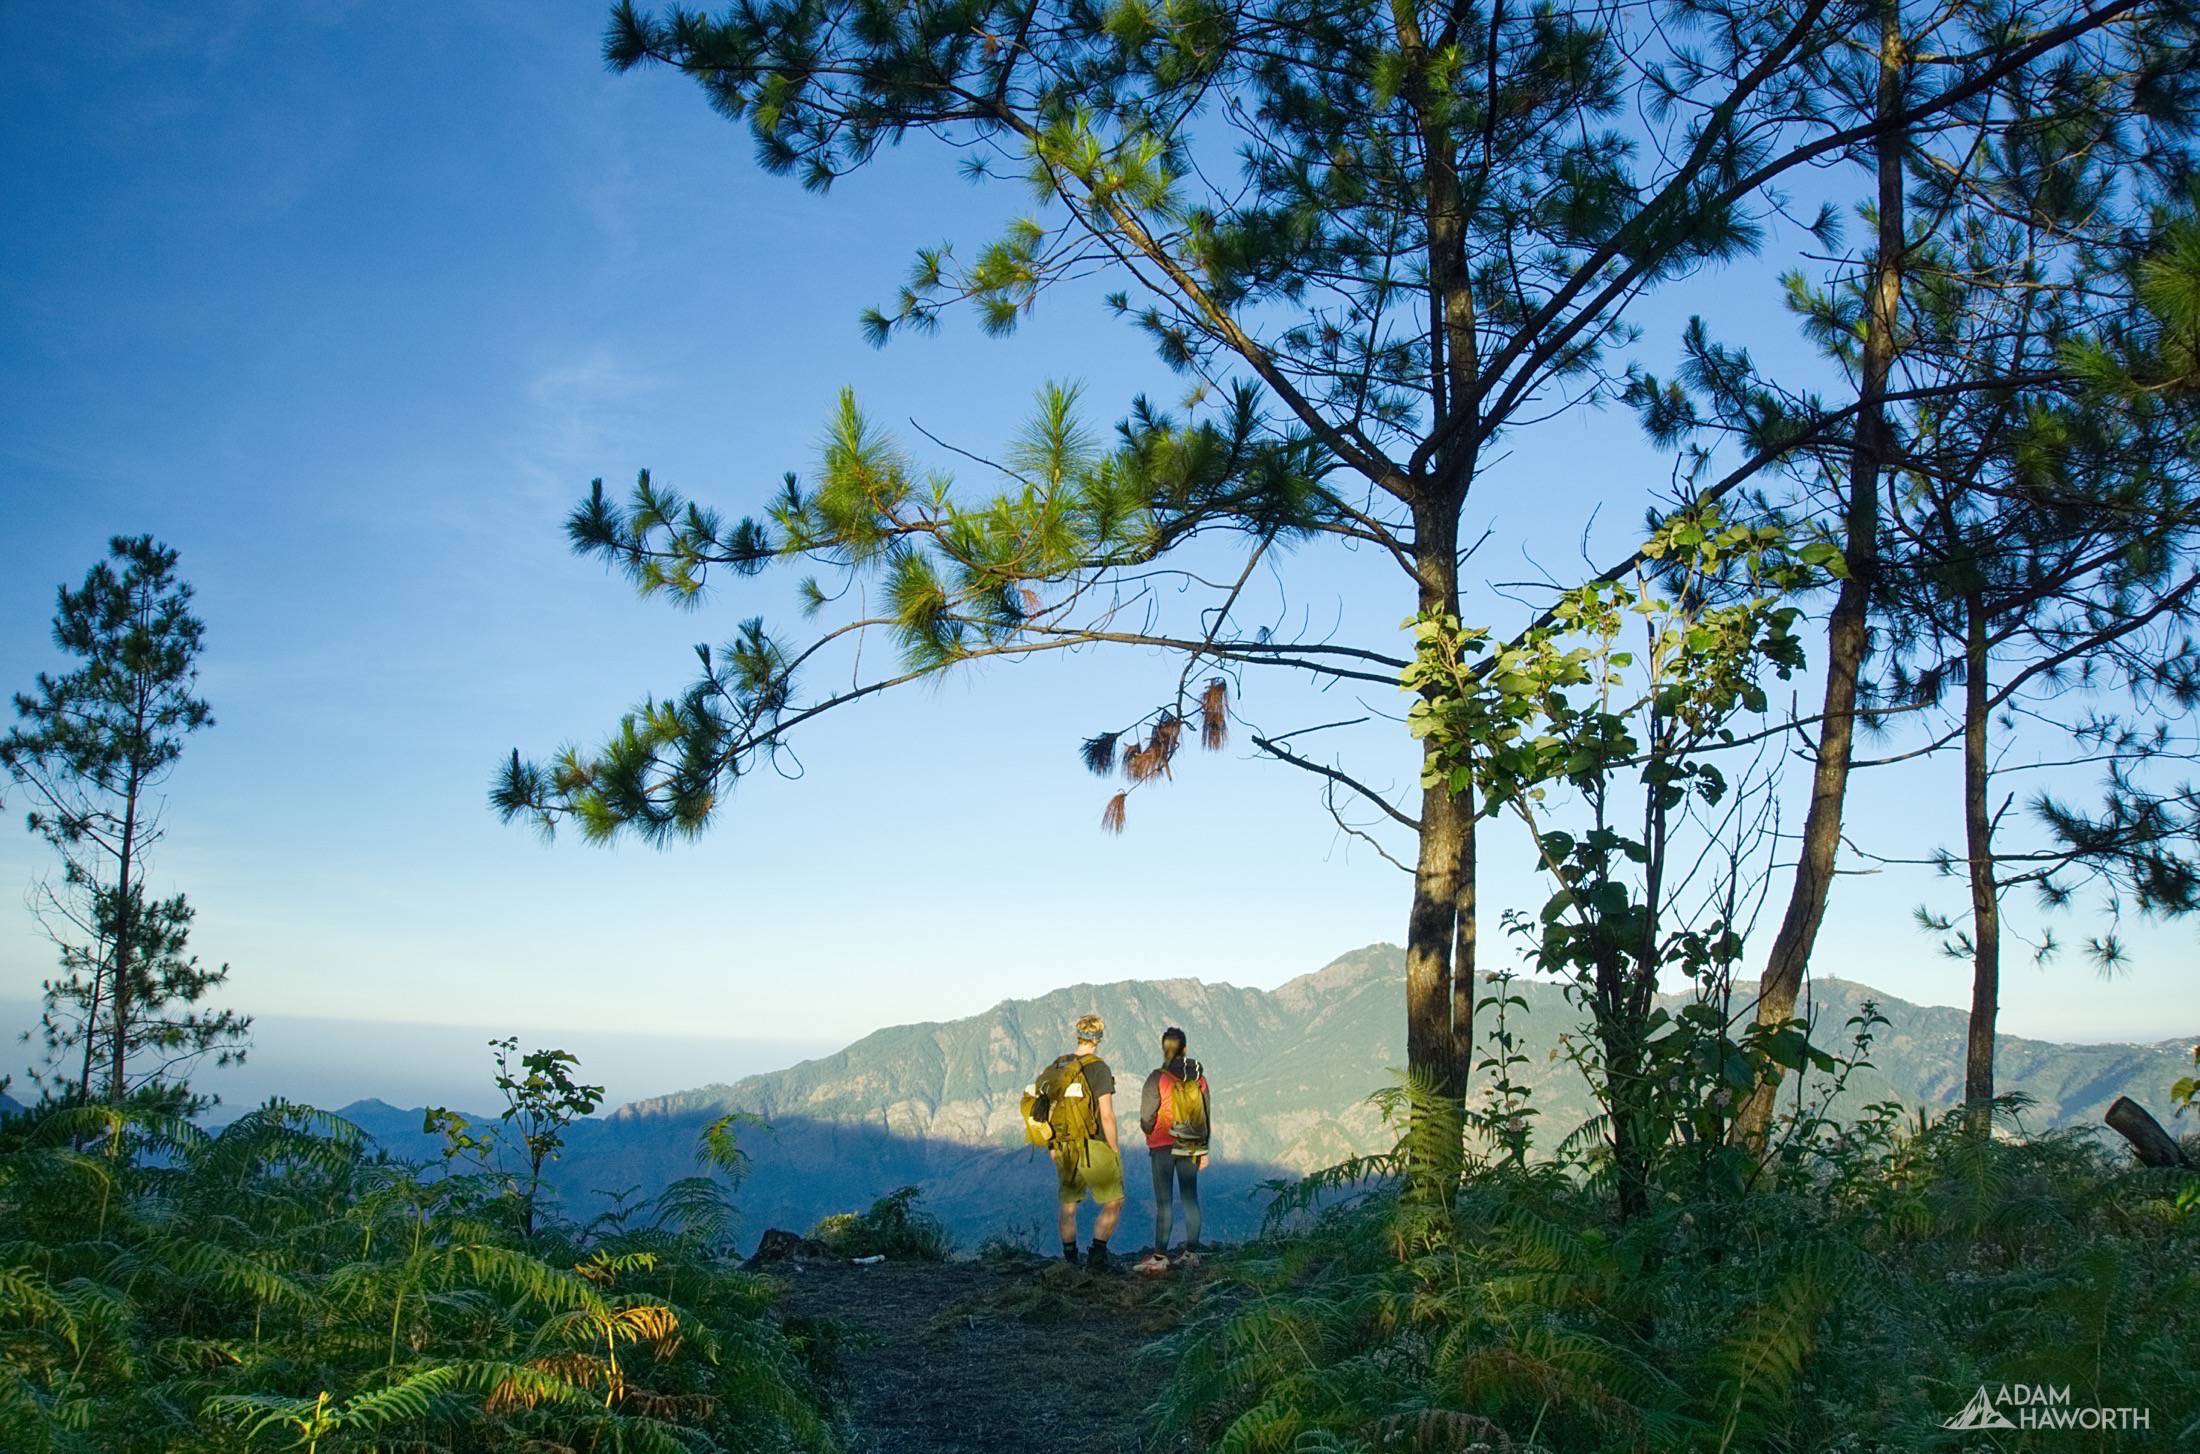
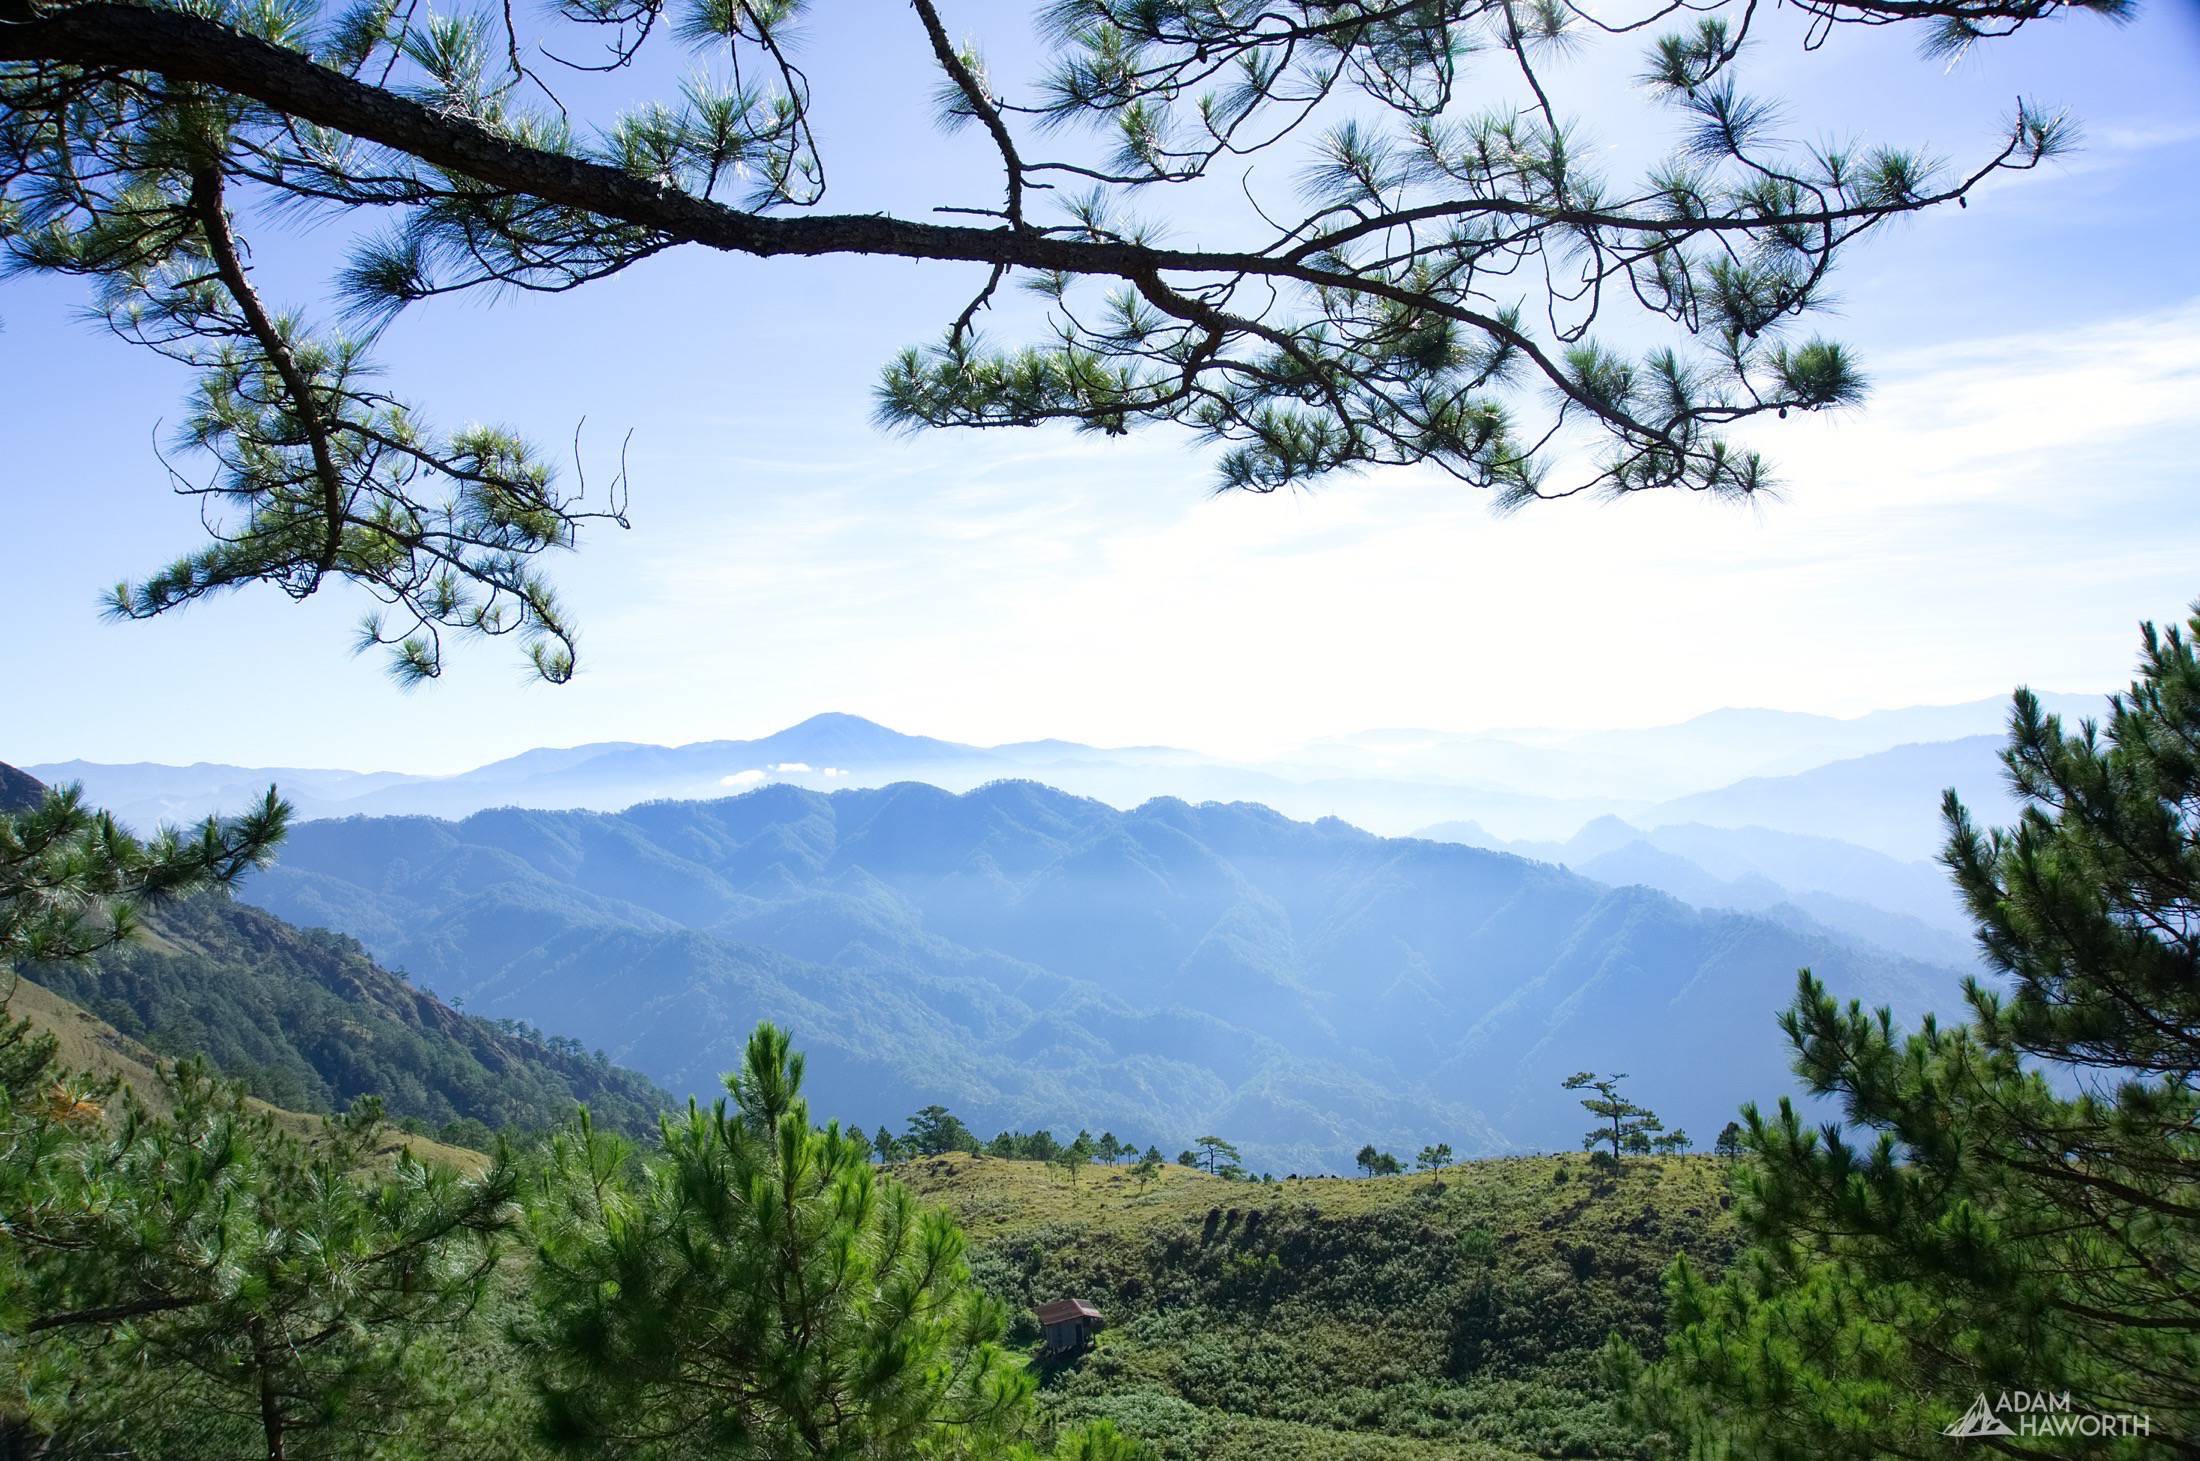
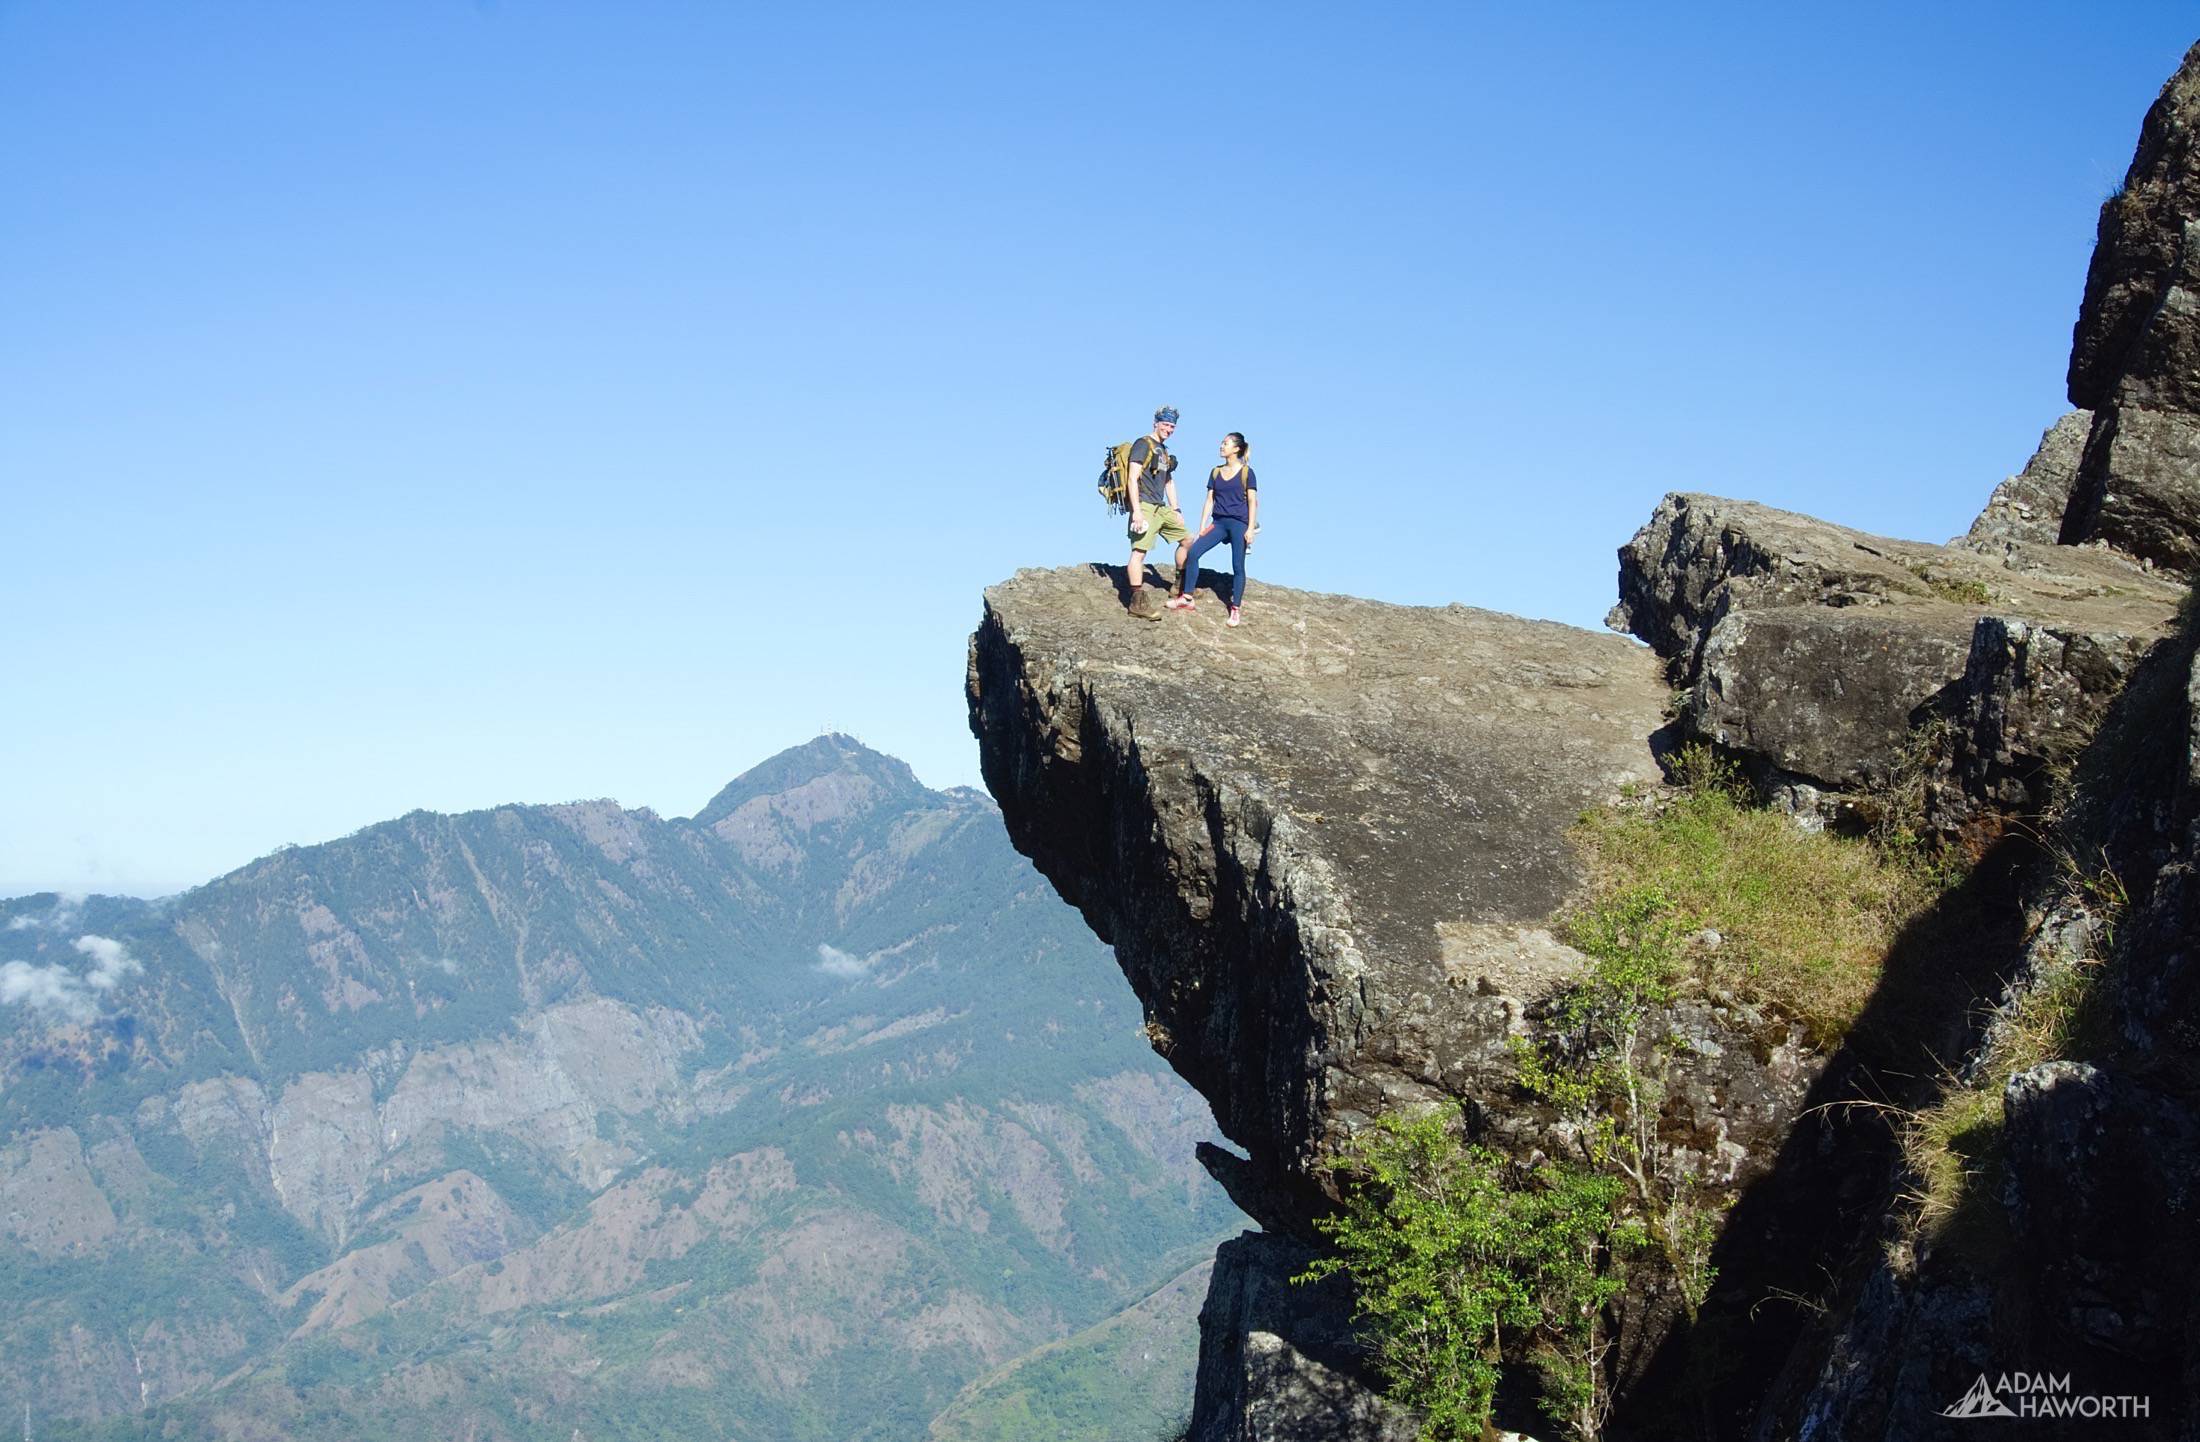
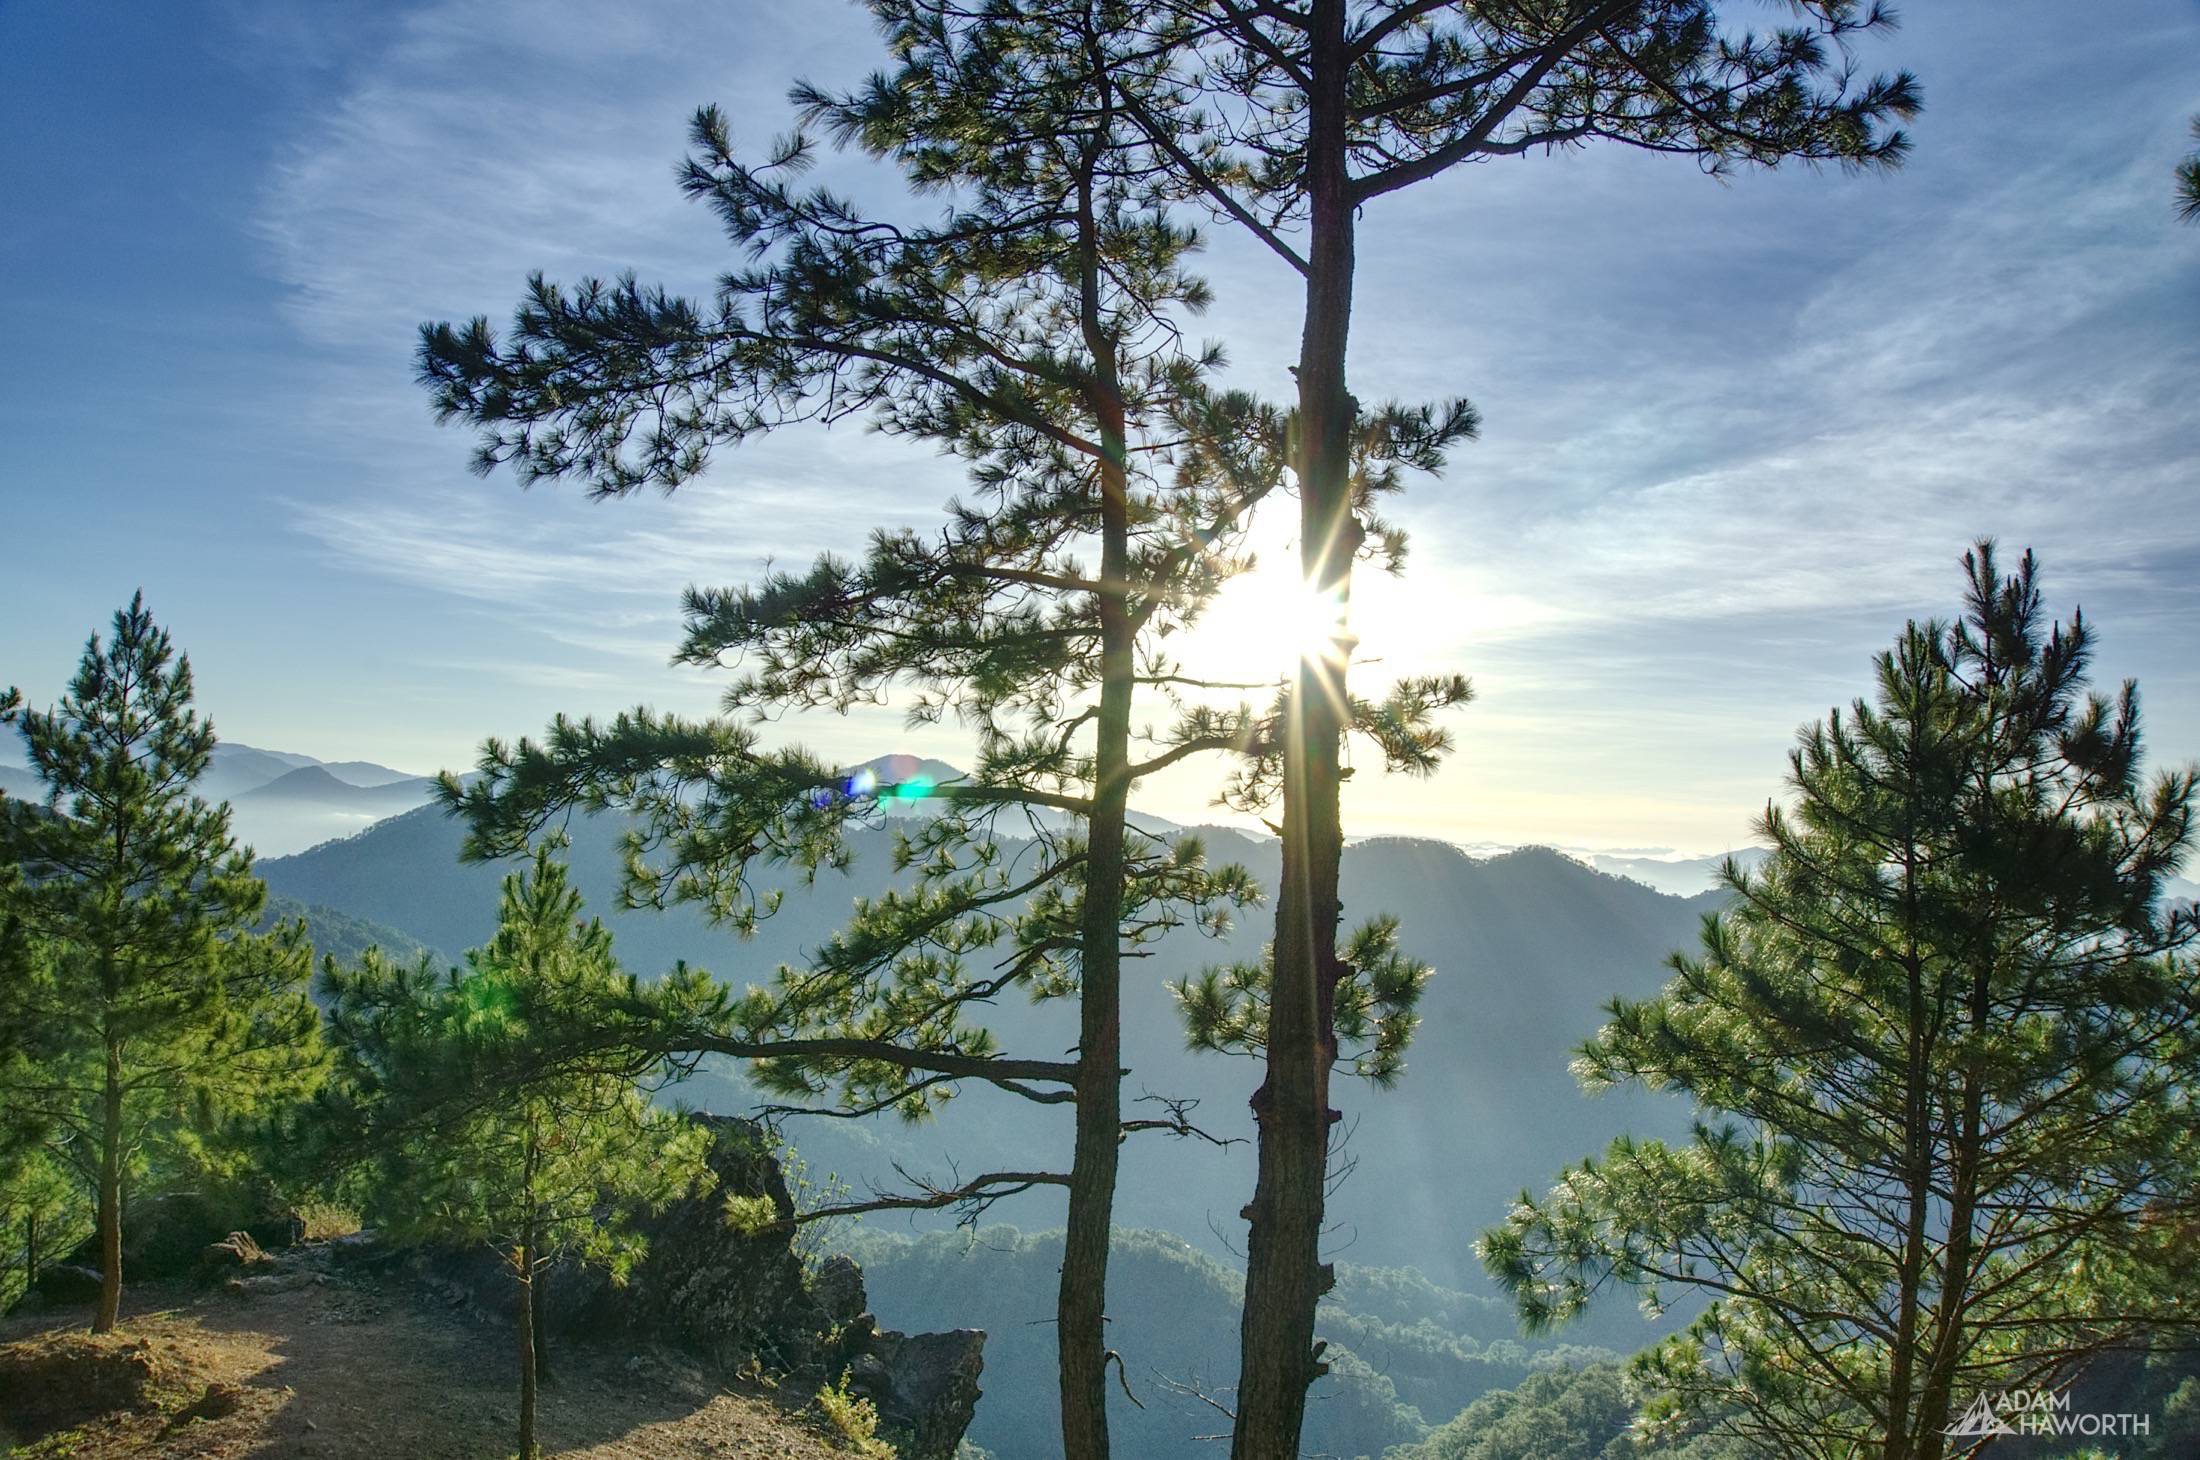
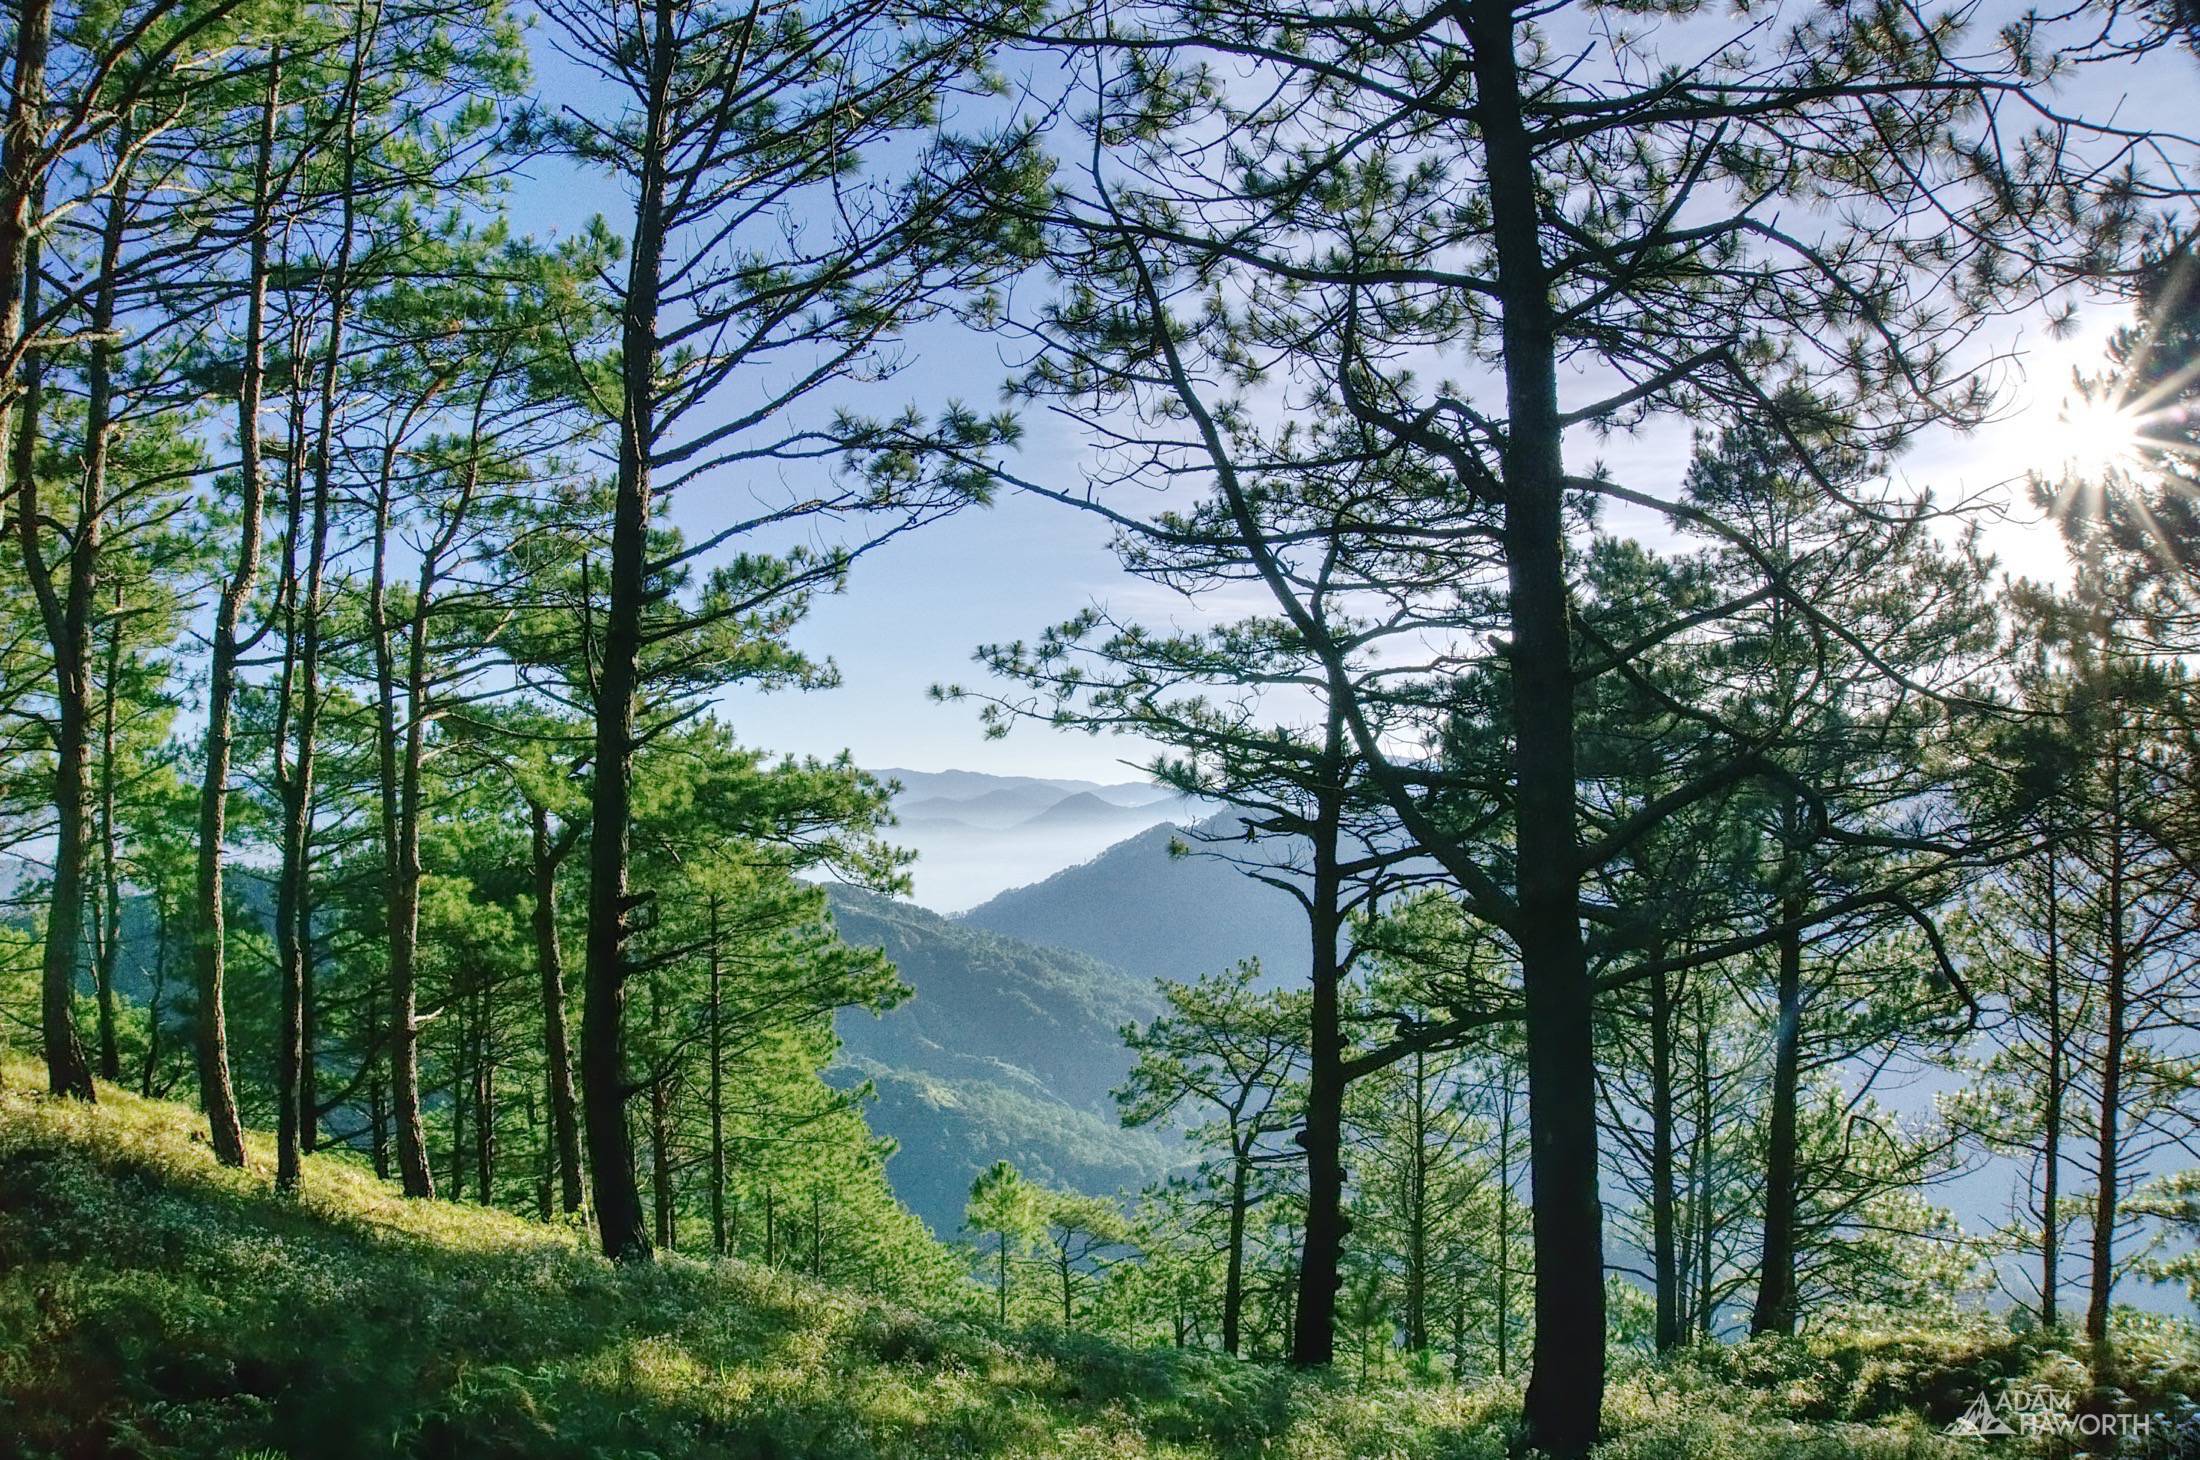
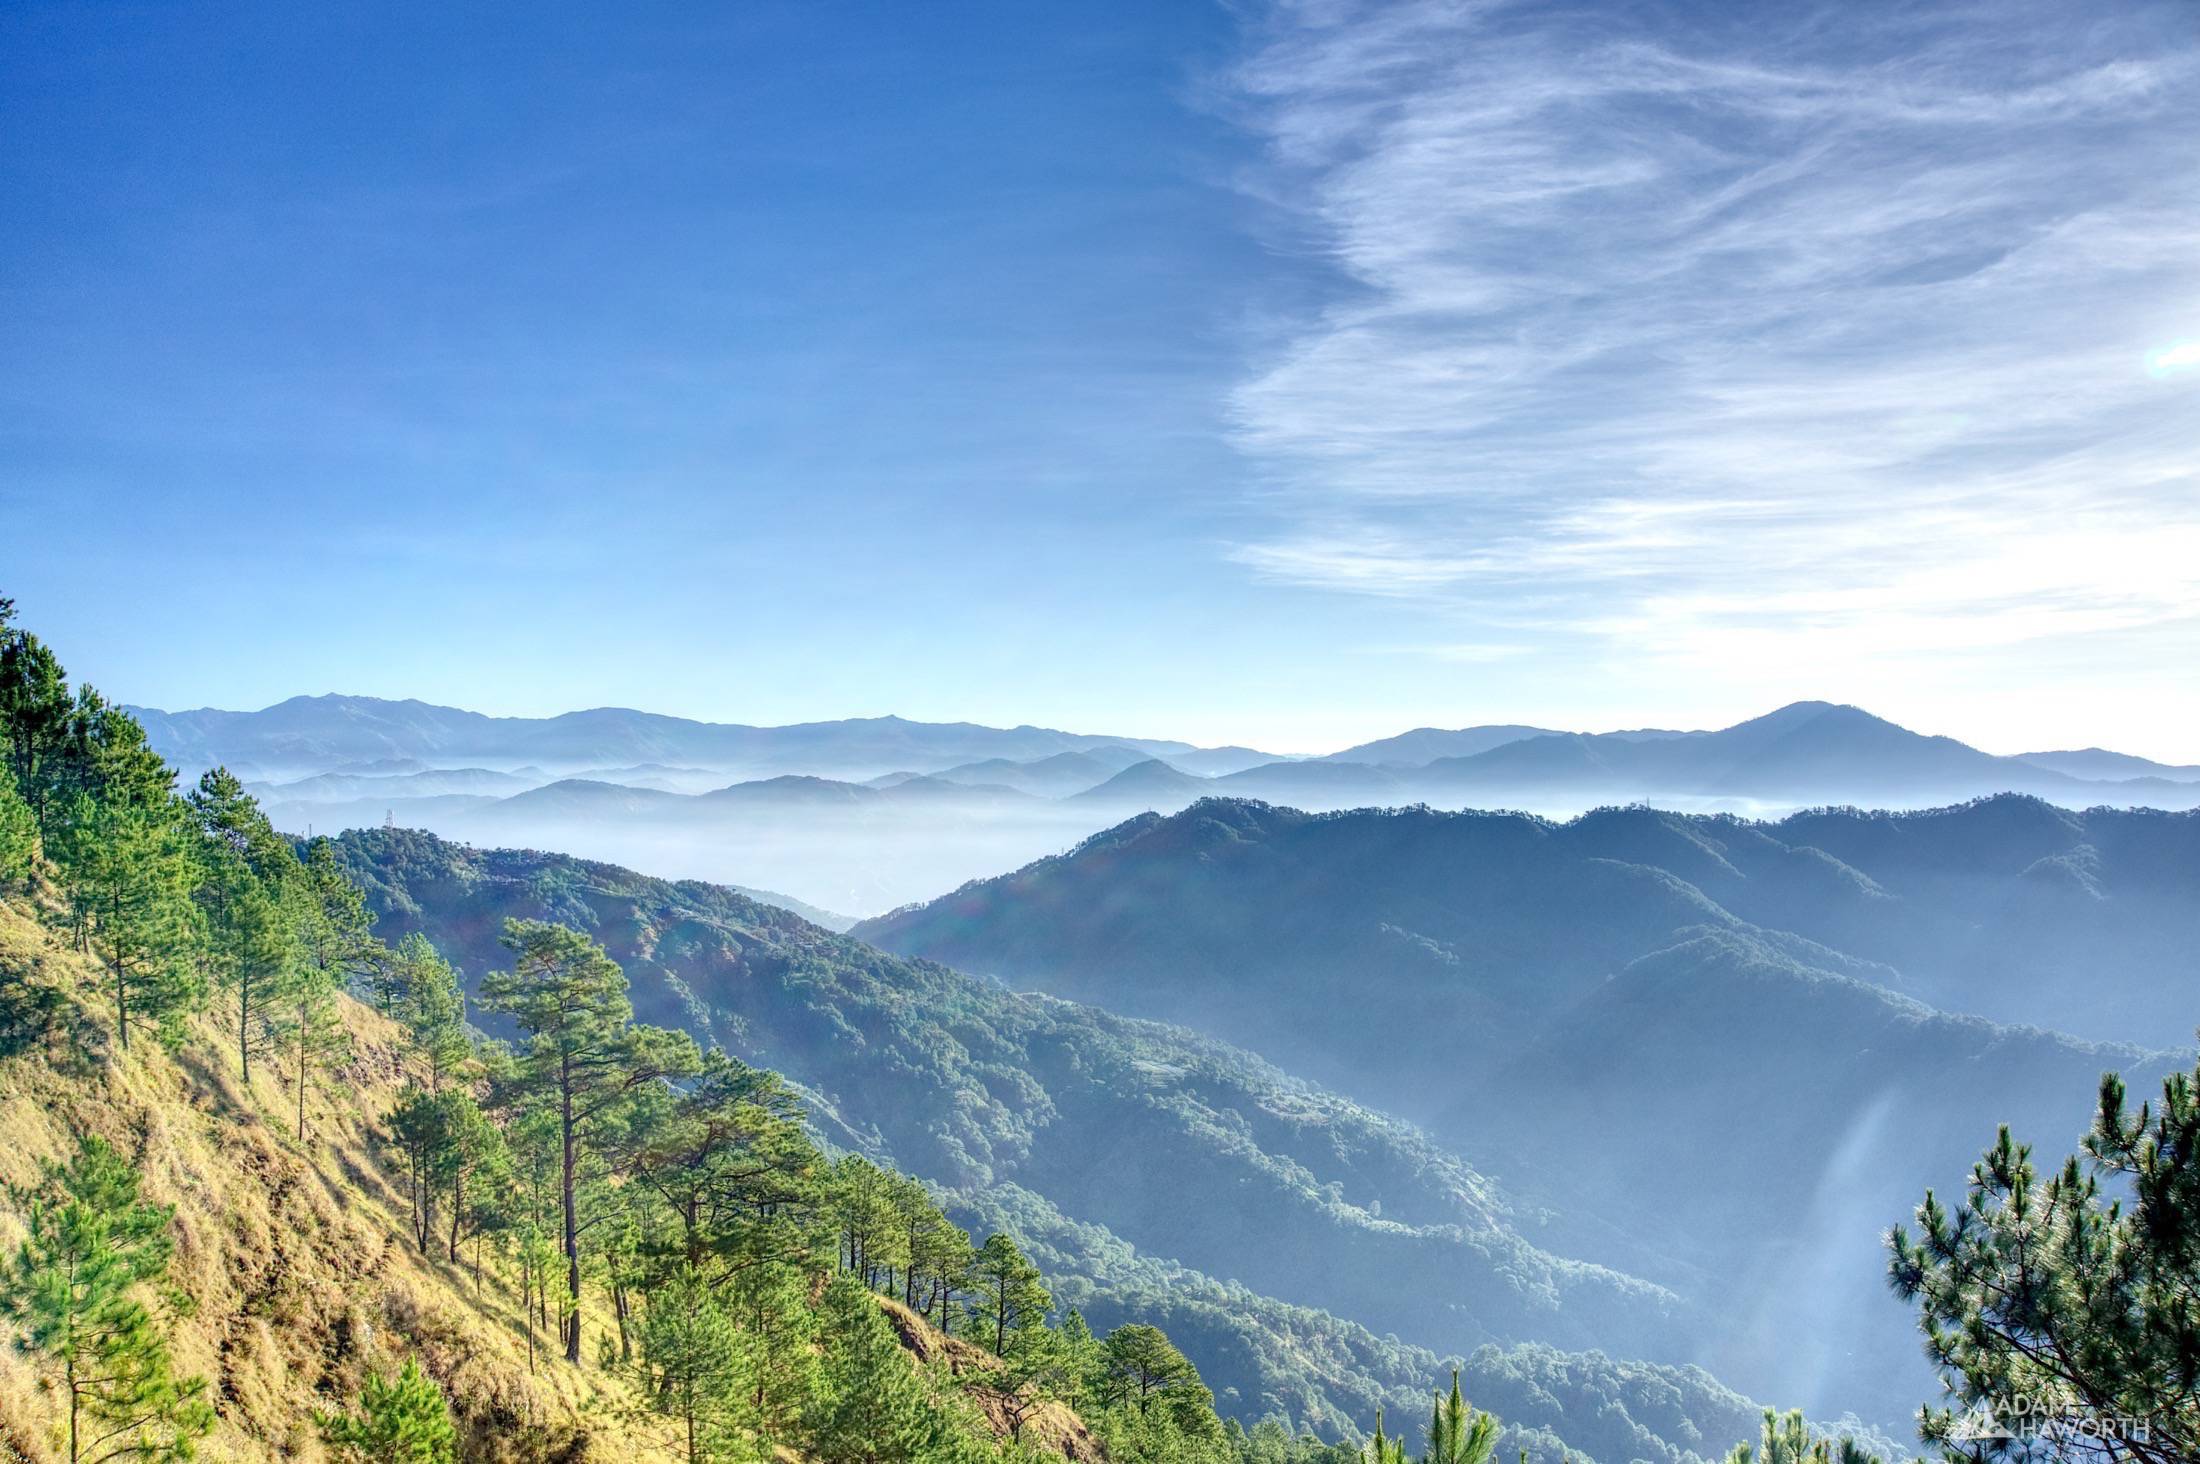
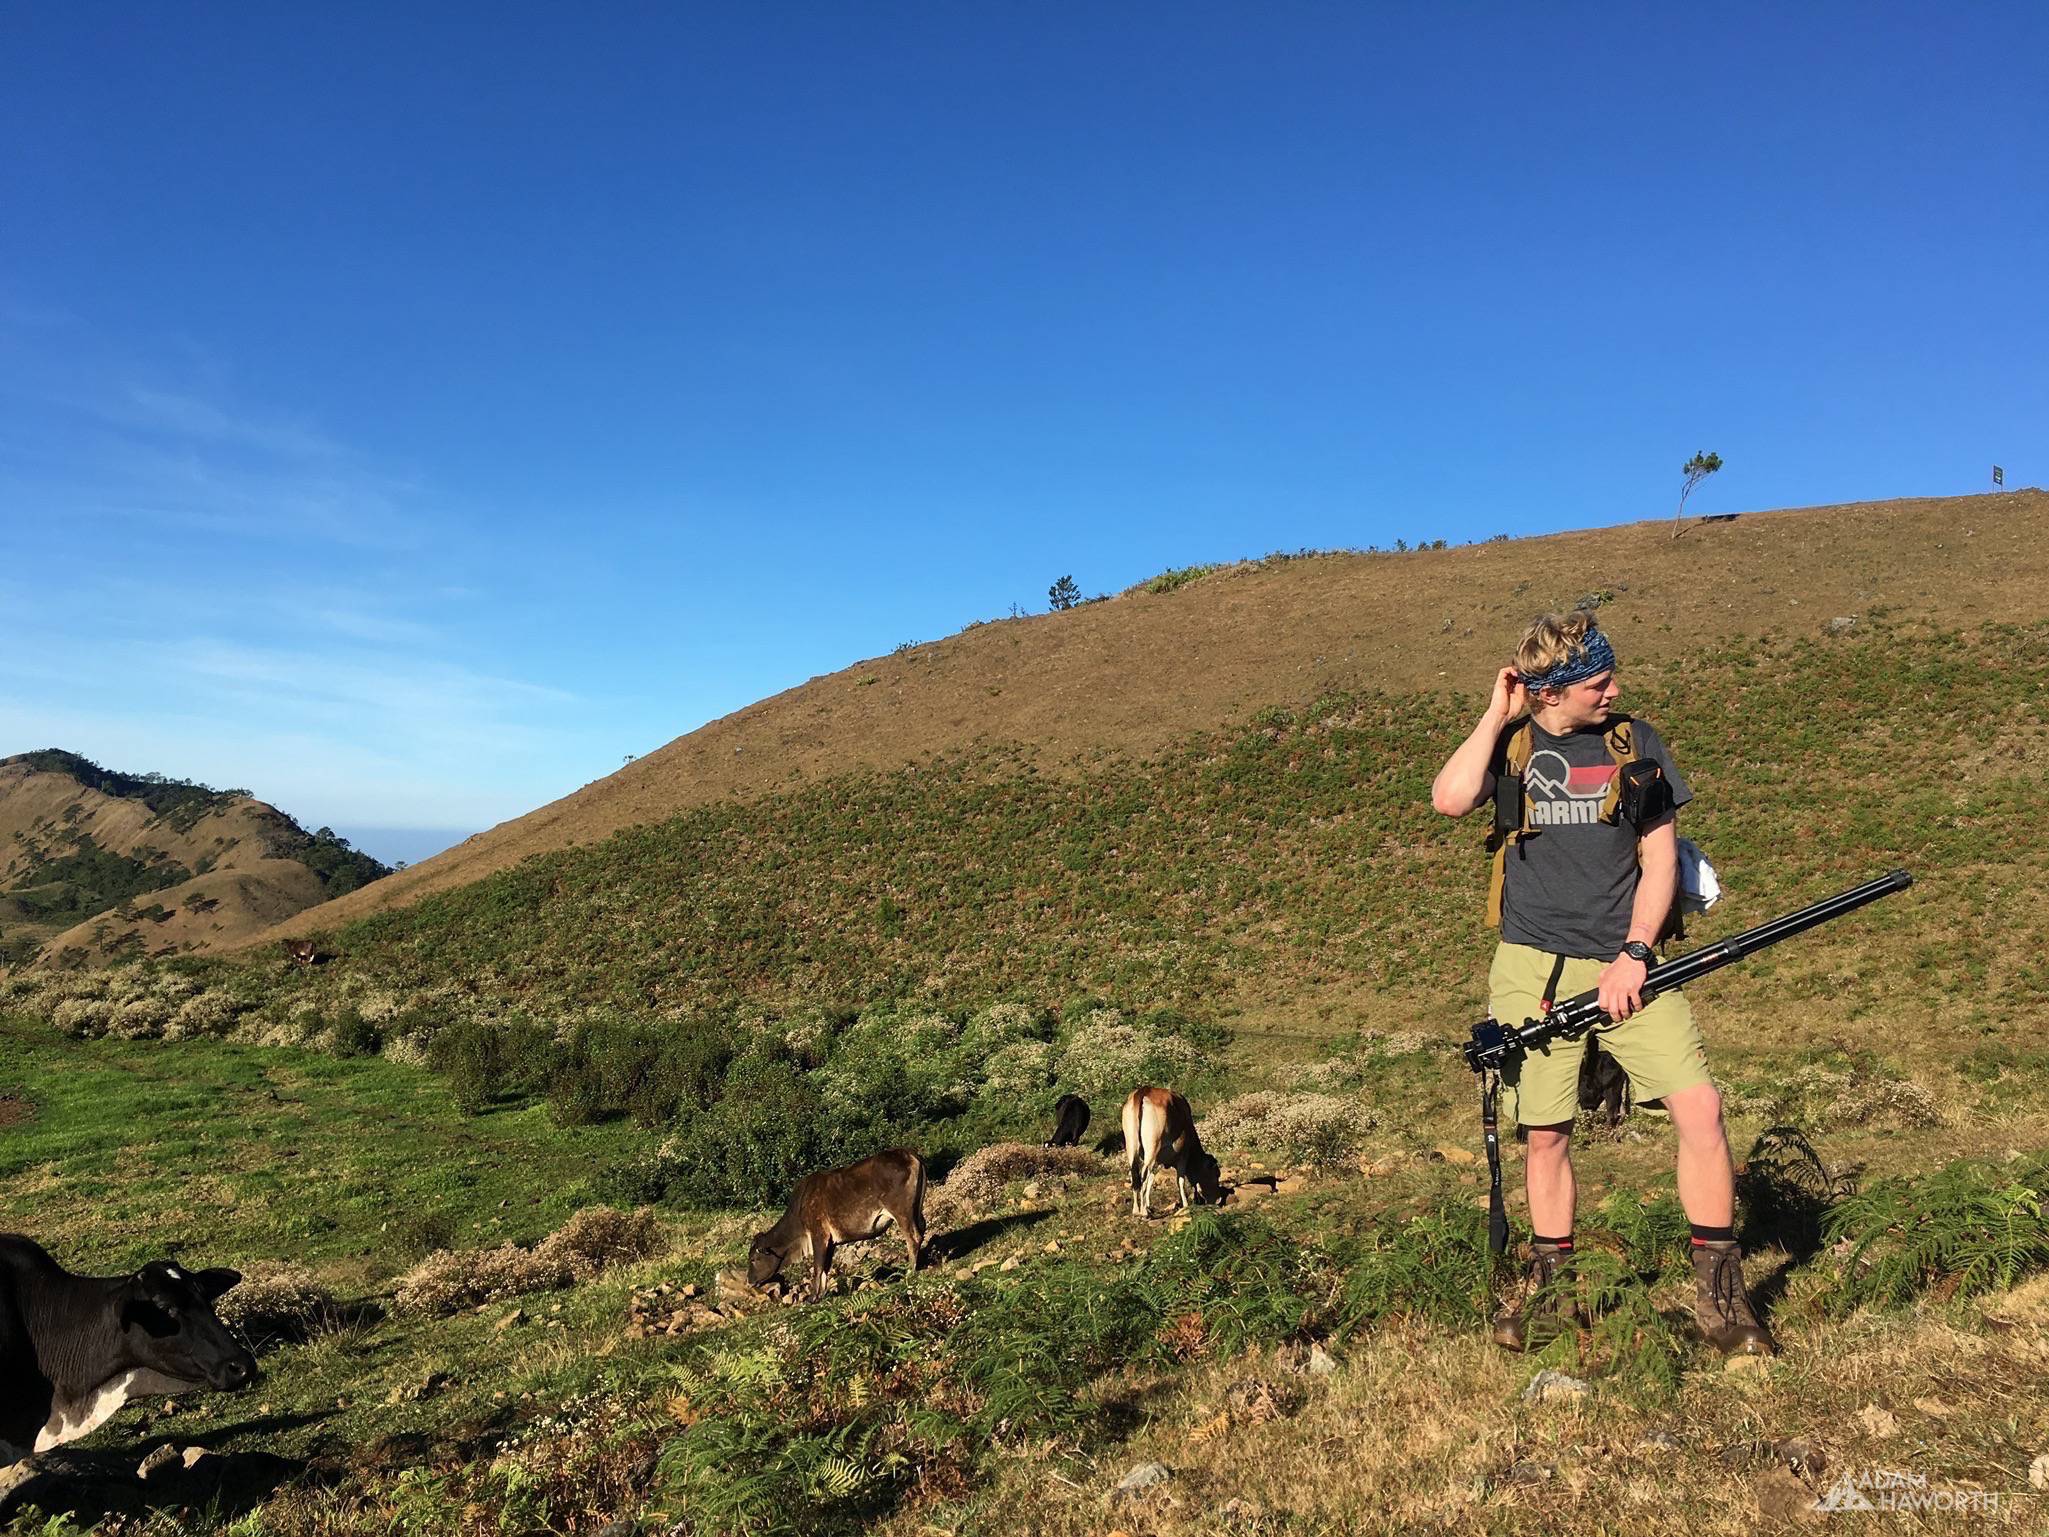
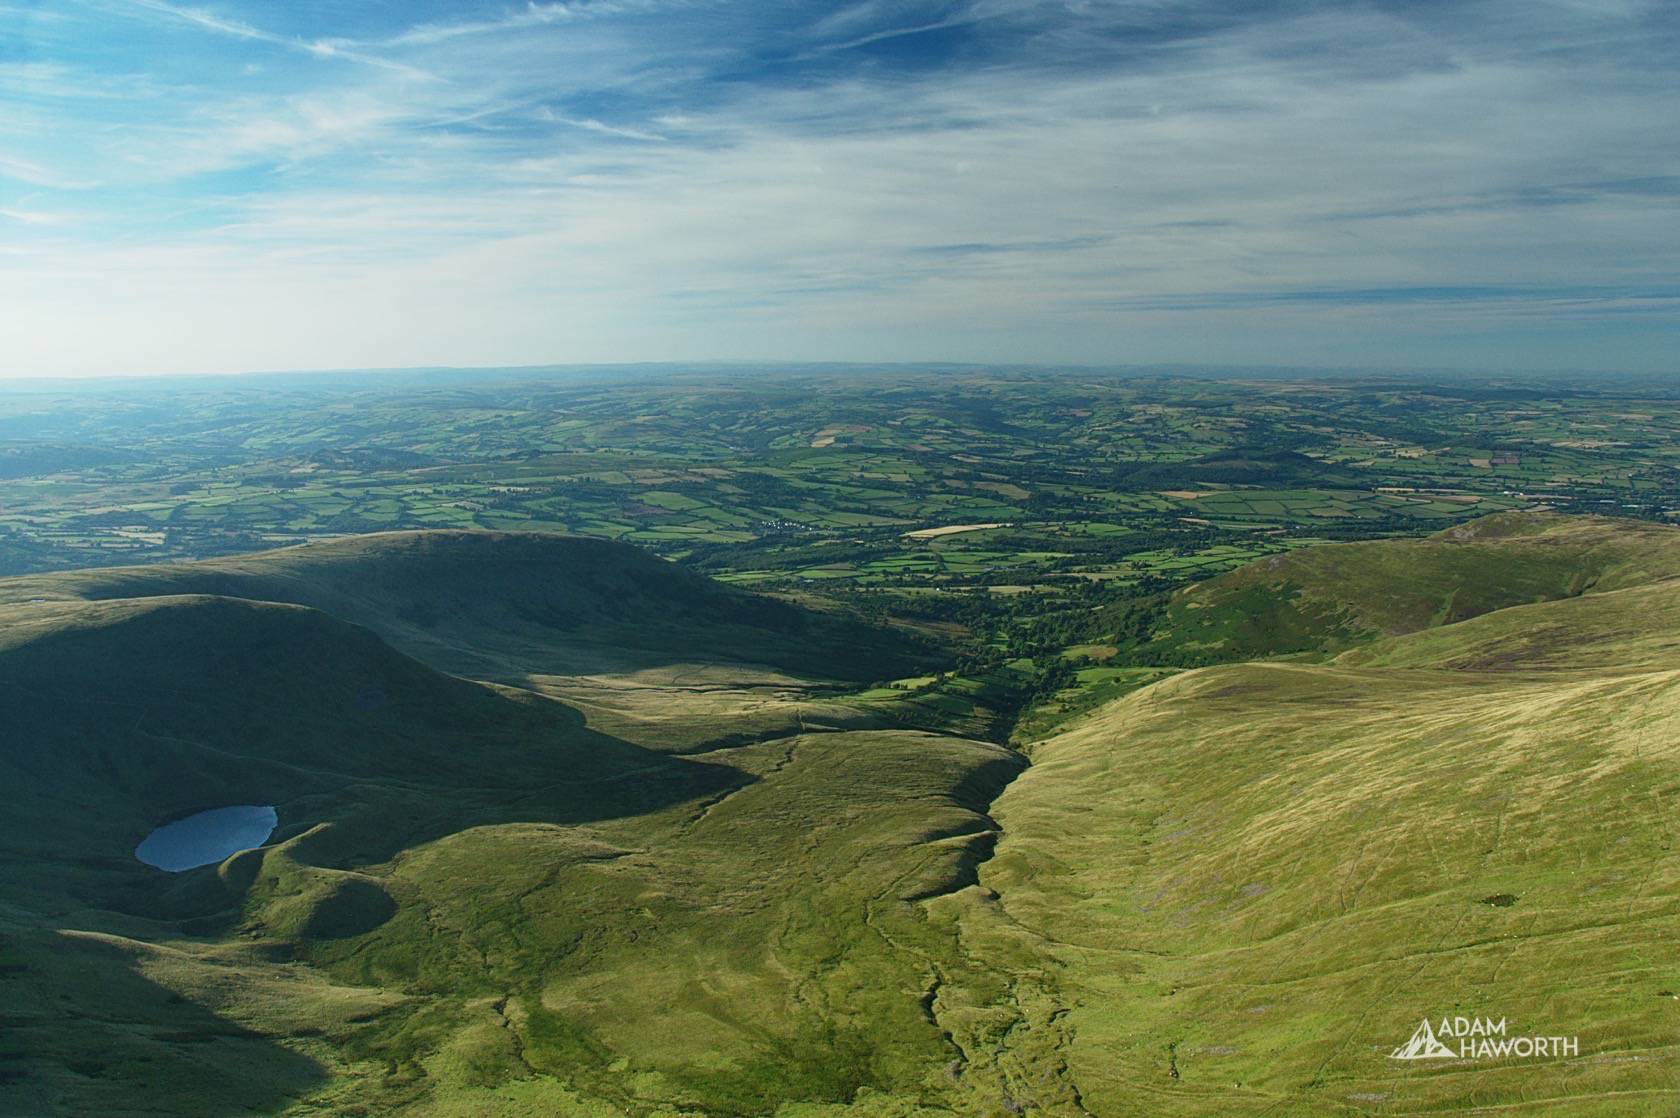
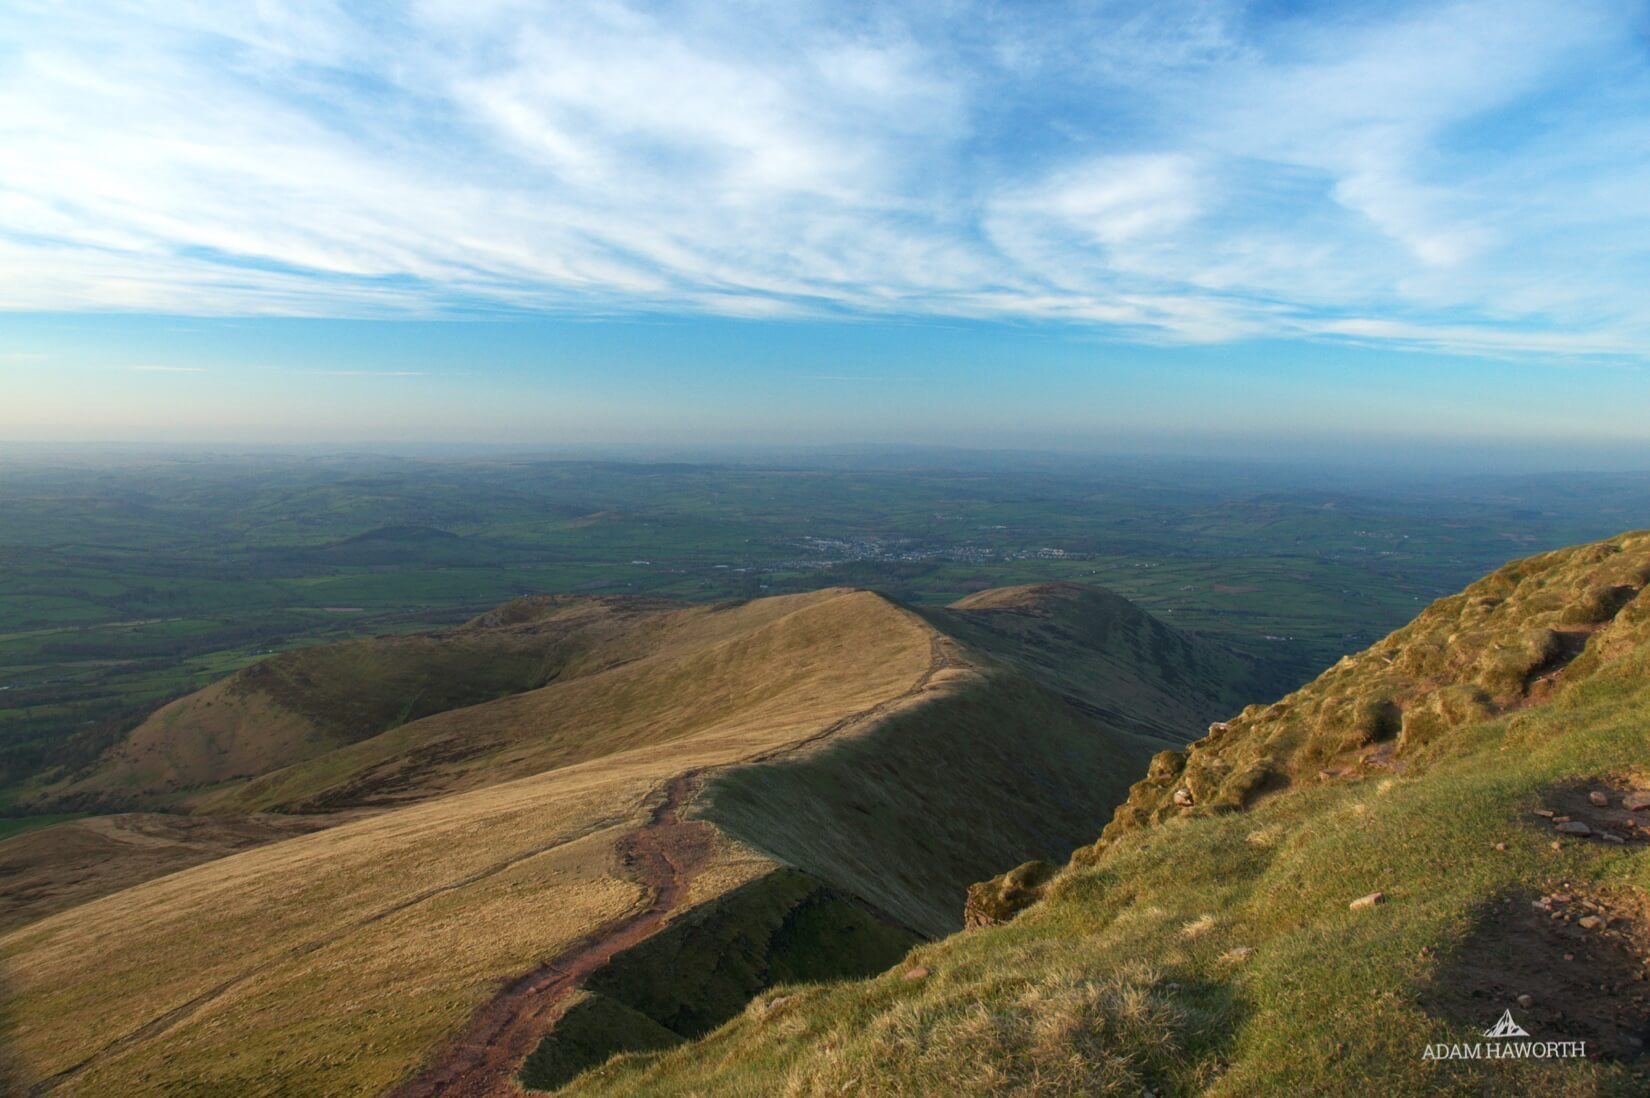
Mt Ulap is one the highest peaks in the Philippines standing just over a mile at 1846 meters, it's a pretty impressive peak as it's not part of a huge mountain range and views from the summit span for miles in all directions. You can even see as far as the South China Sea on a clear day, Ulap actually means cloud so you often get coverings of cloud on the summit and on the accent, however the two trips I've taken it was beautifully clear.
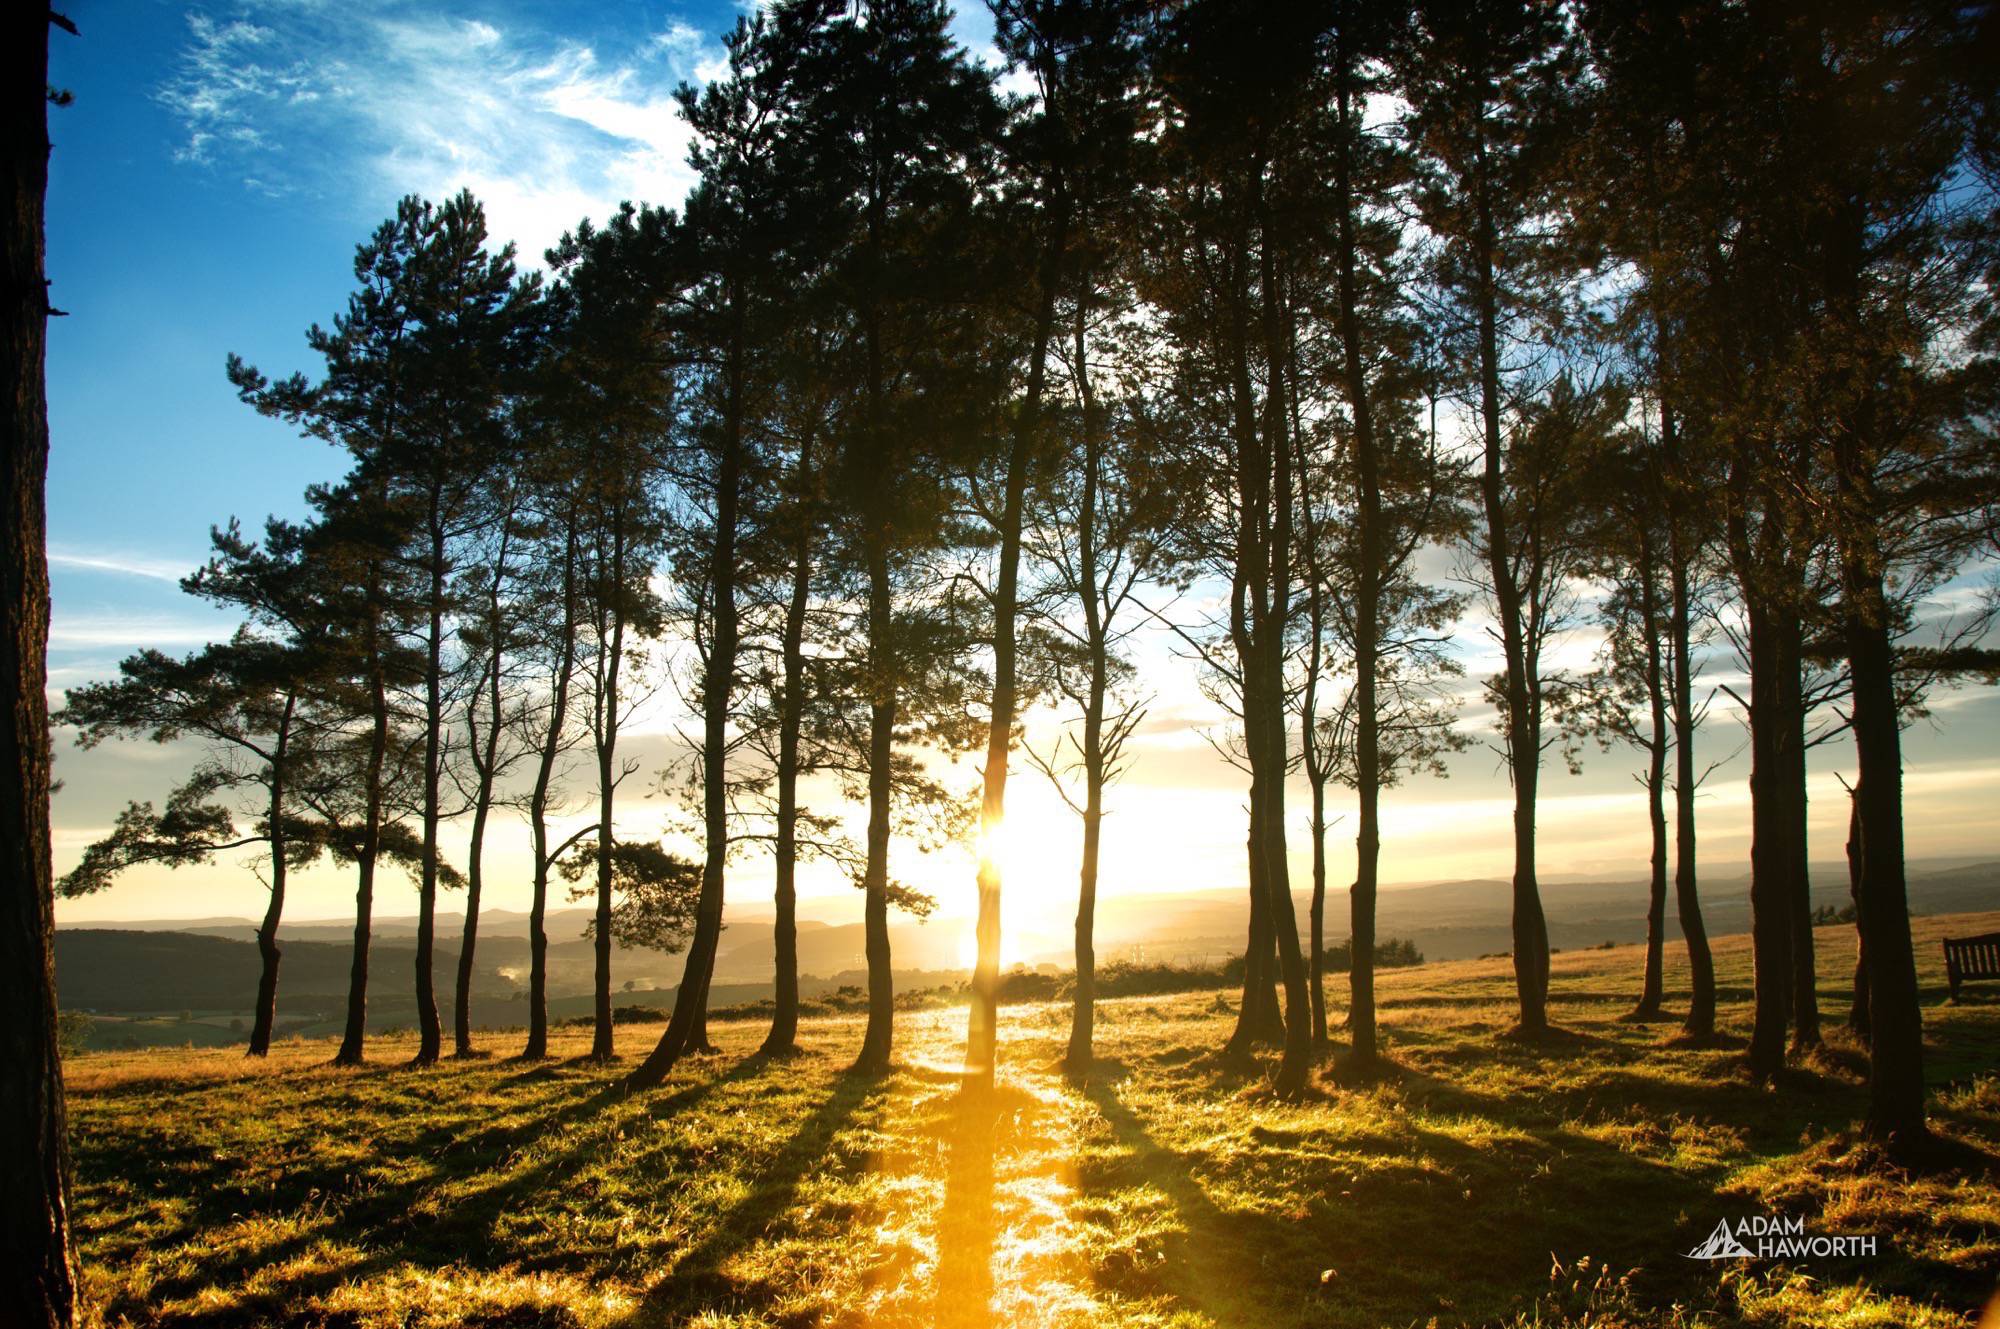
Hiking Mt Ulap won't be for everyone, having grown up near the Brecon Beacons in rural Herefordshire where you can go just about anywhere in the countryside and find a footpath that you can stroll for hours without seeing a single person. As I've grown accustomed to this and one of the reasons I love photography and the great outdoors so much is because I can find calm in the isolation of the countryside, I was slightly put off when I found out that you need to have a guide accompany you on the entire hike. It isn't a particularly long hike at around 10 miles and the path is pretty clear the entire way so the need for the guide is somewhat unclear - I guess it helps provide money for locals and hopefully, some of that money goes into protecting the beautiful area. Having a guide wasn't all that bad and on the second visit the guide was full of information and even helped manage the three dogs we decided to bring on the adventure.
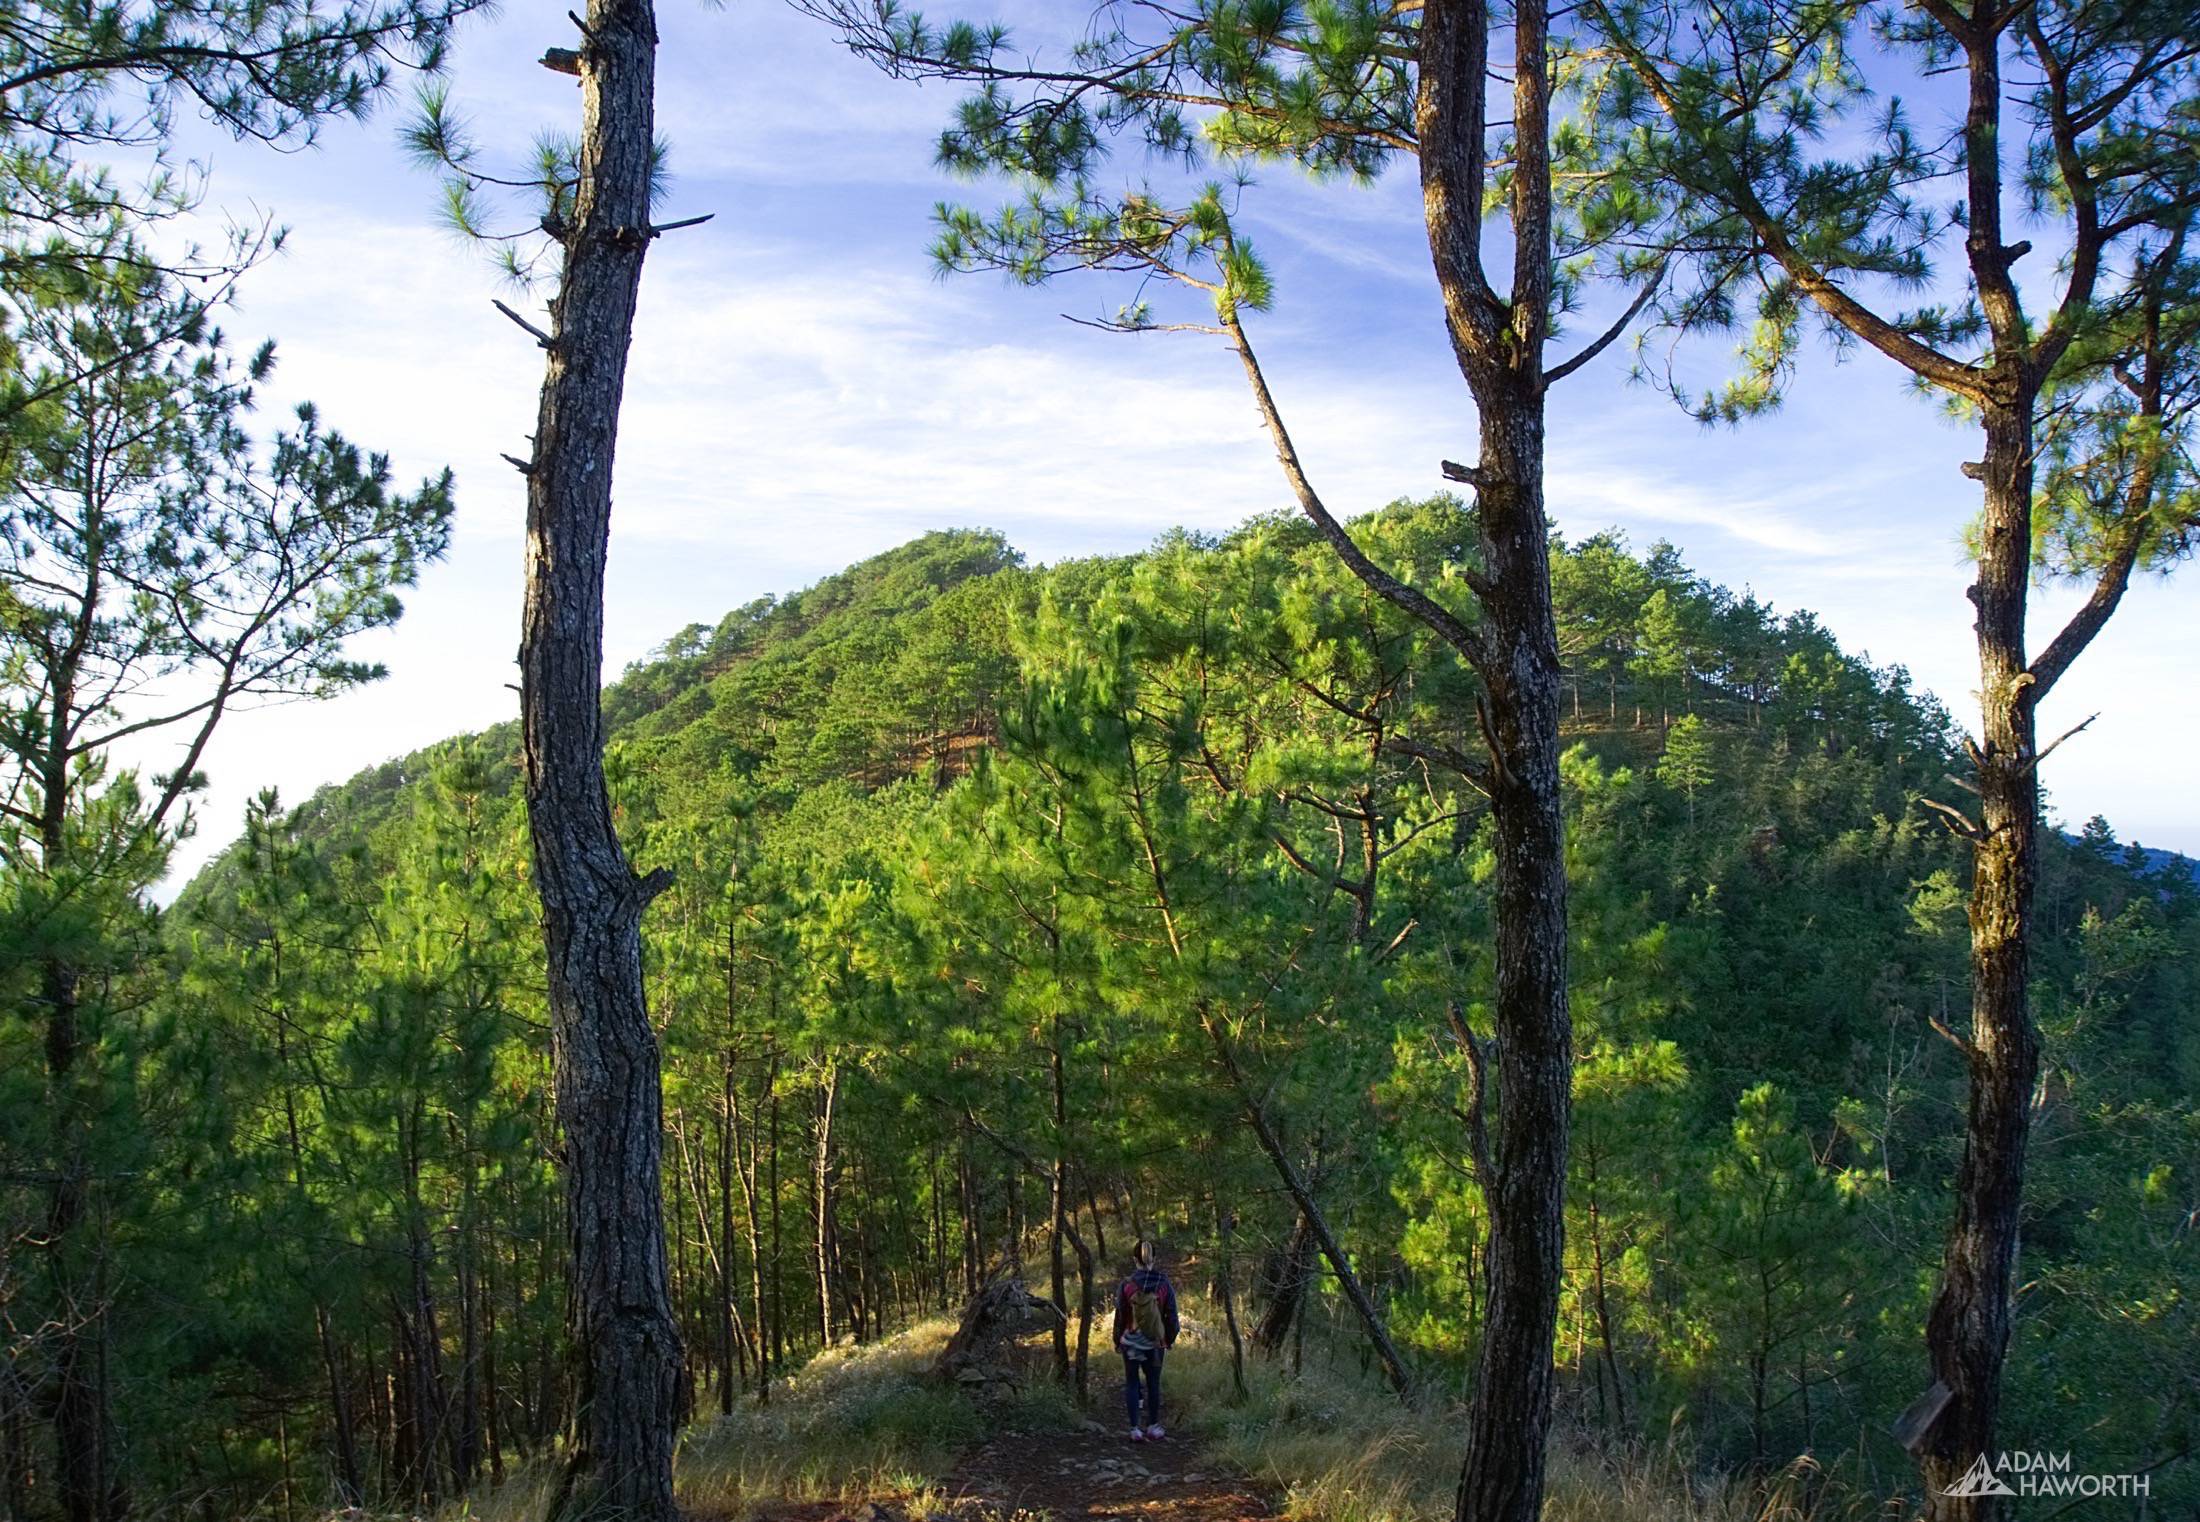
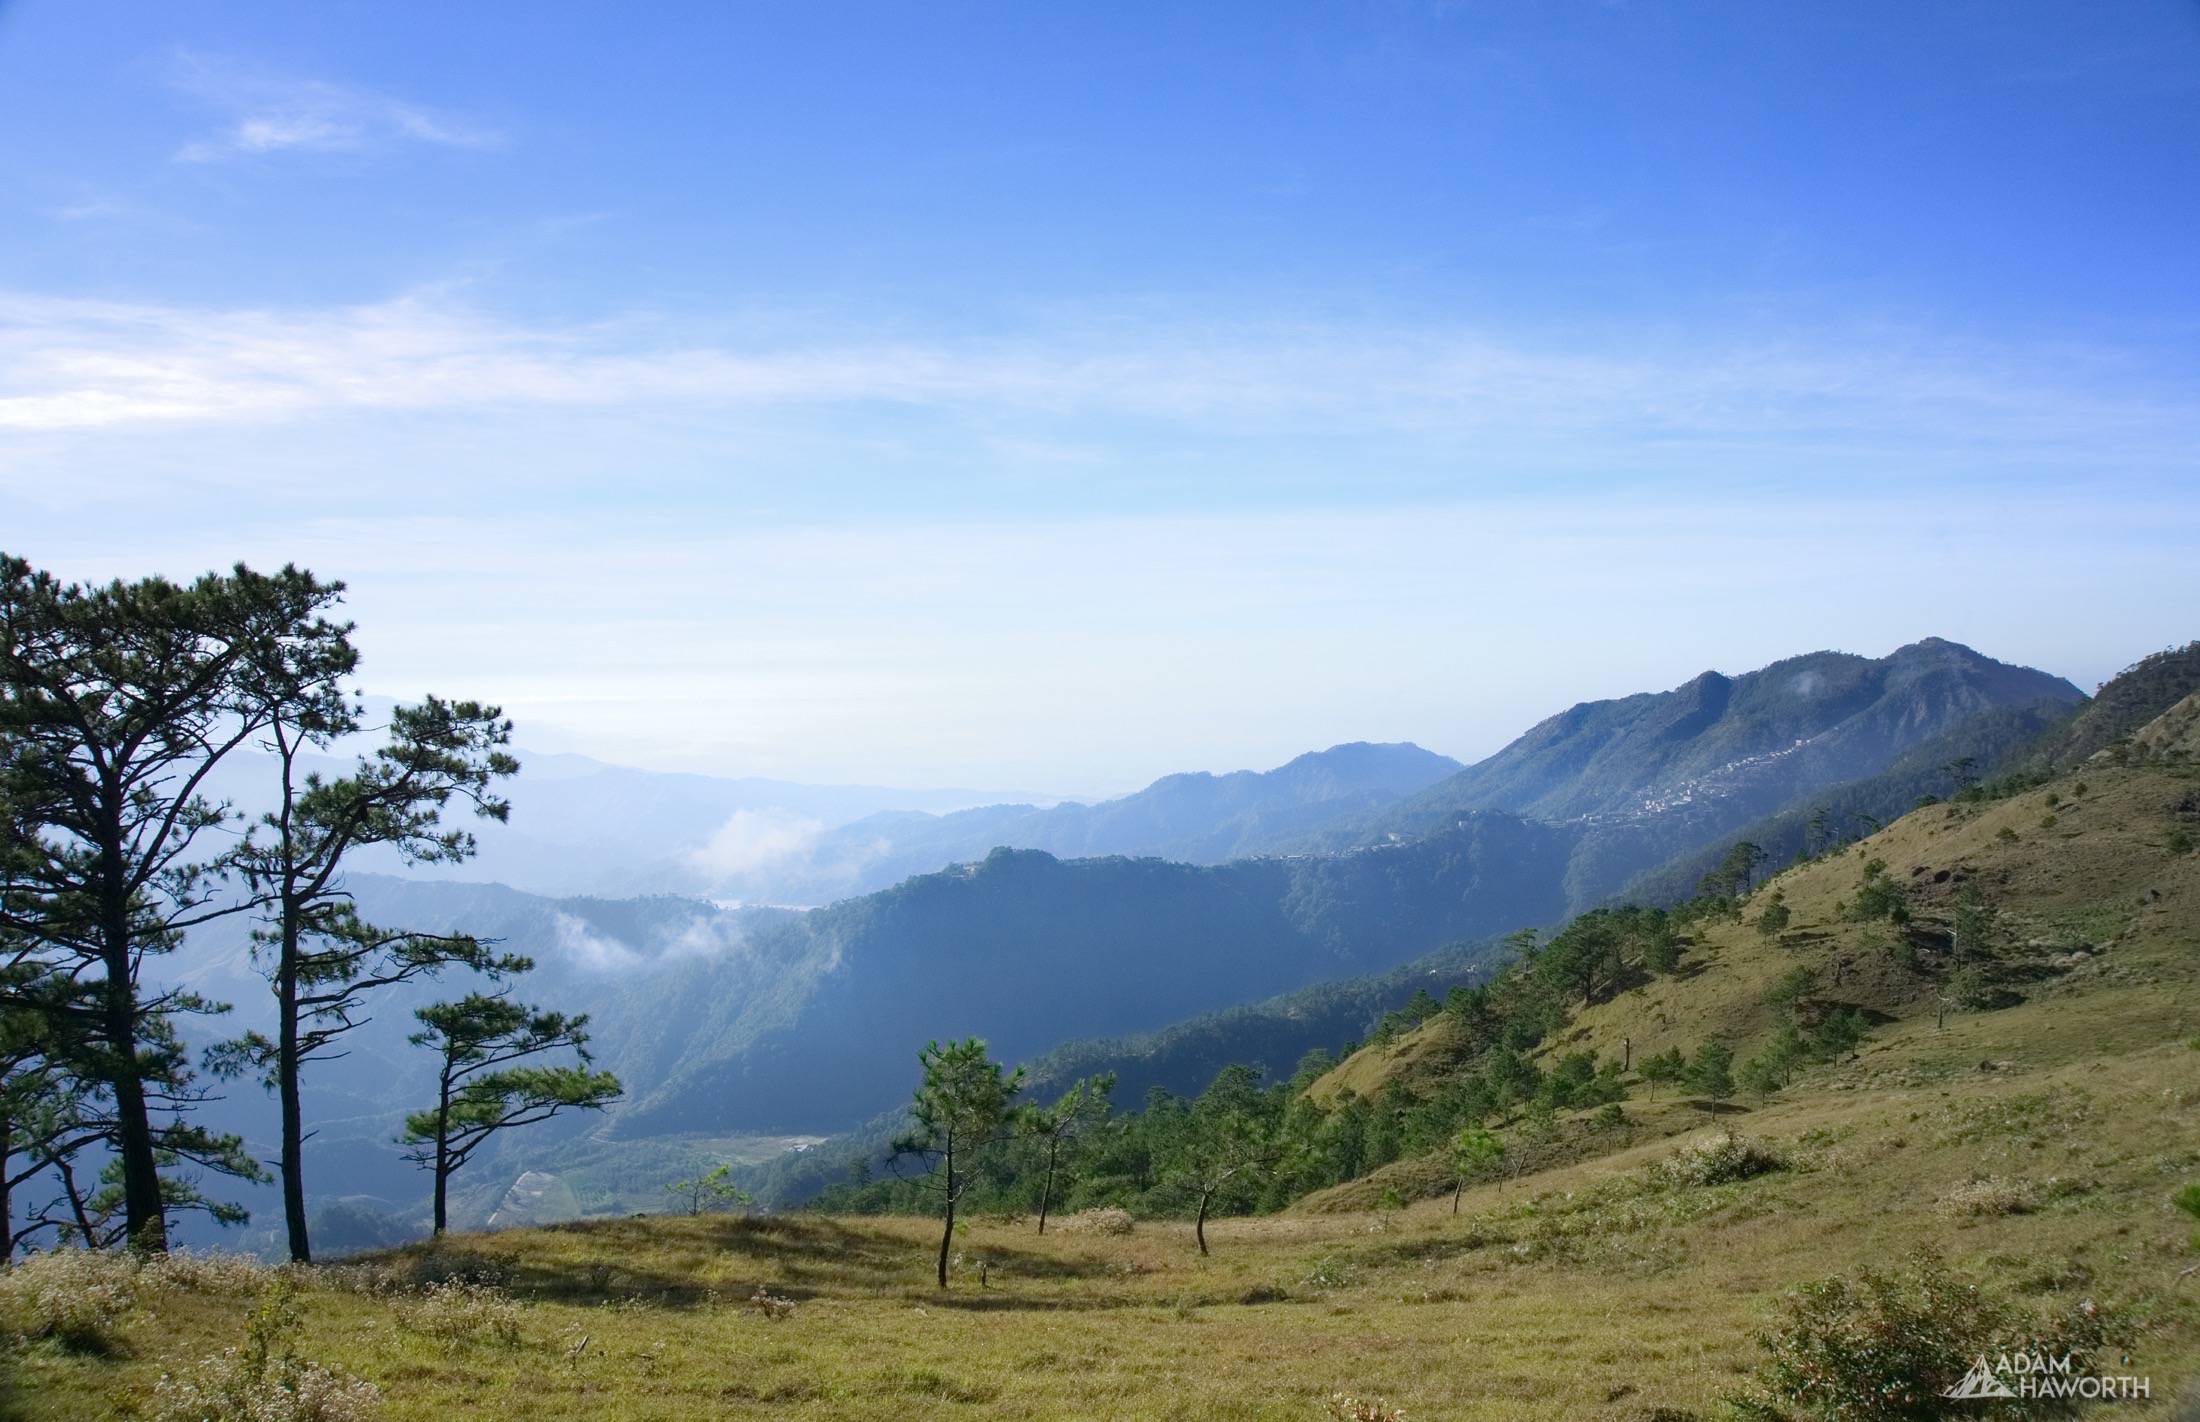
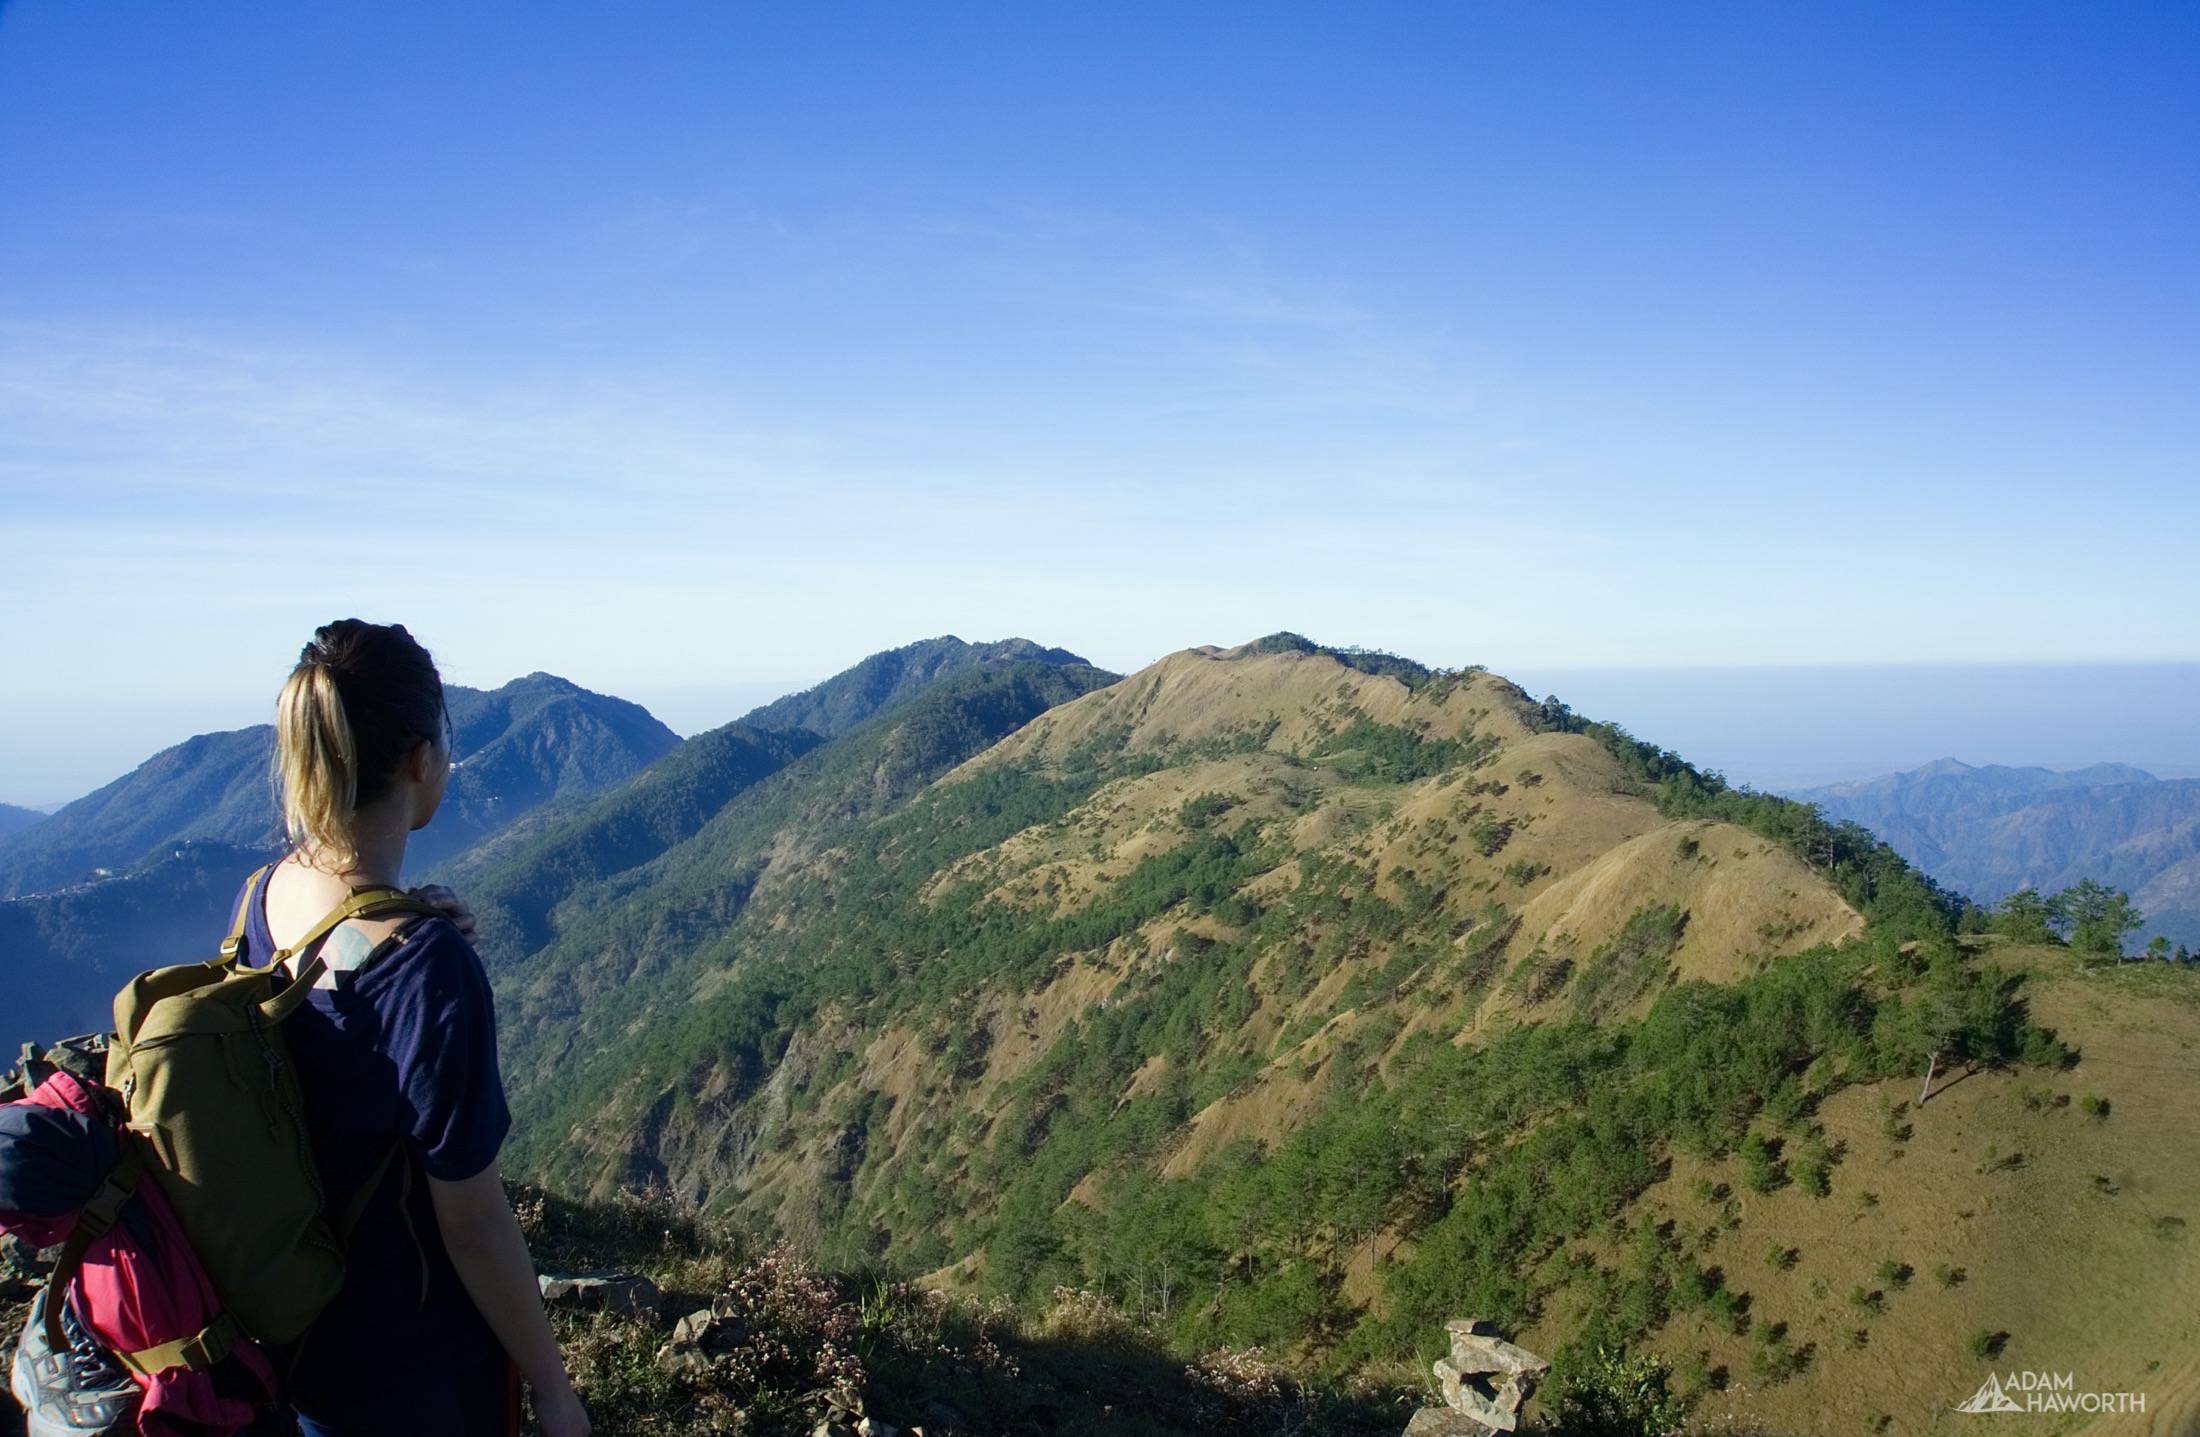
The hike is pretty straightforward, no matter how early you arrive, there always seems to be a group already on their way up, I guess that hiking has become as popular in the Philippines as it is in the UK! You can make the entire hike without seeing many other people as most groups end up at a different pace throughout the route there are a few markers along the route to Mt Ulap which include a few other peaks that you can stop at for a rest and some food.
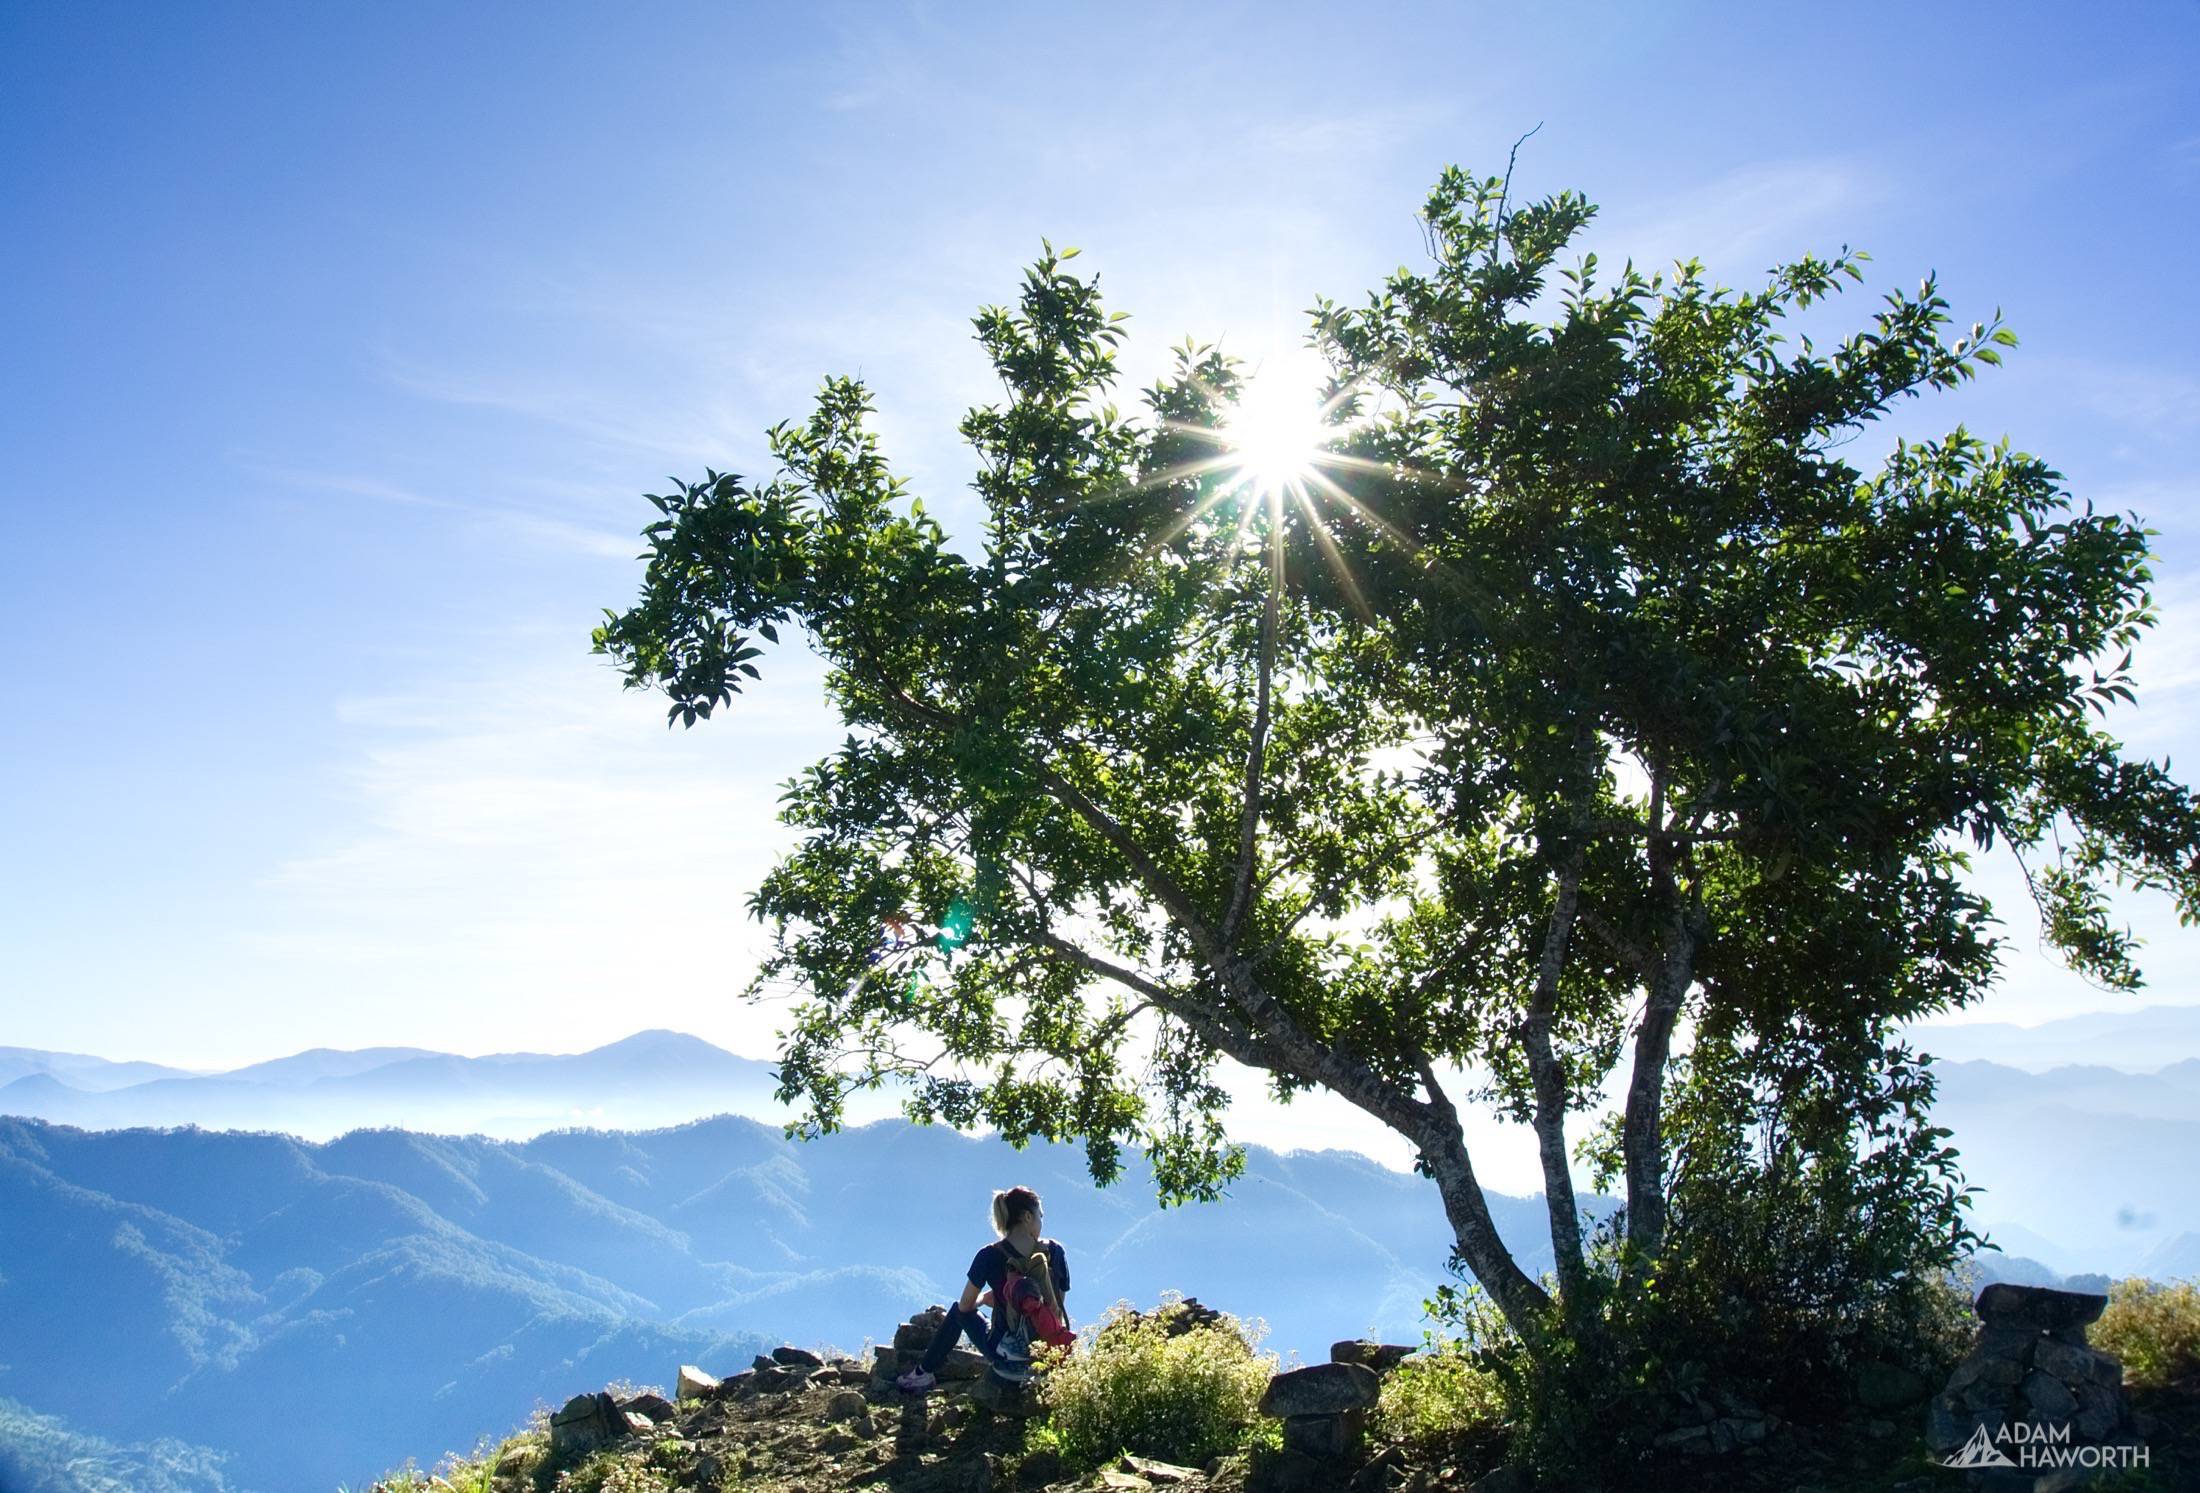
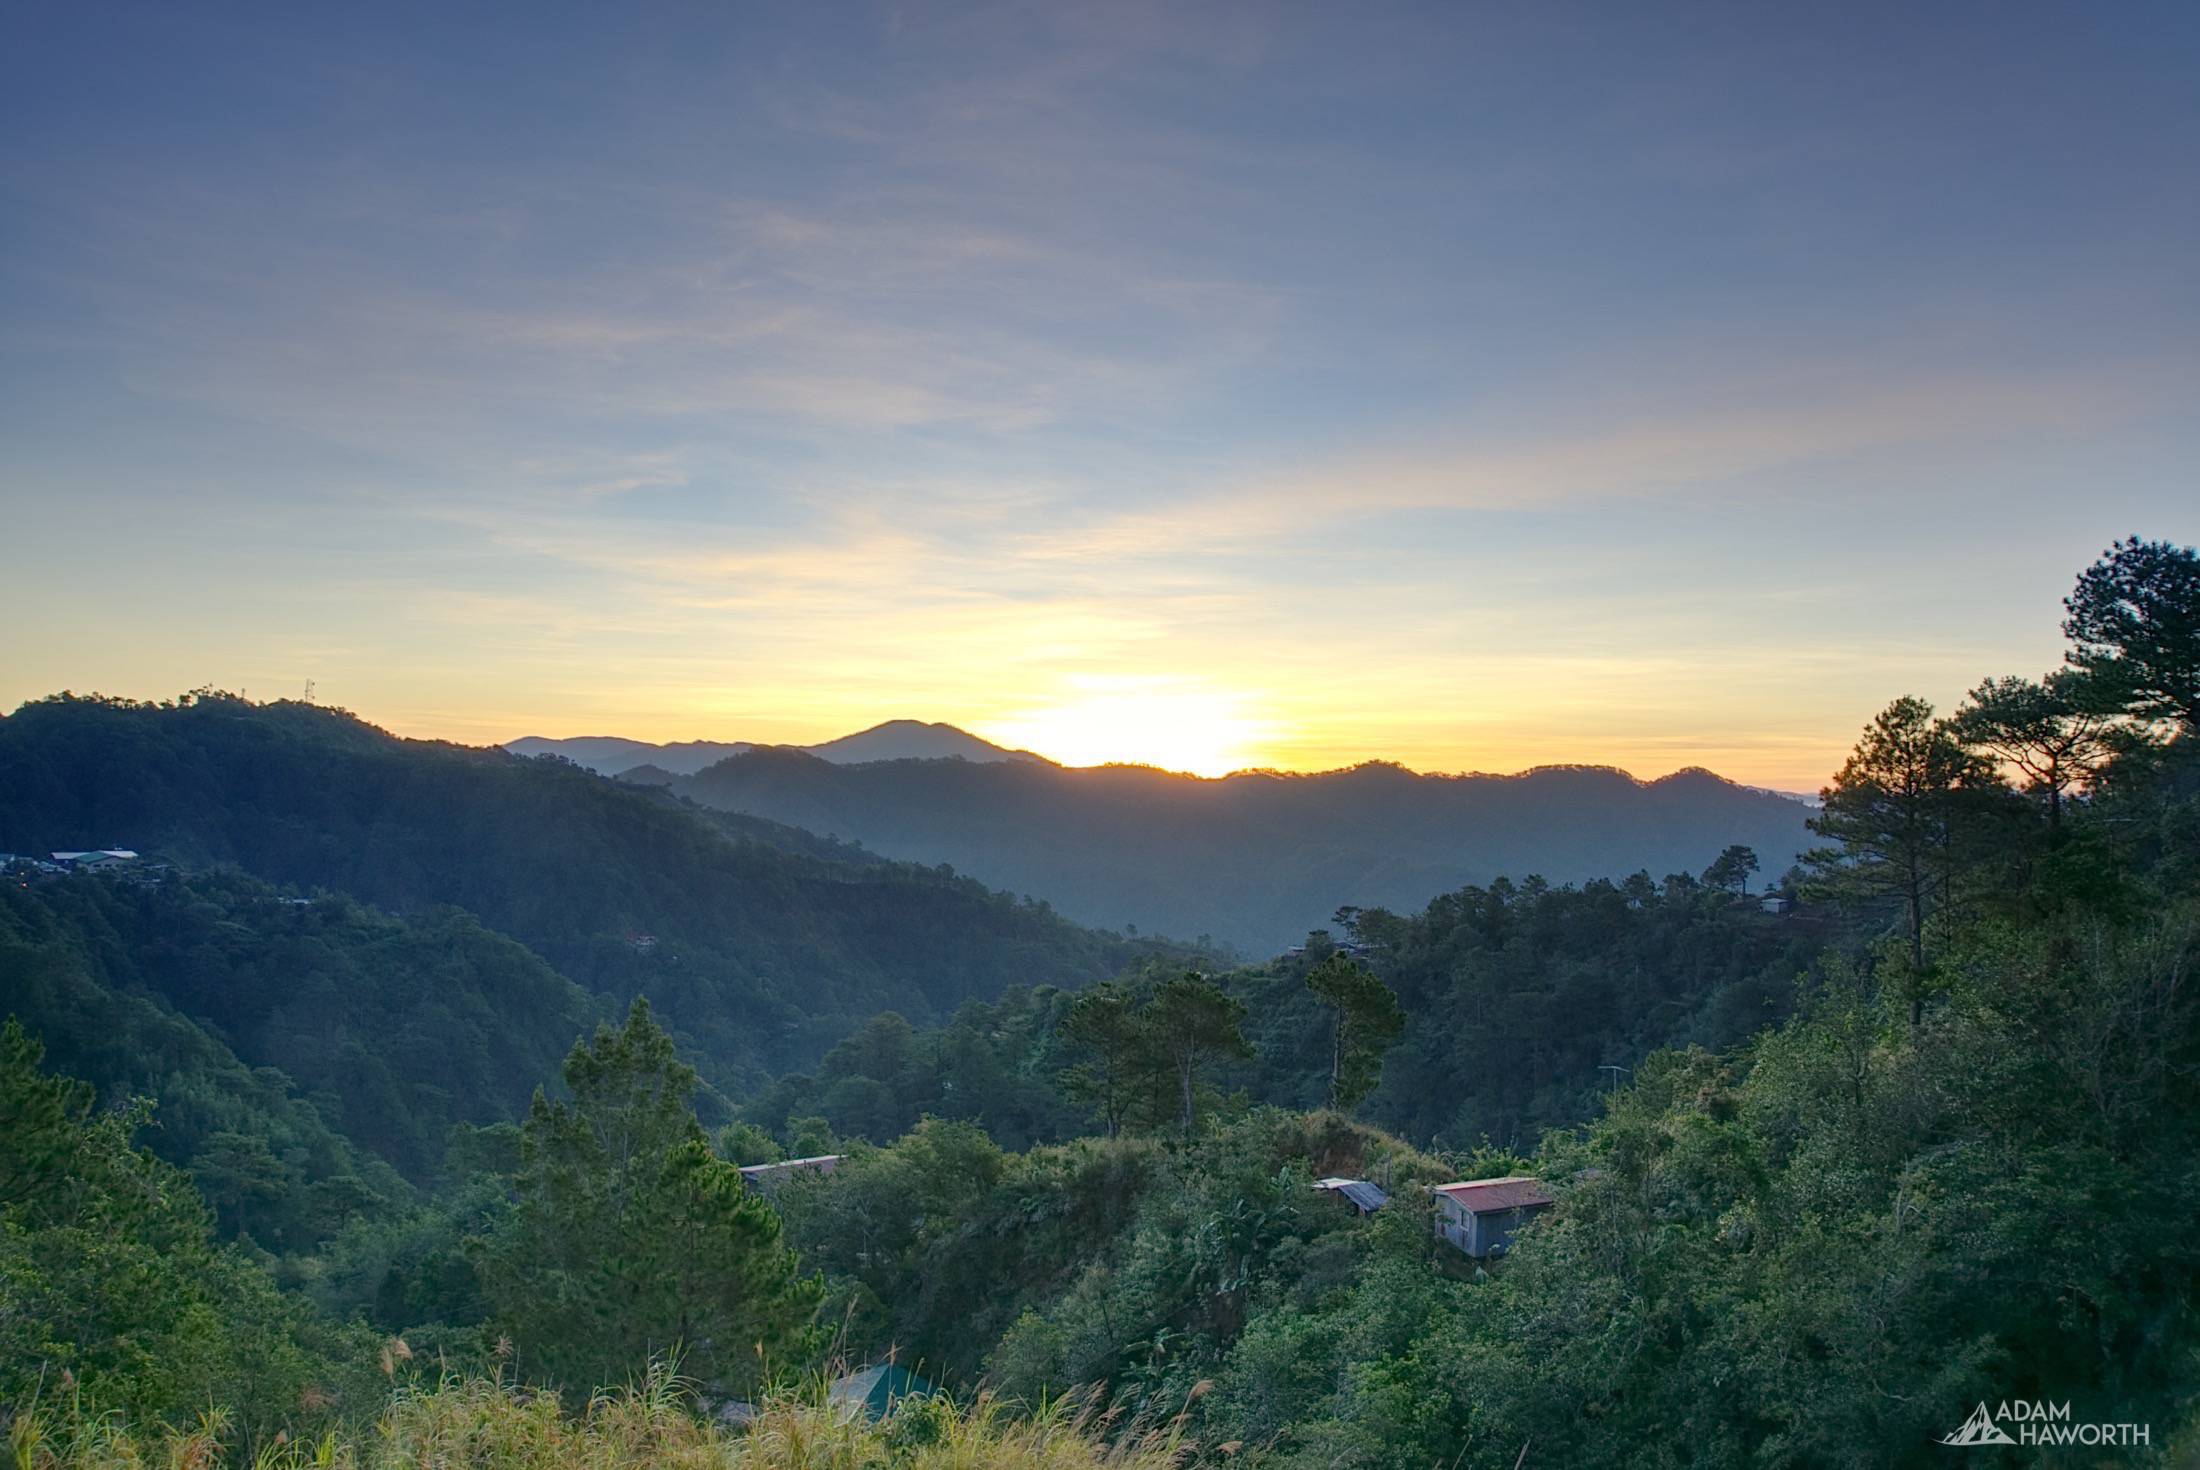
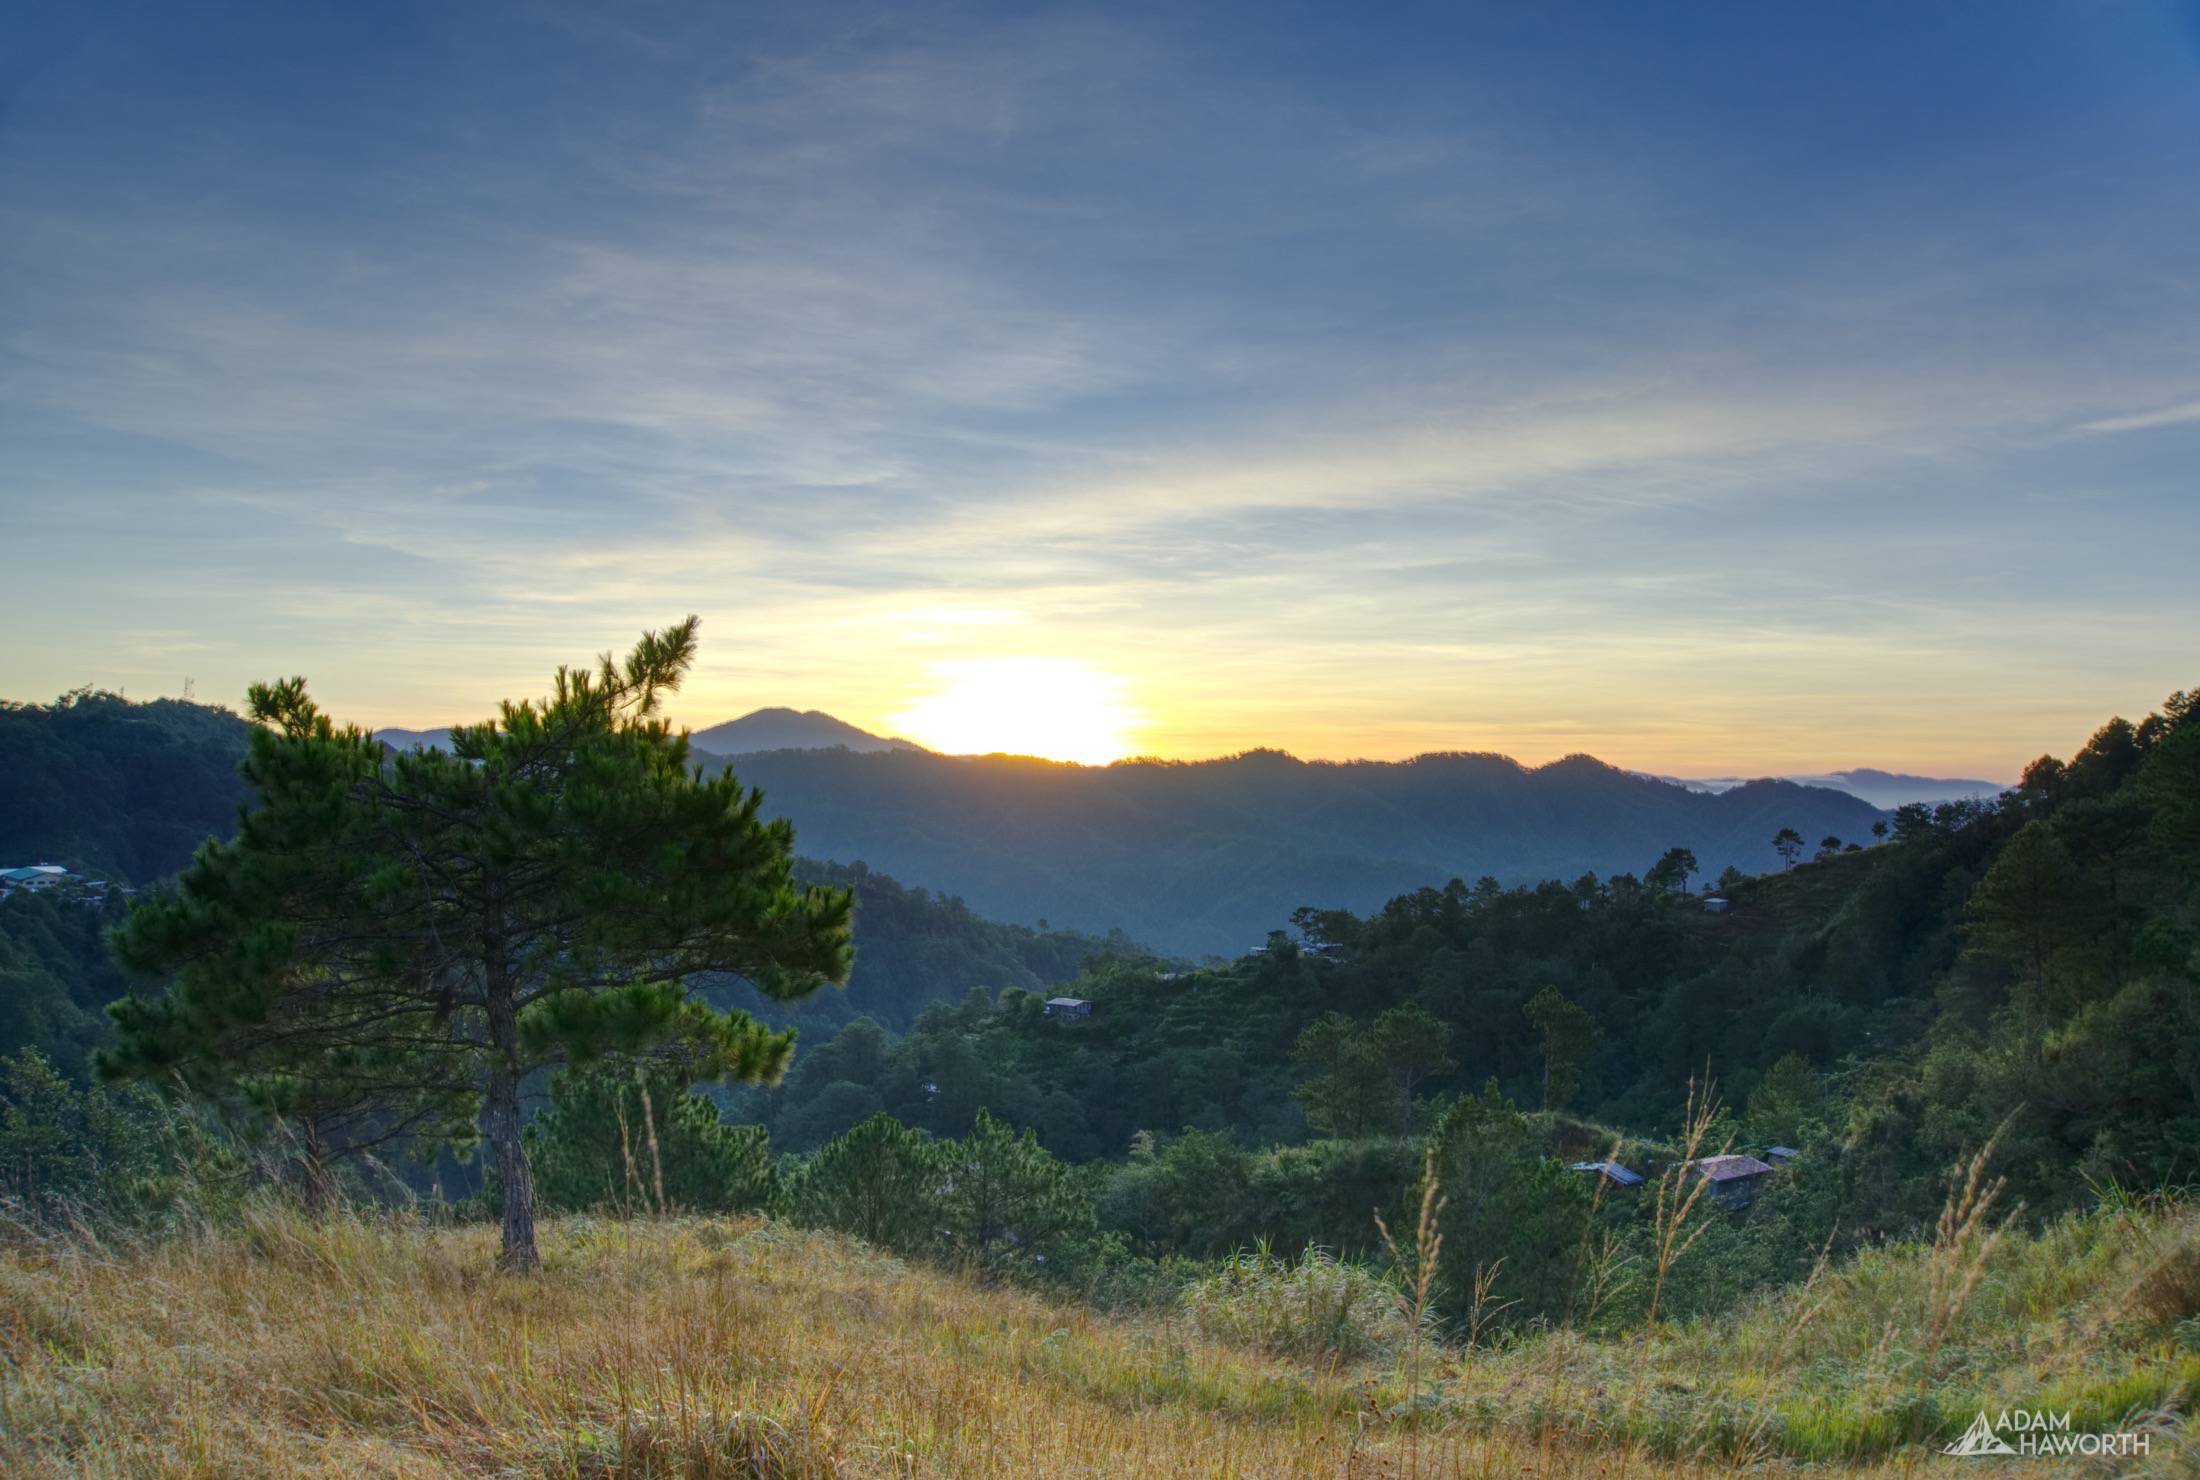
The best time to visit is before sunrise so you can catch the sunrise from a high advantage point, and continue the rest of the hike in relatively cool temperatures. The heat isn't much of an issue as you are going to be at least 1300 meters above sea level along the entire route and even high for most of it, that said the shade is limited along most of the ridges so the sun is pretty intense on a clear day.
Below are a selection of some of the photography from my first visit to Mt Ulap, I will add more images from my second trip soon. Please leave your comments below. For info on how to go to Mt Ulap yourself please see the bottom of the post for details of where to register and go to get started.

Mt Ulap Hike Details
MT. ULAP ECO-TRAIL
Itogon, Benguet (See map above)
Entry point: Brgy. Ampucao, Itogon
Exit point: Brgy. Sta. Fe, Itogon
LLA: 16.2904 N, 120.6312 E, 1846 MASL (Mt. Ulap)
Days required / Hours to summit: 1 day / 2-3 hours
Specs: Difficulty 3/9, Trail class 1-3,
Features: Grassland and pine ridges, scenic views of the Cordilleras, burial caves
Source: www.pinoymountaineer.com
How to Register
To reserve a place you will need to go to the following Facebook Pages and send a message, they limit the number of people going up each day so please register in advance - facebook.com/mtUlap

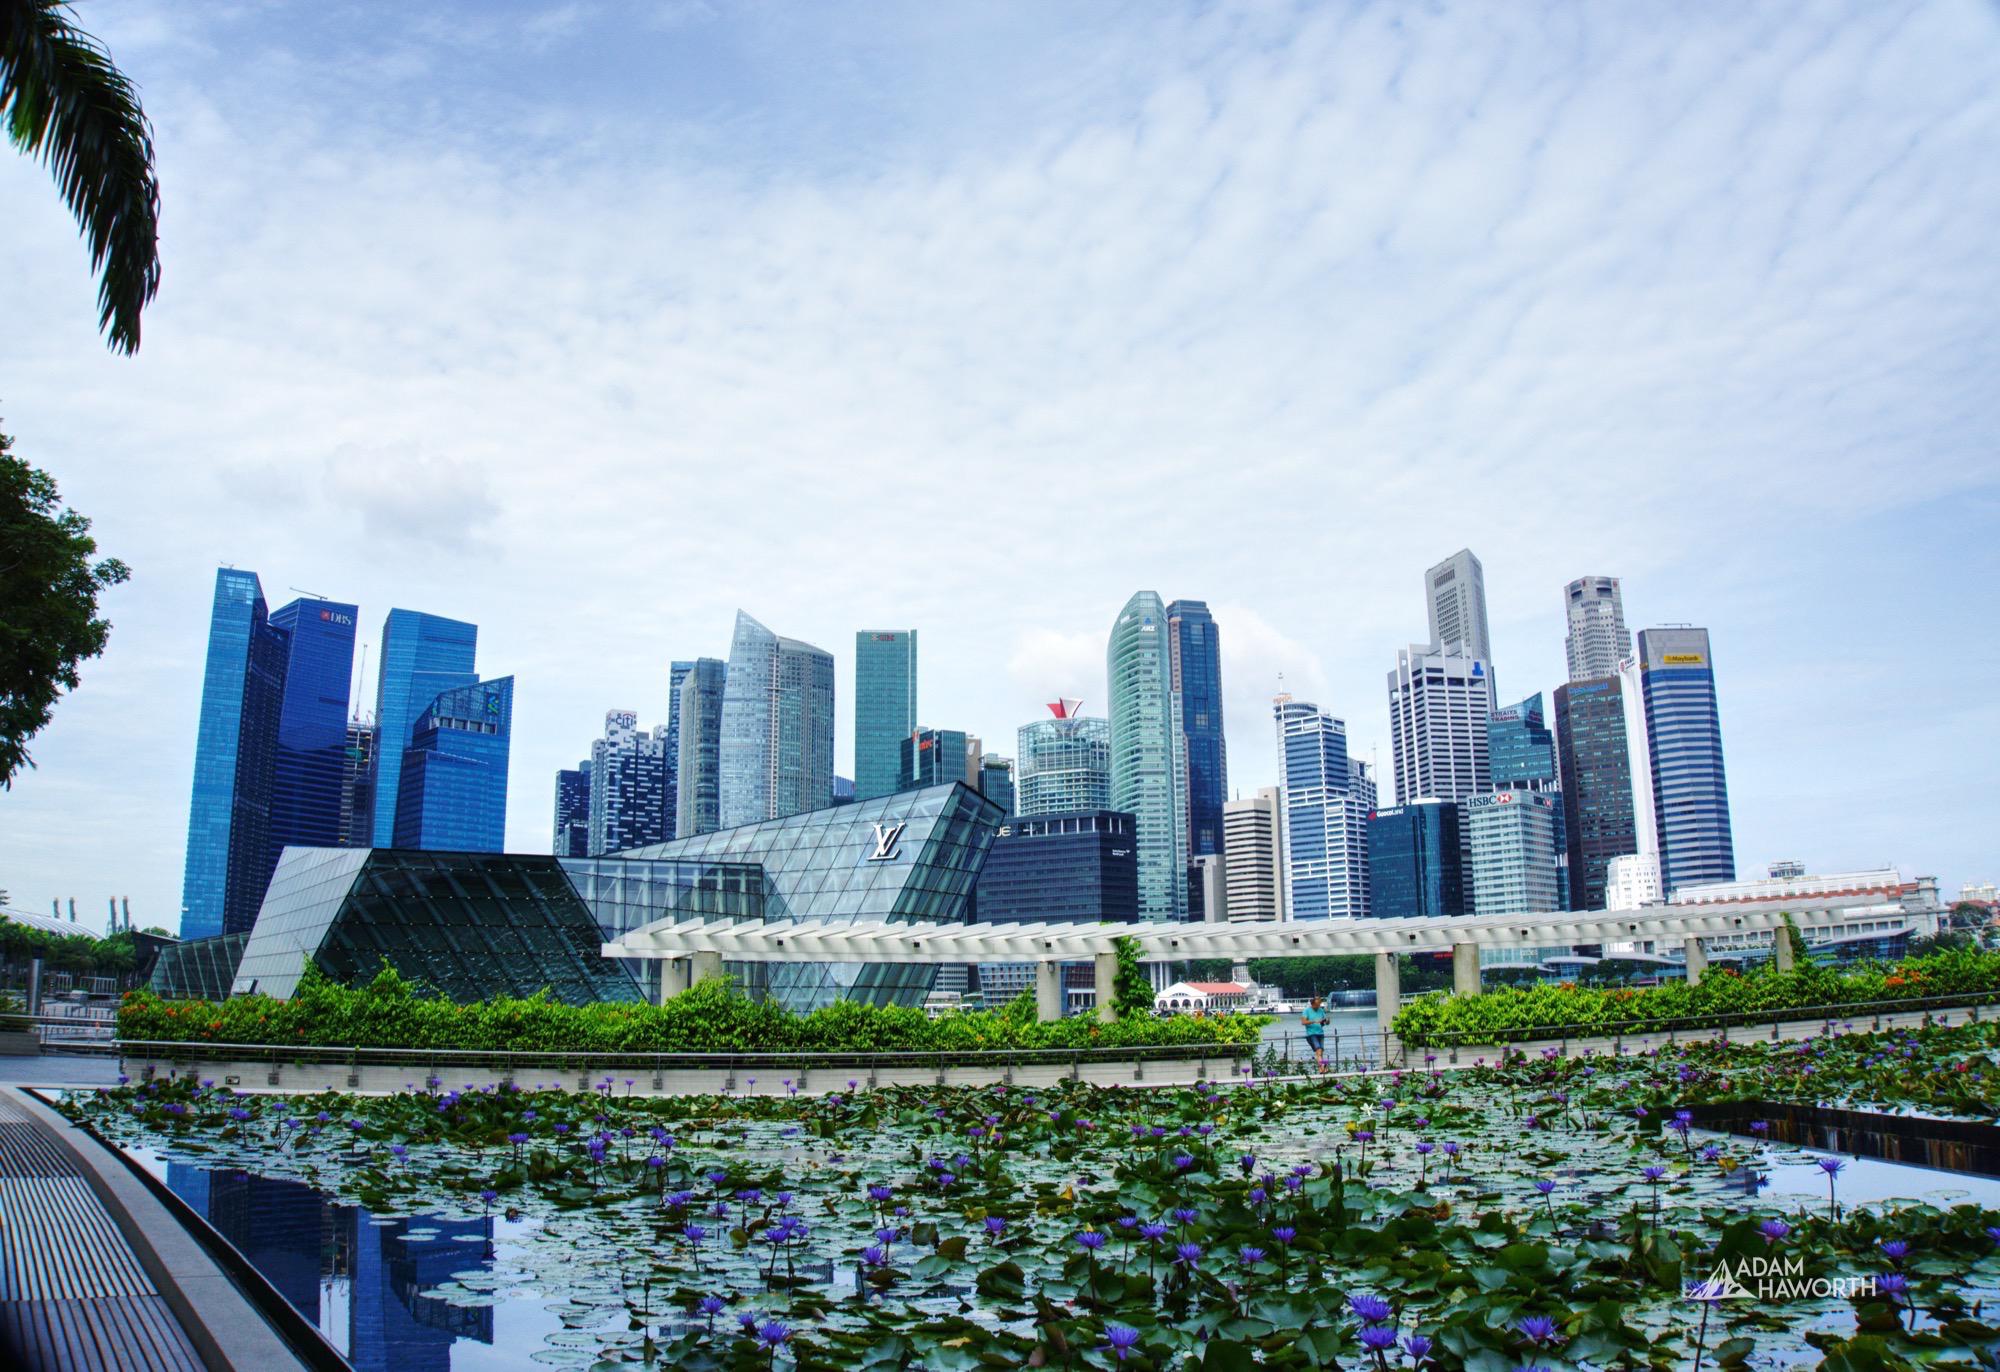
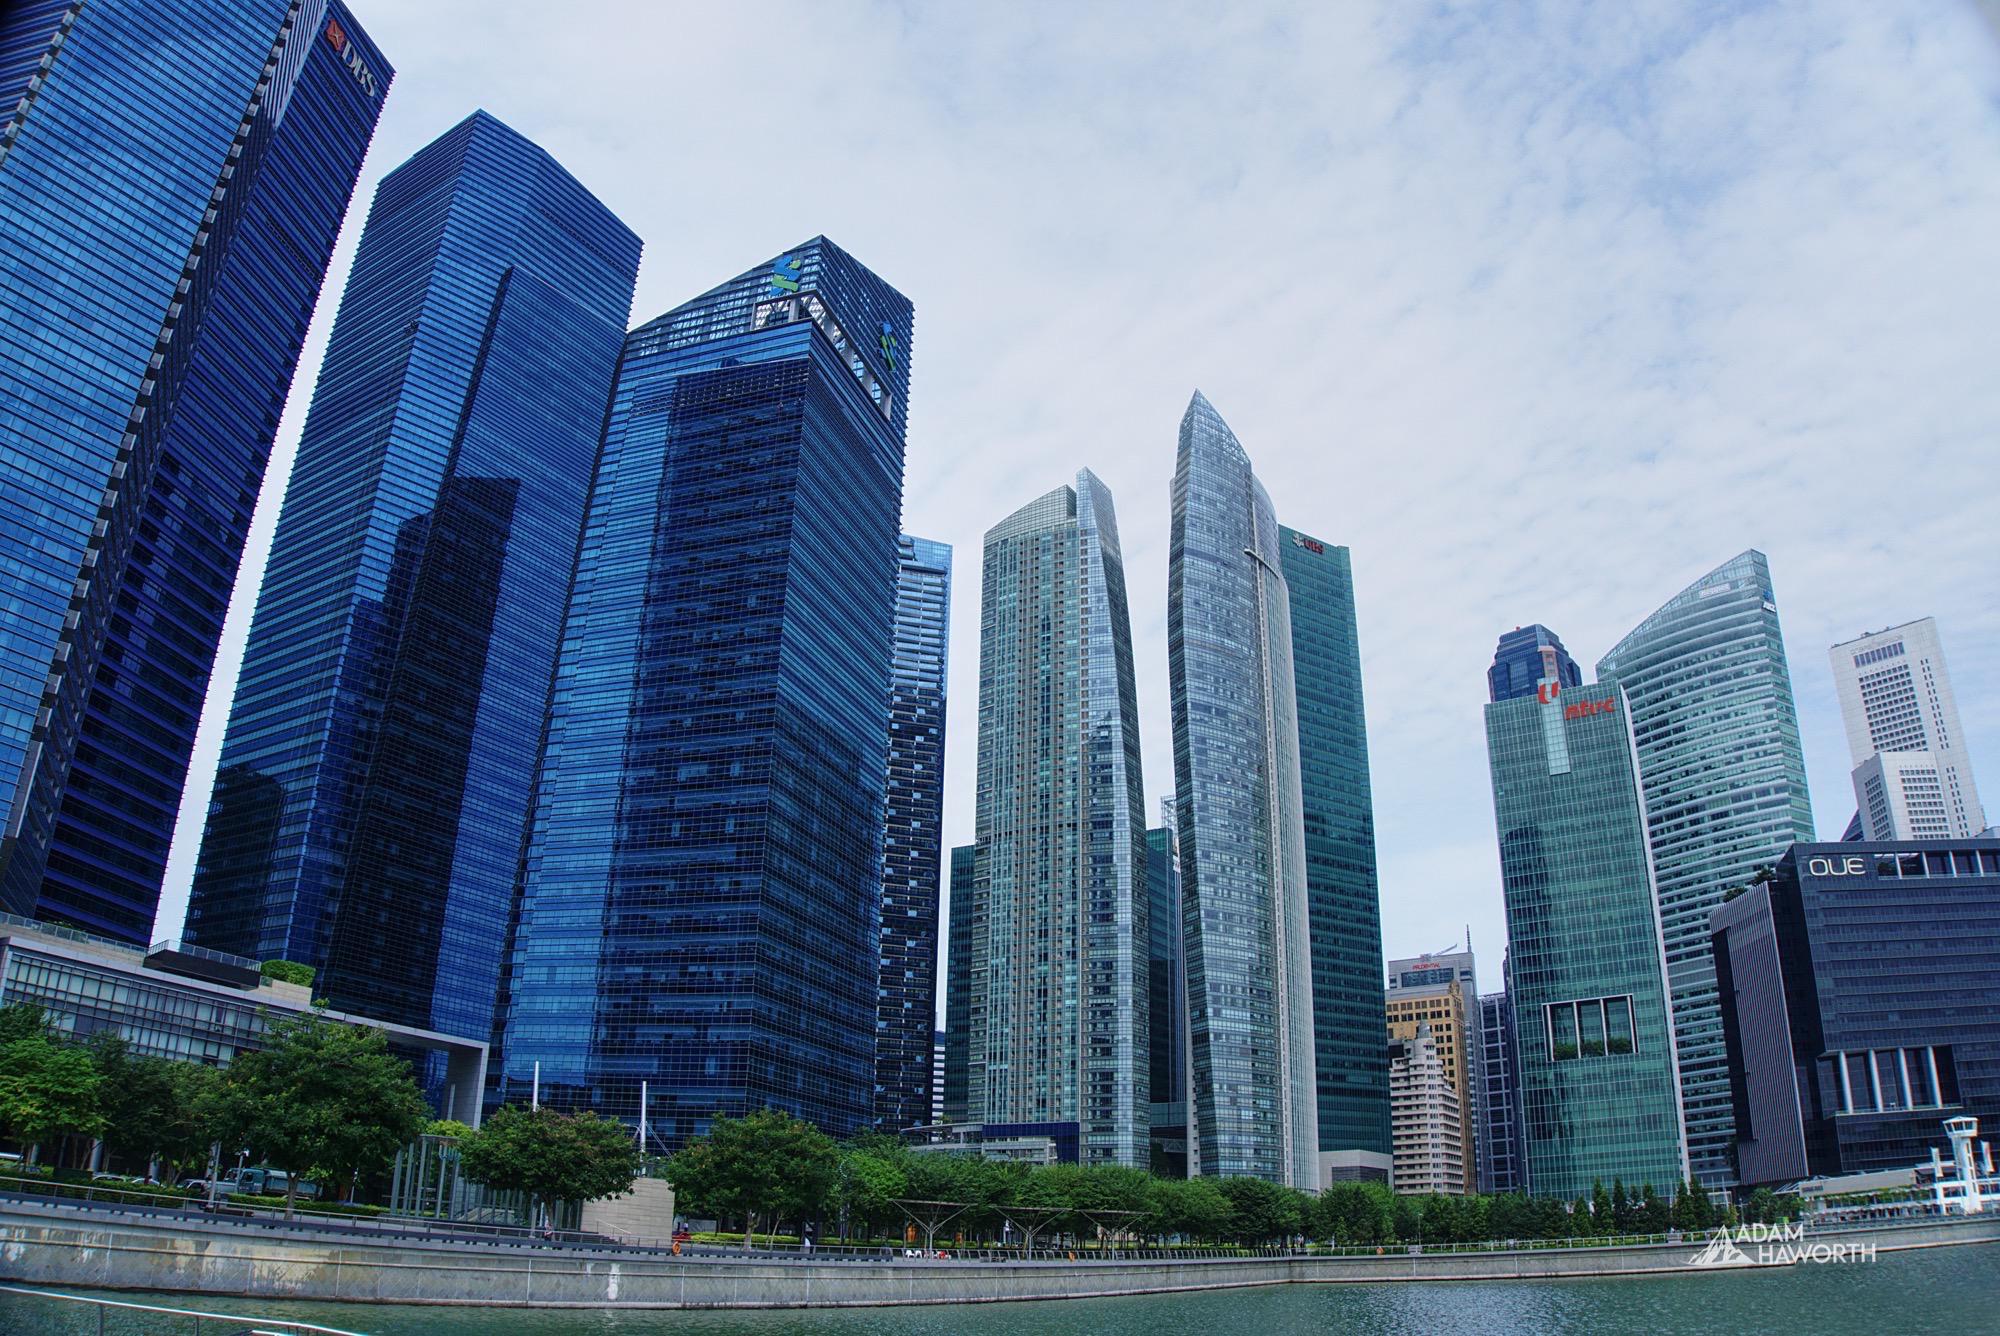
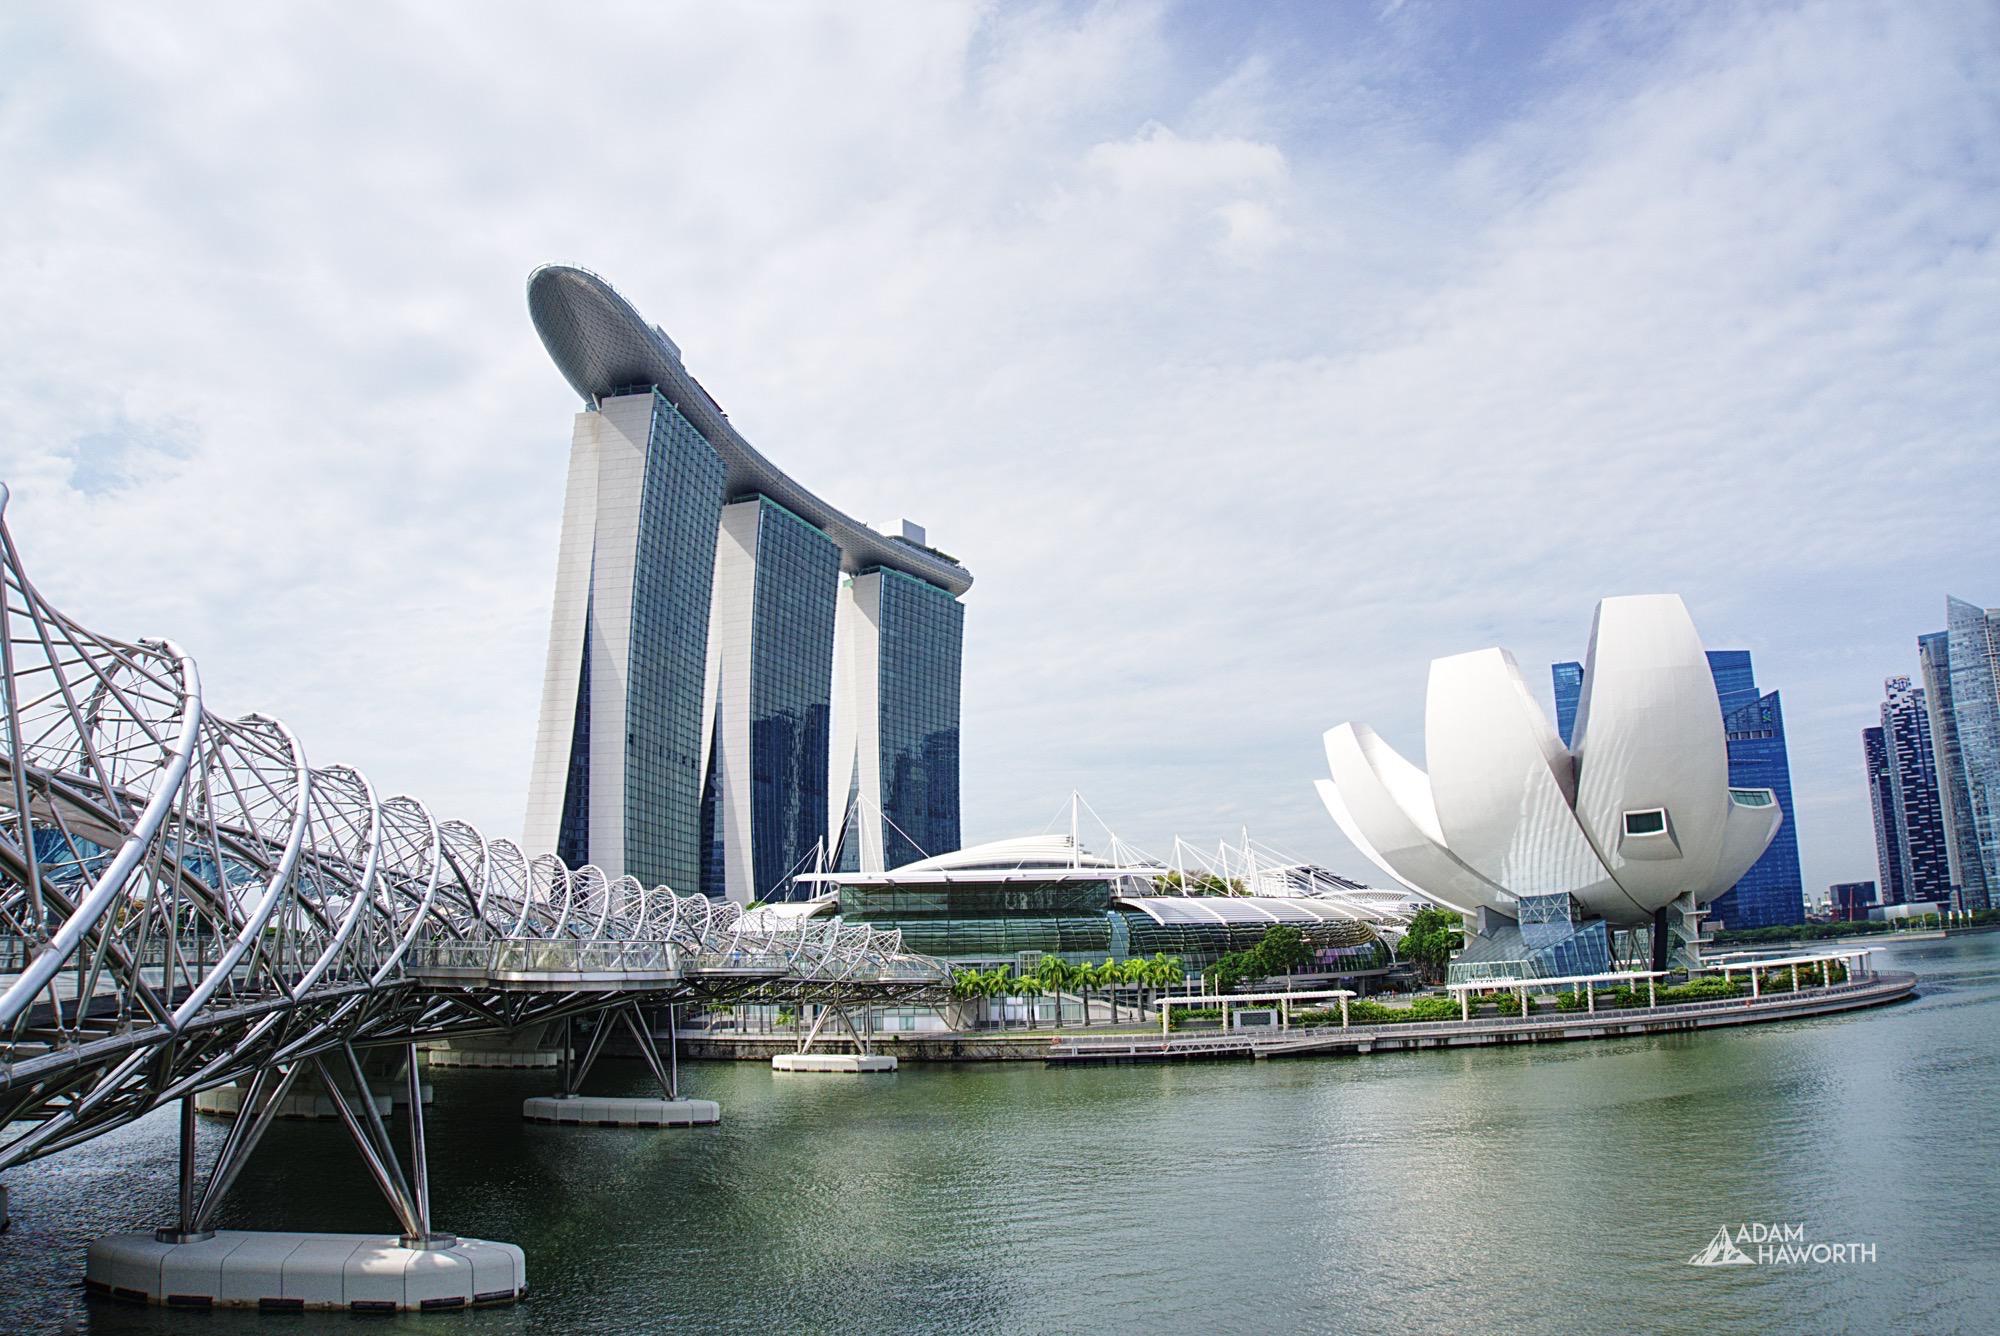
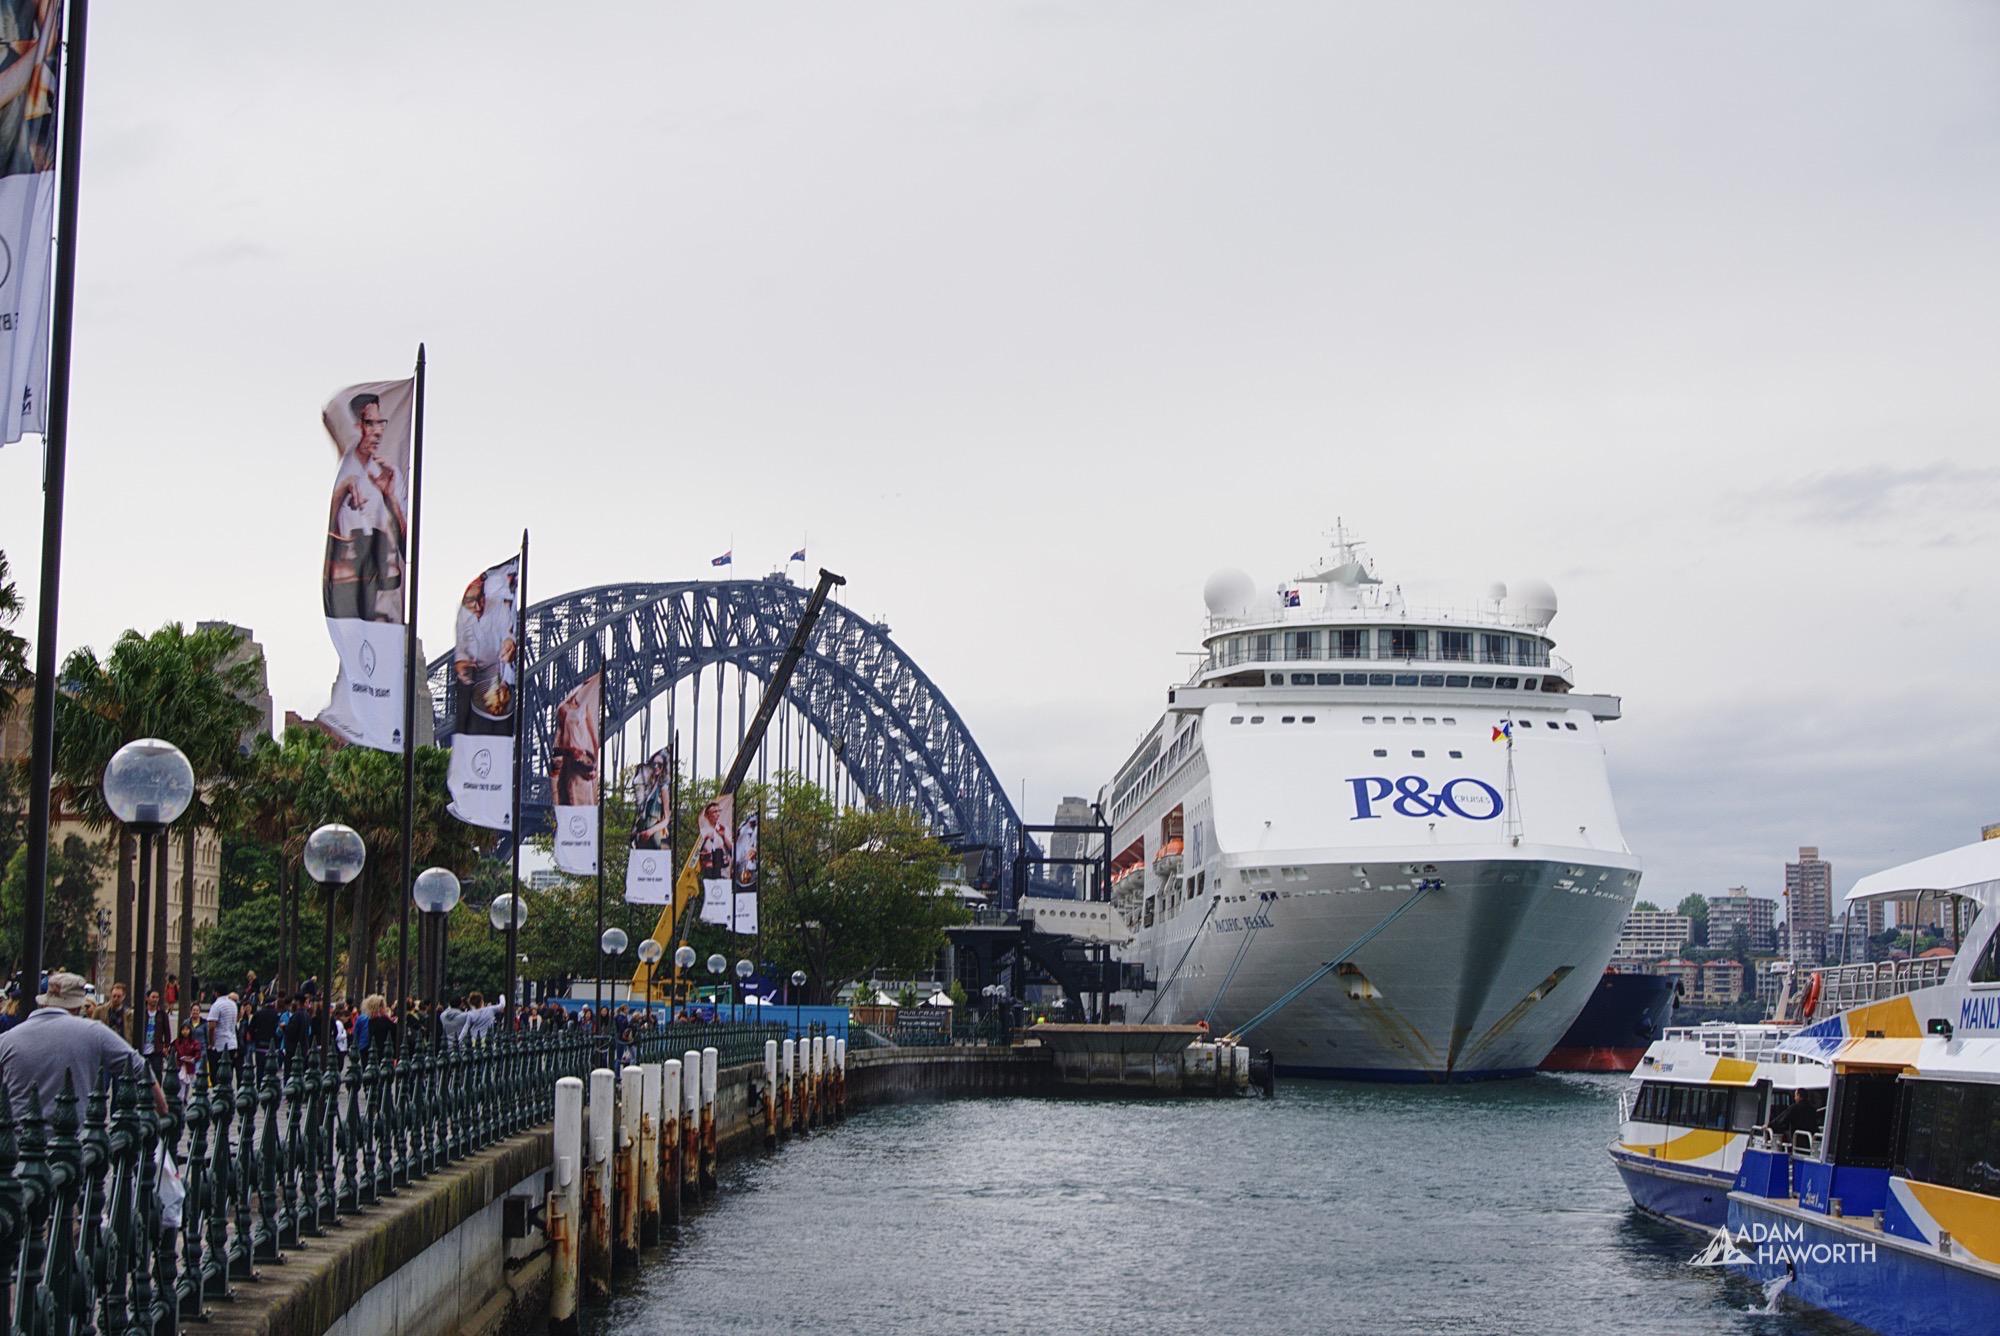
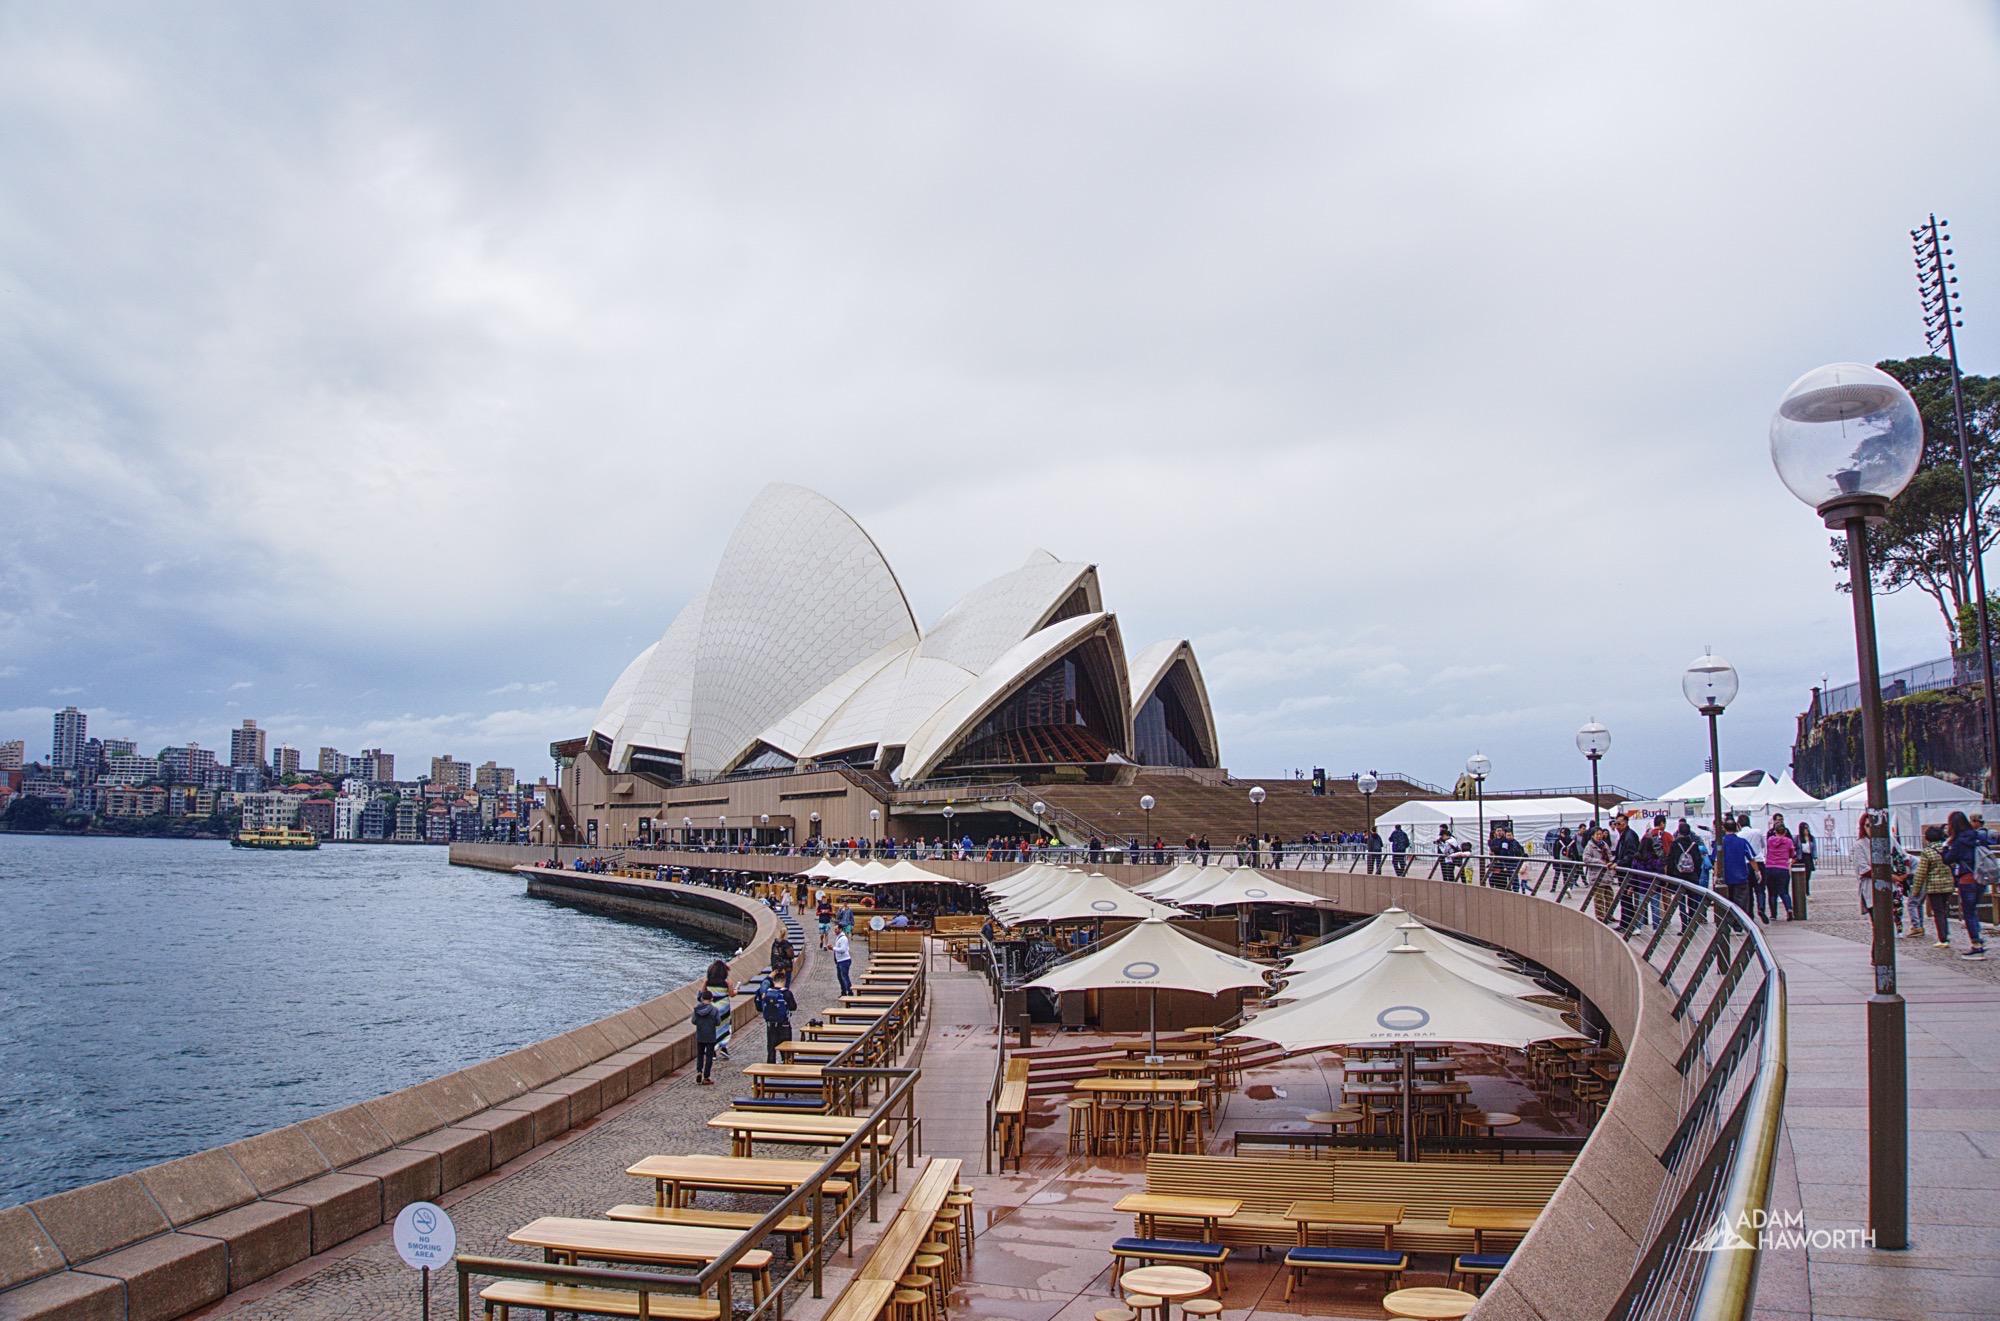
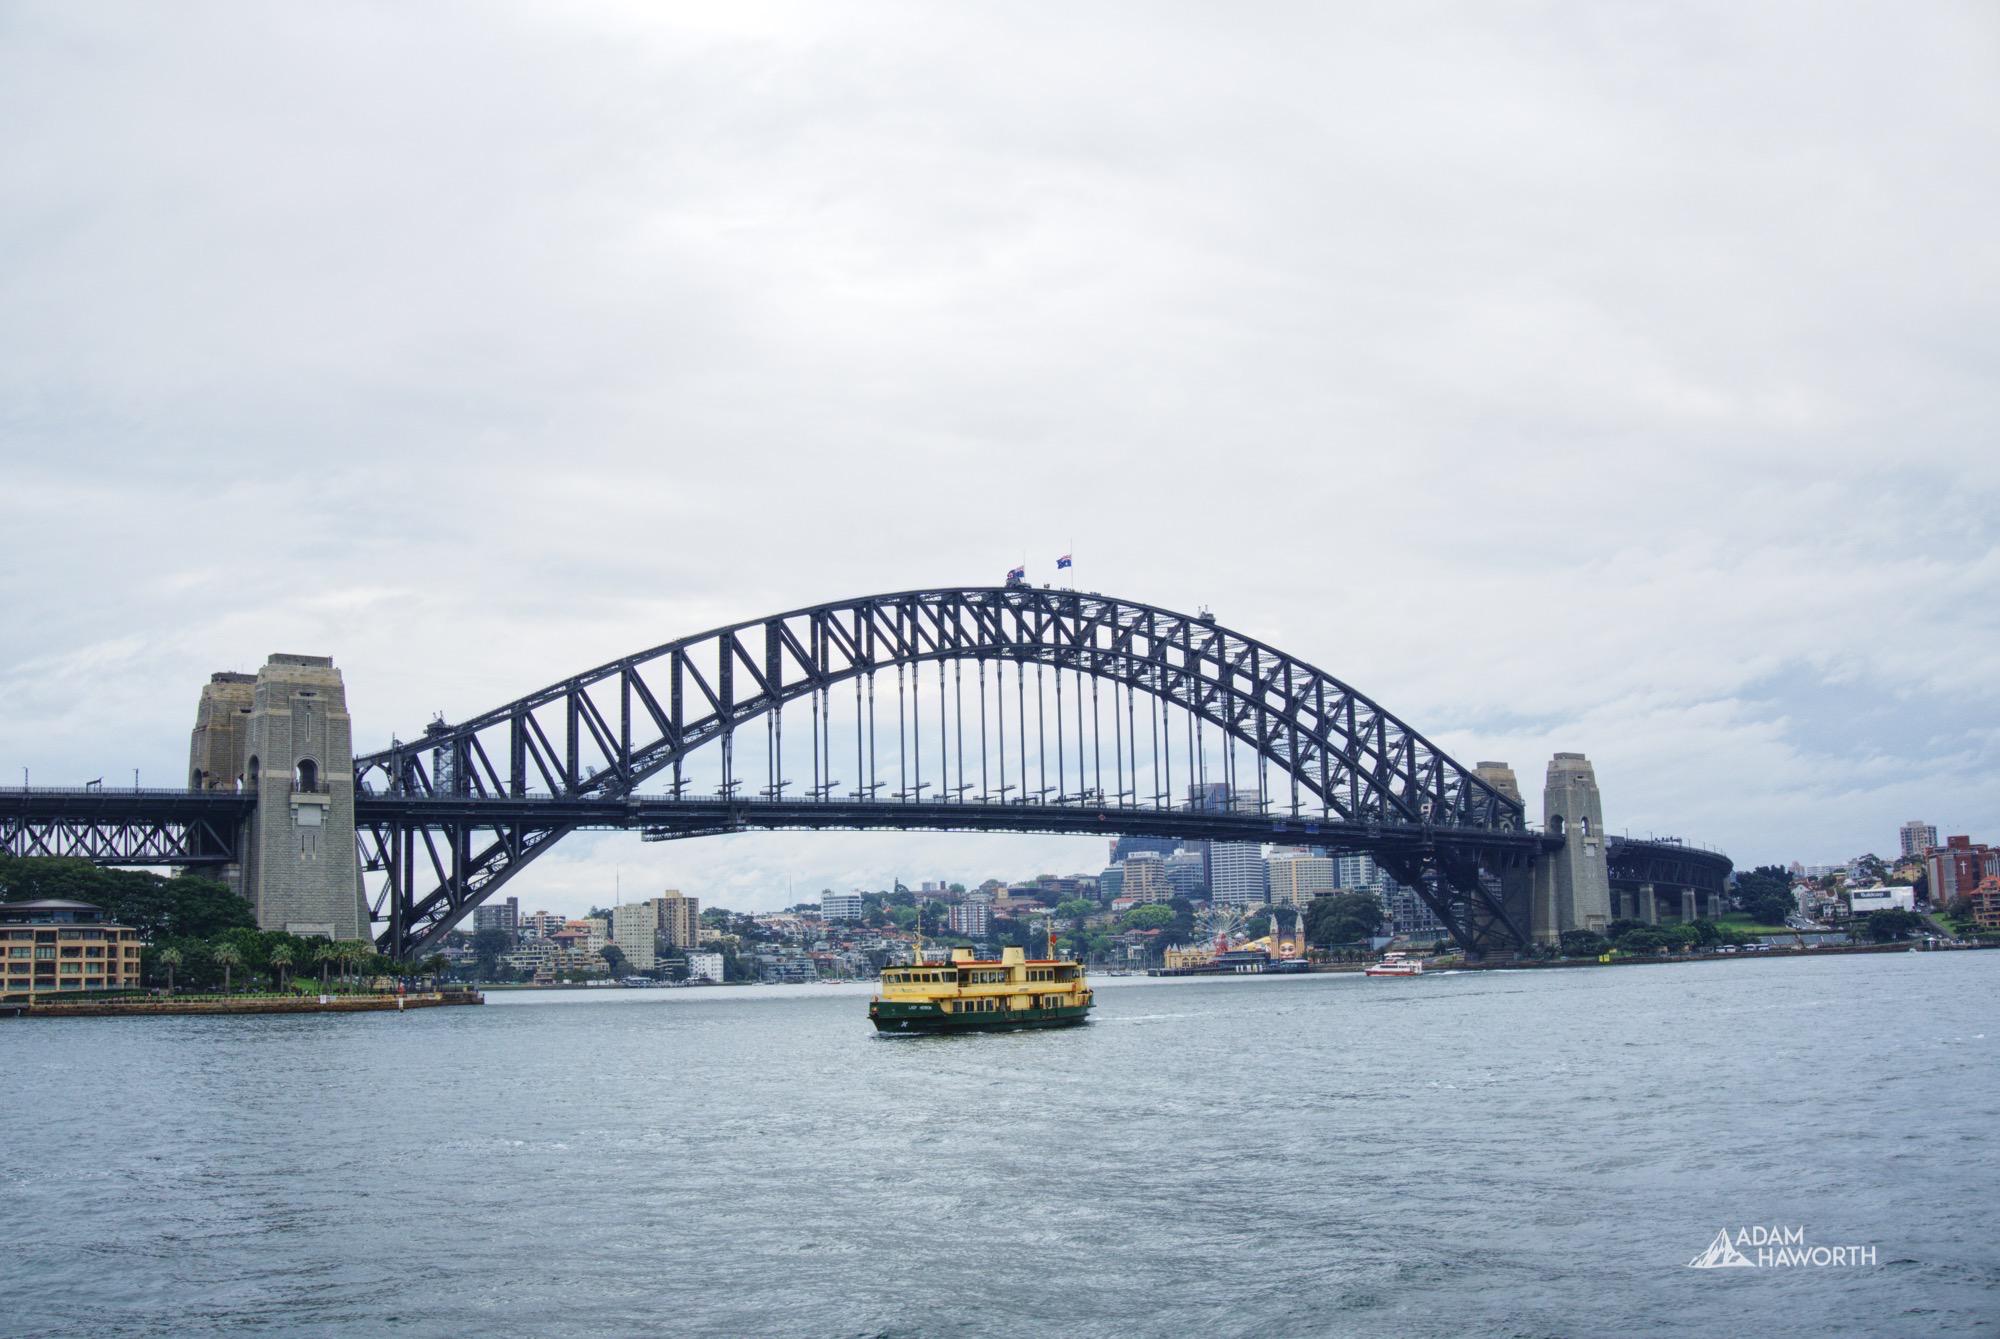
Singapore & Sydney City Photography
This is a bit of a different post from the usual landscape photography that I publish. In September I took a trip to Singapore and Sydney. I wanted to get out with the camera as much as I could while there. I have to admit I didn't get as much chance as I'd hoped but below are a few of the images I managed to capture while in both cities.
Photography in a city is a new experience for me, being so used to the rural landscapes and waiting for sunsets and sunrises. The fast pace in the city was completely new.
I also struggled to find much inspiration, sounds crazy in such inspiring places but I tend to look for lighting and landscapes so looking at buildings for shots was just so new.
Anyway, please leave any thoughts in the comments below.
Landscapes from Waun Fach, Brecon Beacons
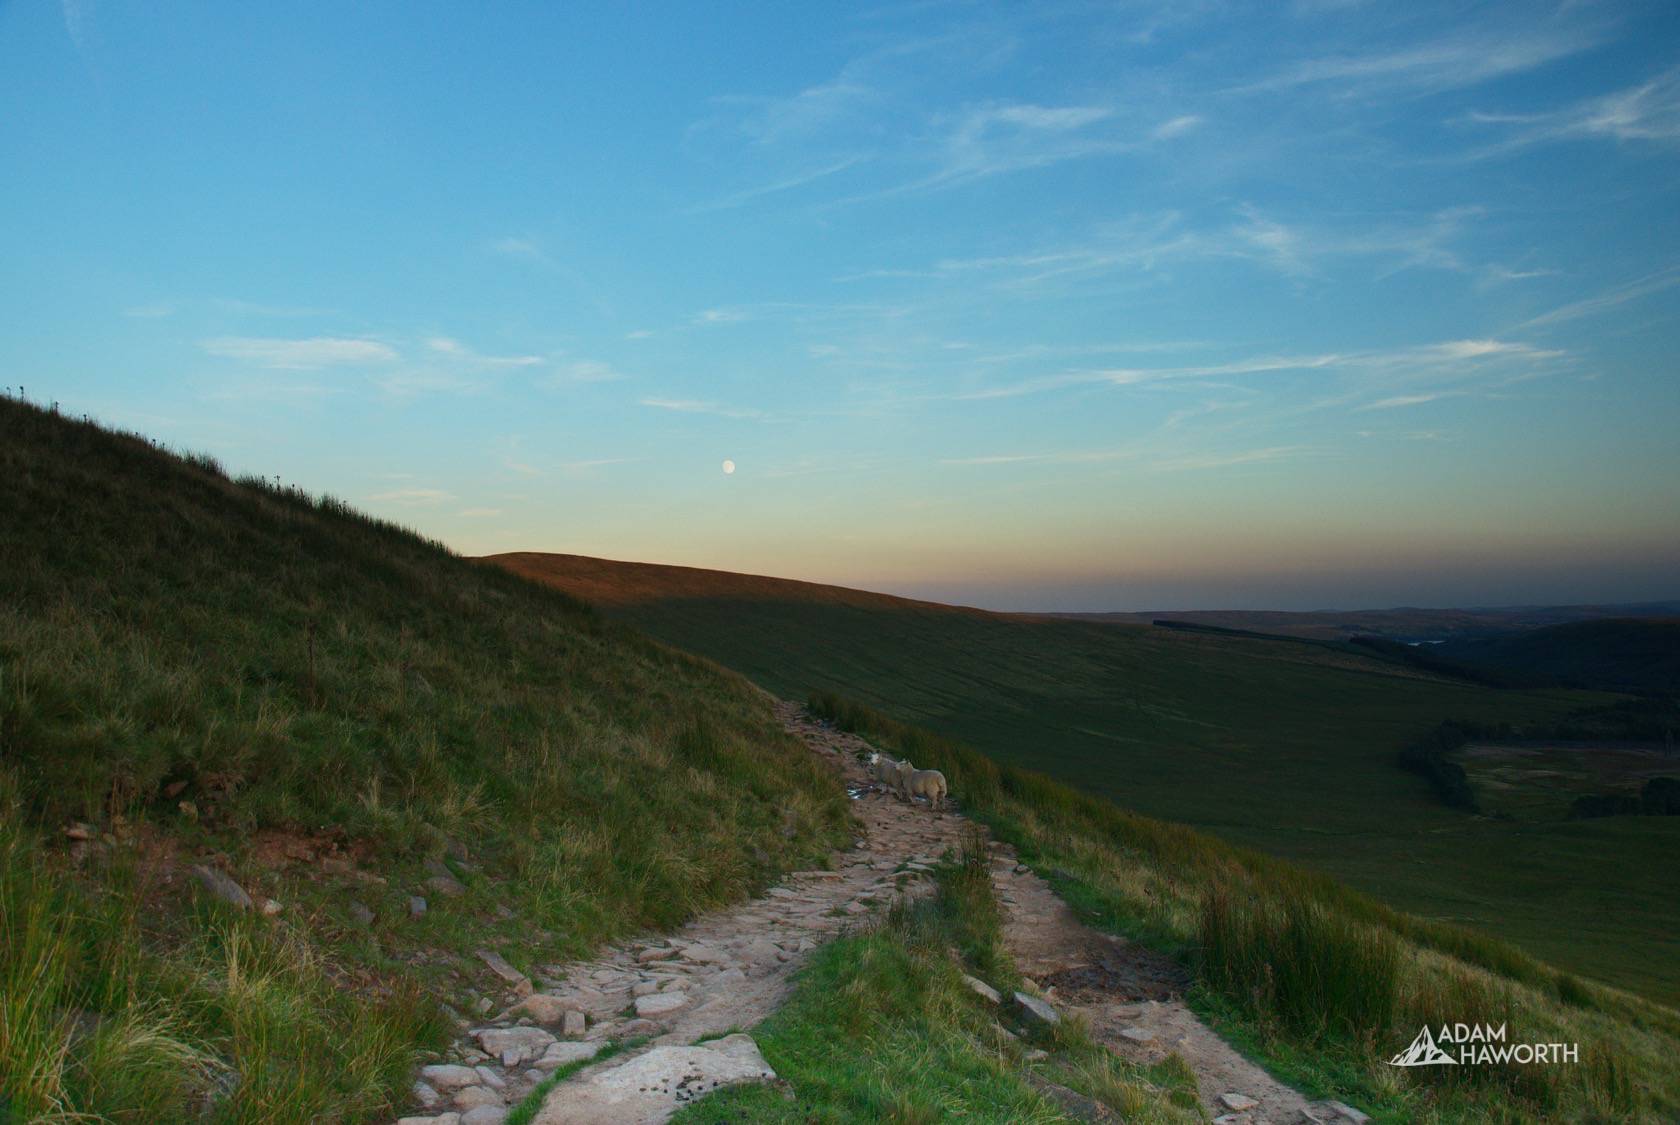
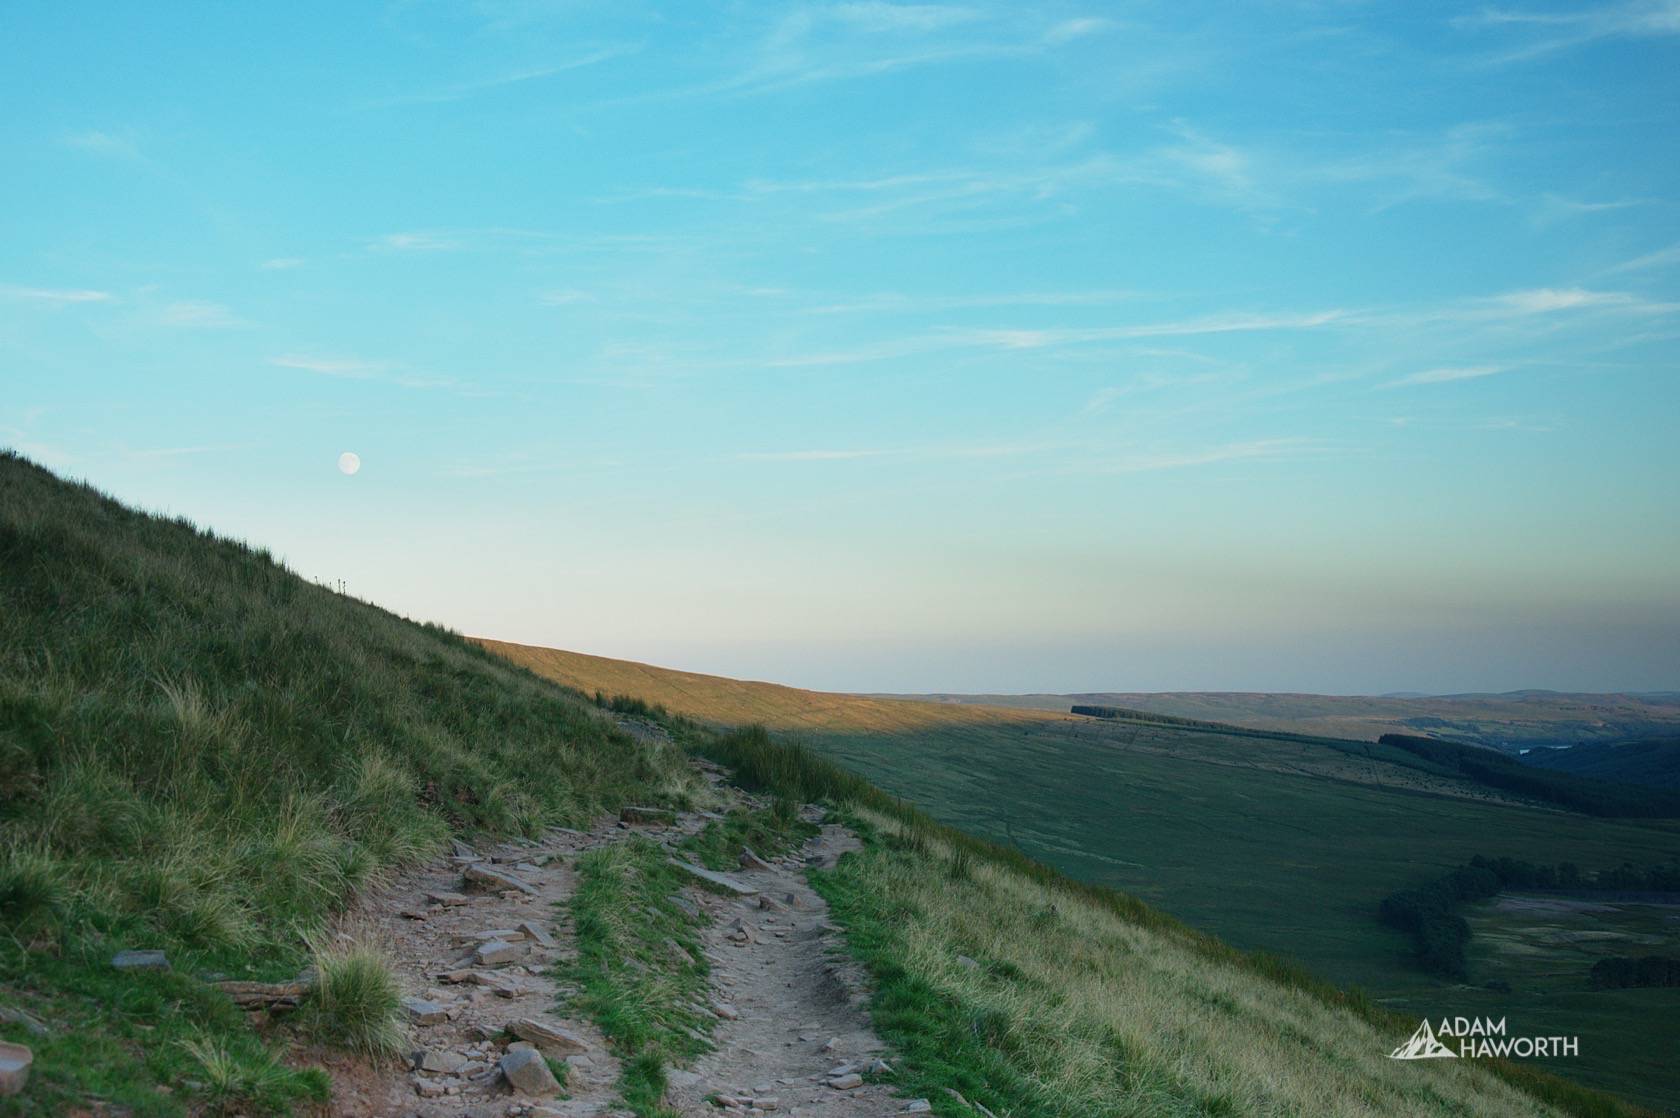
Waun Fach is one of the highest peaks in the Brecon Beacons and is the highest peak East of Pen y Fan. Located just South of Talgarth Waun Fach is easily accessible and on a clear day the views are spectacular, or as I found out even on a misty day they can be equally as spectacular.
I Set off on a Wednesday afternoon to try and find some locations on East side of the Brecon Beacons, I was hoping to get a good sunset shot across the National Park with the dominating peaks of Pen y Fan and Corn Du as the central point.
I arrived at Pengenffordd around 4pm and set off up the hills, I've never actually been up Waun Fach before and never expected to come back with any pictures on that day. I wanted to just see what was there. I slowly made my way up the first ridge and every time I turned around the light was spectacular. I never thought the mist and bright light would make for any images but a few interesting shots presented themselves.
From Pengenffordd you can want to the summit of Waun Fach pretty easily and quickly, it's only 3 miles from where you can park up. I've mapped out the path I took to get to Waun Fach, I'll probably go back soon and do a longer walk and write an article.


Hands-on: Why I replaced Photoshop with Affinity Photo
Photoshop has been the undisputed leader when it comes to photo editing software for well over 20 years. It has come a long way in that time and cemented its self as an essential program for any photographer. Much to every amateur photographers disappointment, nothing has really presented itself as much of a competitor to Photoshop. Until now, in 2015 Serif began to change the scene with their new Affinity range of creative software including Affinity Photo.
Affinity Photo was built for the Mac from the ground up, unlike Photoshop that has legacy code in new versions. Affinity Photo is very much targeted at photographers. Whereas Photoshop has become a tool for creatives in many different fields, not just photography. So I will be looking at how I replaced Photoshop with Affinity in my photography workflow.

There are a few different reasons why I decided to switch over to Affinity Photo and ditch Photoshop for photography, here are a few of the main reasons.
- Much quicker processing
- Better RAW development
- Intuitive interface for Photography editing
- Quick and powerful removal of objects with the inpainting tool
- Cost. Affinity Photo cost just £30ish (one off), compared to the current Adobe CC subscription you can pay around £16 per month for Photoshop. Technically you are renting Photoshop with the Adobe CC subscription model
Break up your workflow with Persona Workspaces
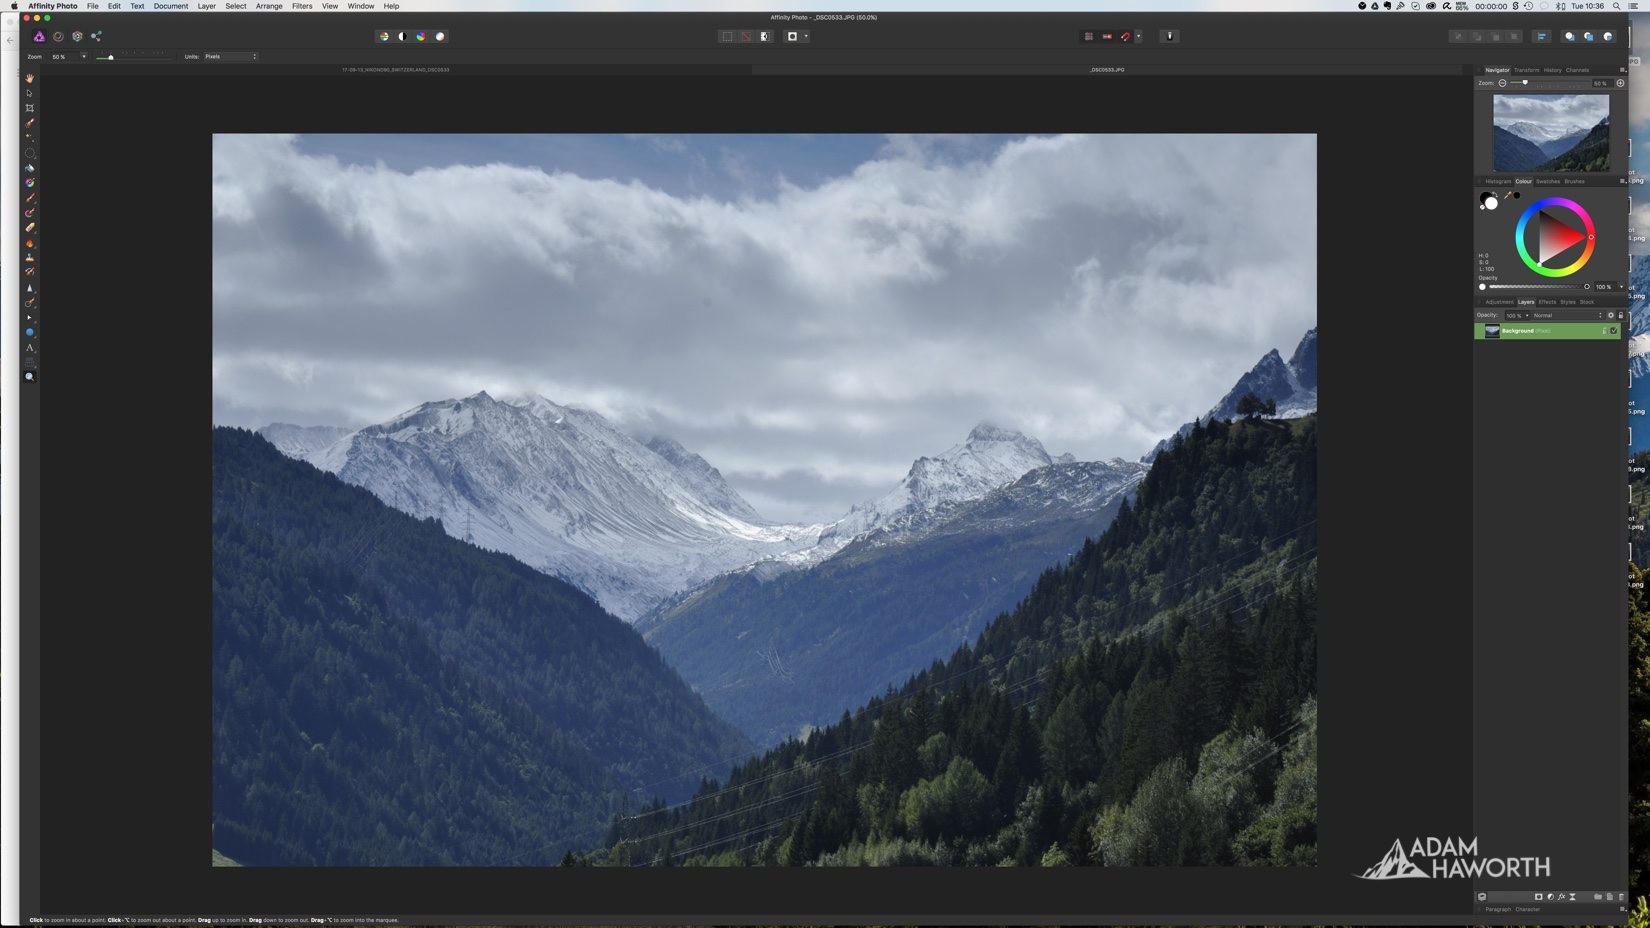
Opening a raw image into Affinity you will start off in Development persona, there are 4 personas in Affinity. Personas in Affinity Photo are different work areas for performing different processes. I like how Affinity give you a work area for each process so you aren't stumbling around menus trying to find what should be right at your disposal.
In Development mode, you can make powerful adjustments to your RAW image before moving onto the Photo Persona. Development is what I love the most about Affinity Photo, you can perform almost all edits here such as basic edits, lens corrections, tone adjustments, detail refinement and my favourite is the use of overlays for controlled adjustment of the part of the image. The overlays are particularly useful for landscape where you want to adjust the exposure or contrast in the sky without effective the foreground or landscape of the picture.

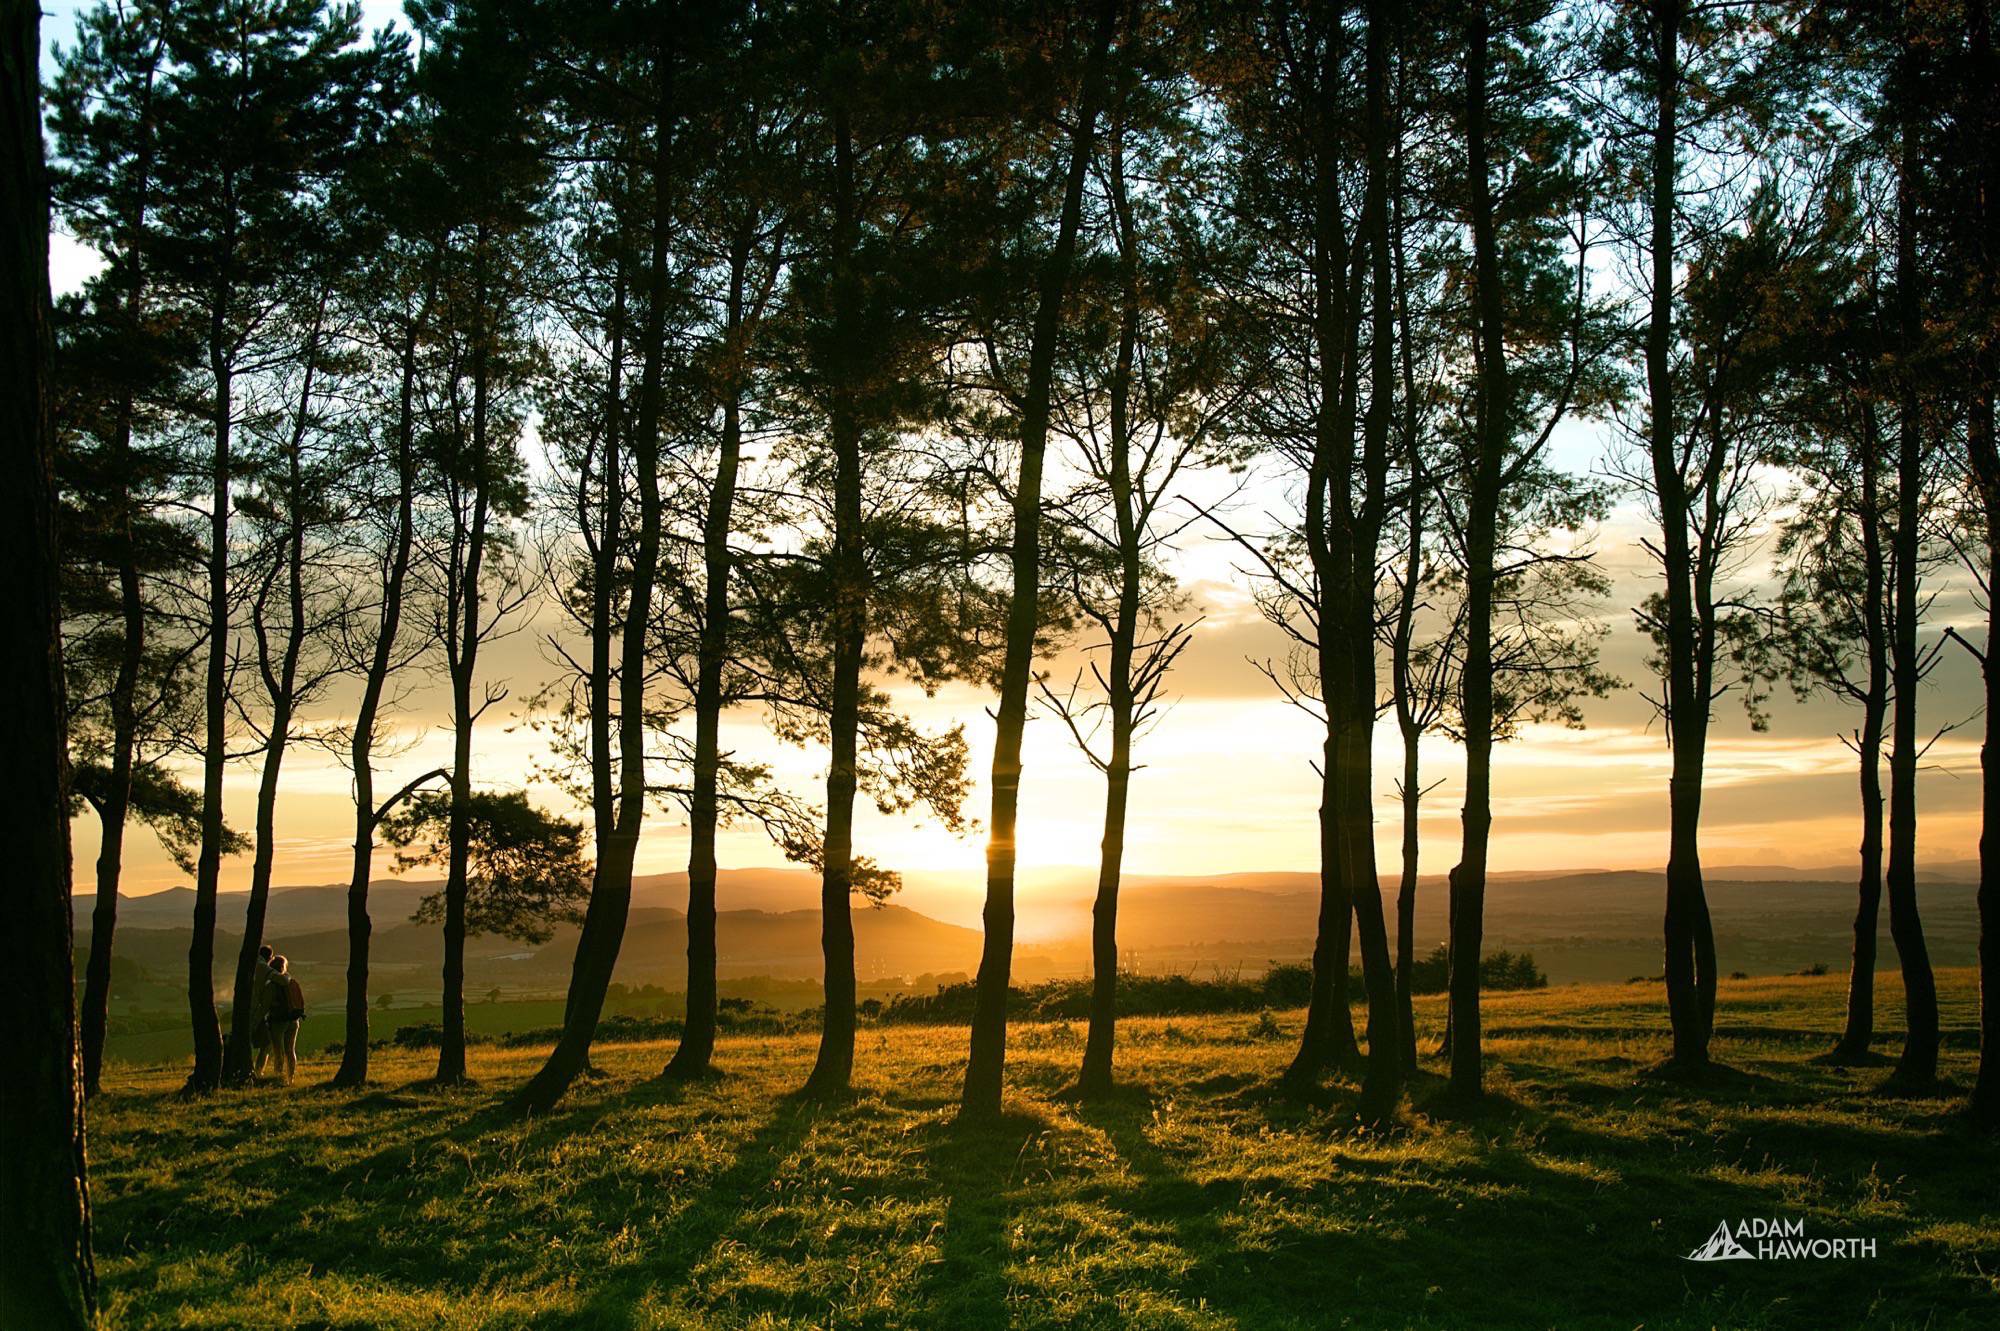
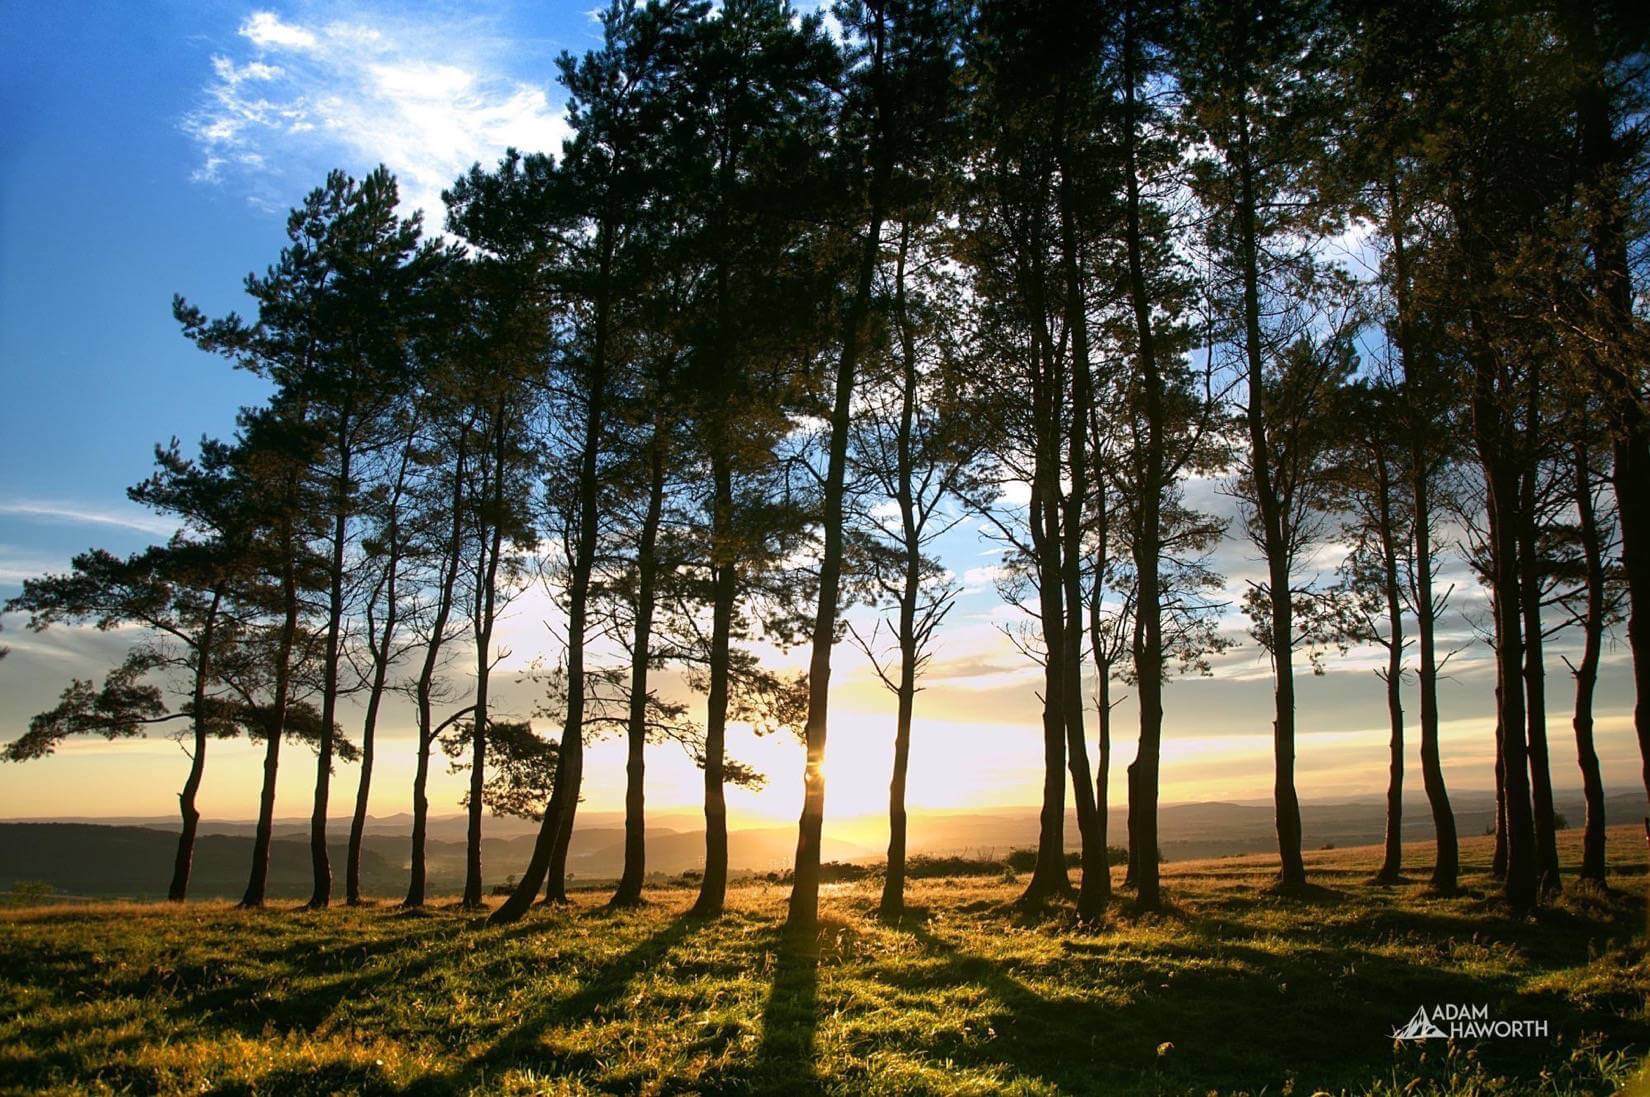
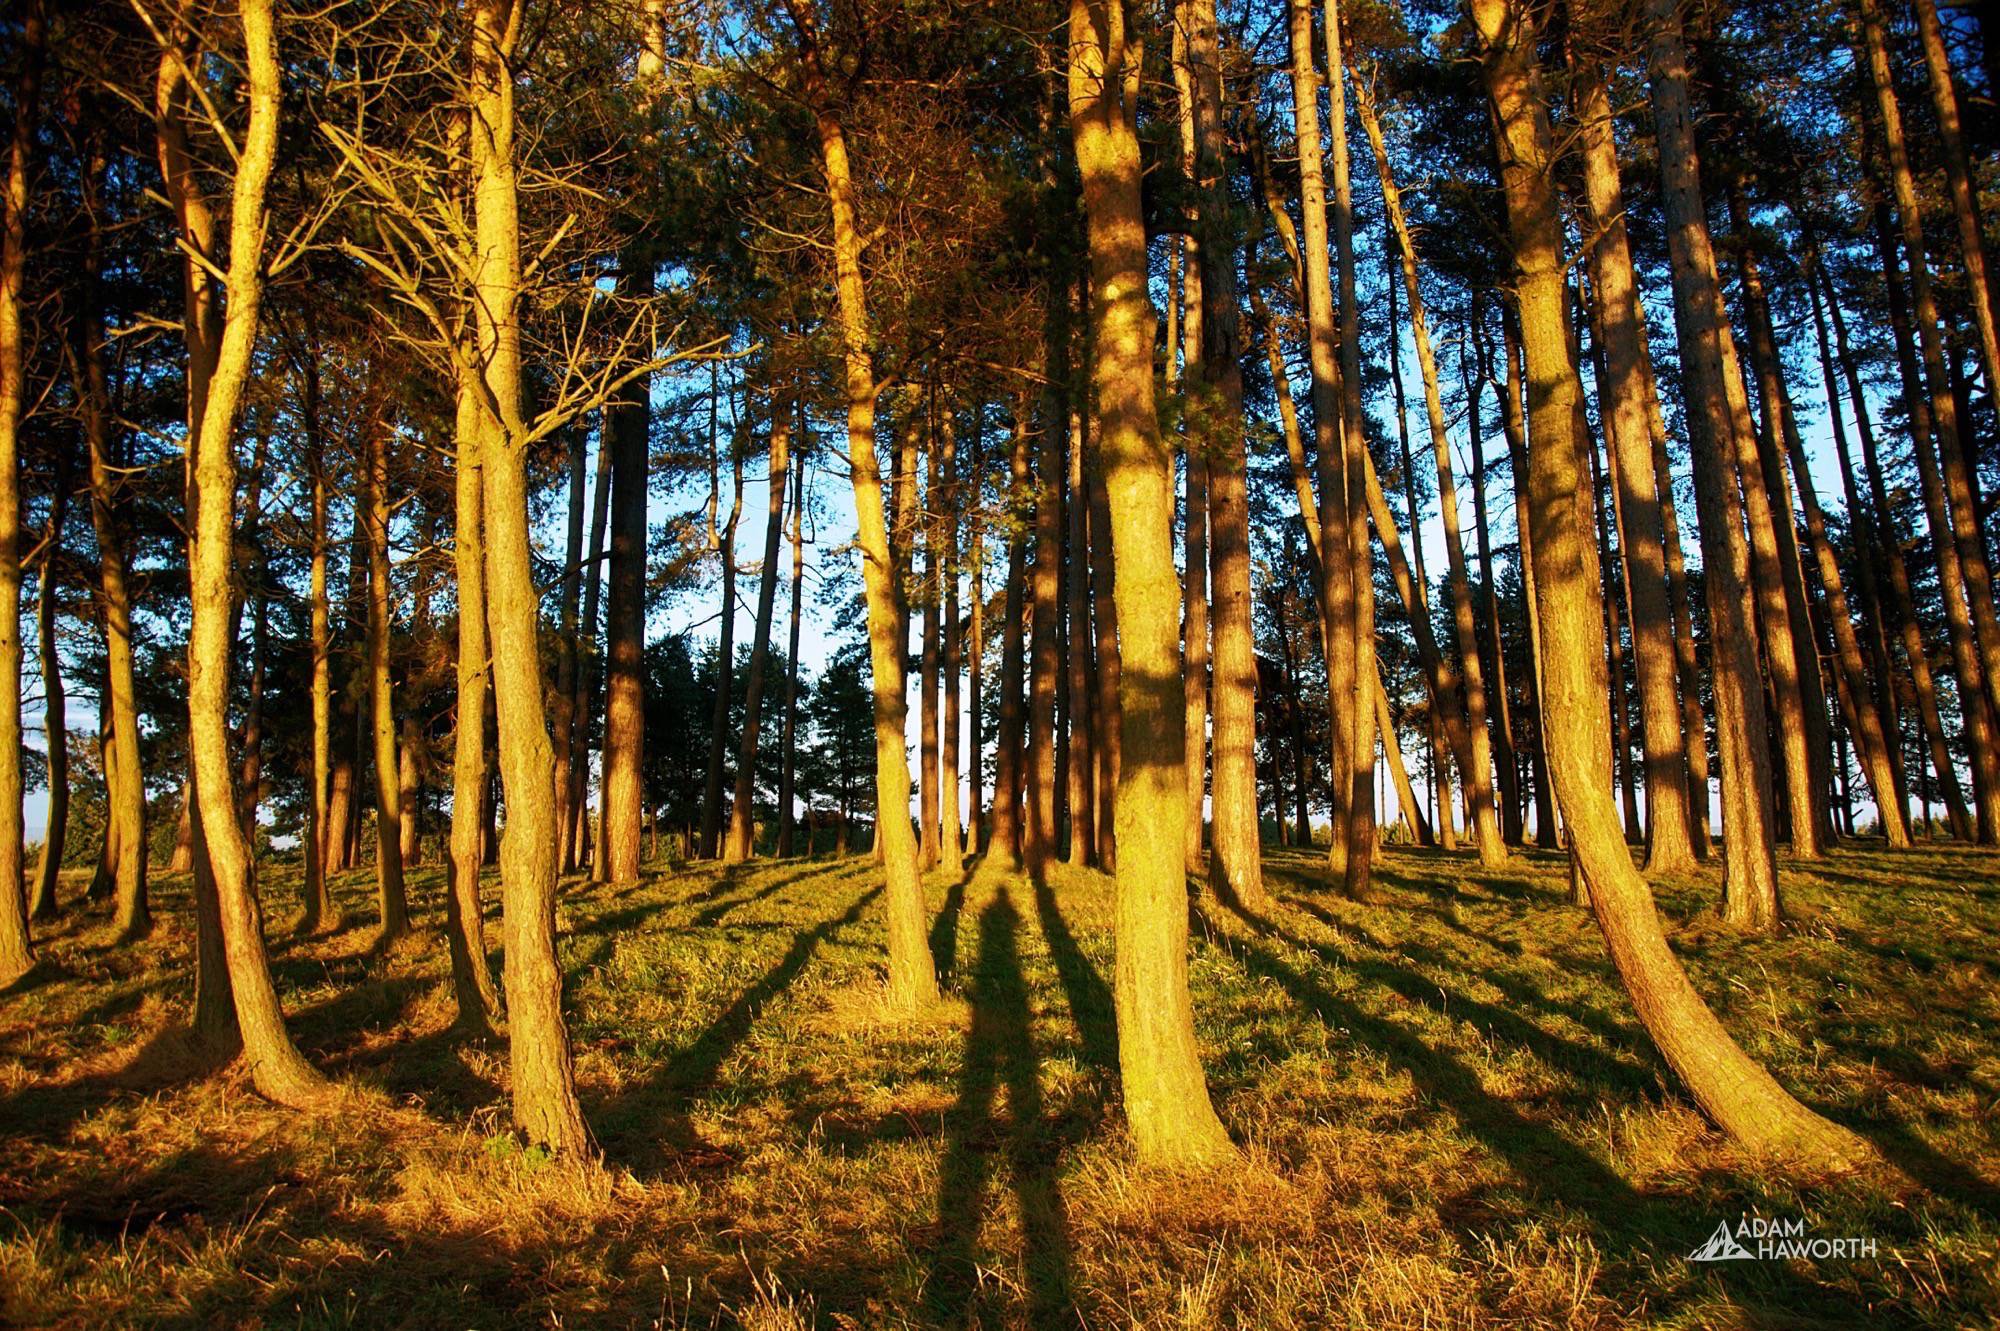
After you have finished developing your RAW image you can move along to the Photo persona to make further adjustments and access more powerful tools for manipulation of your image. With this image, I just used the inpainting brush and the burn brush. The Inpainting brush was used to remove the power lines in the image, inpainting allows for much quicker removal of unwanted elements and works extremely well in most cases as you can see in the example below. Removing elements is a much quicker process in Affinity than in Photoshop.


You can see in the examples below the difference between the original and the effects of just 10 minutes of editing. How far you go with your edits is entirely up to you but with Affinity, you can achieve just about anything you want with your editing.

Conclusion
Give Affinity Photo a try, it won't replace Photoshop for everything but it can certainly replace Photoshop for editing photography. Affinity is due to release Affinity Photo 1.5 which will bring a load of new features such as a dedicated HDR persona and 360 image editing capabilities.
When comparing the £39.99 price for Affinity Photo to even Adobe's Photographers subscription it still works our much cheaper and you can use it on as many machines as you want.

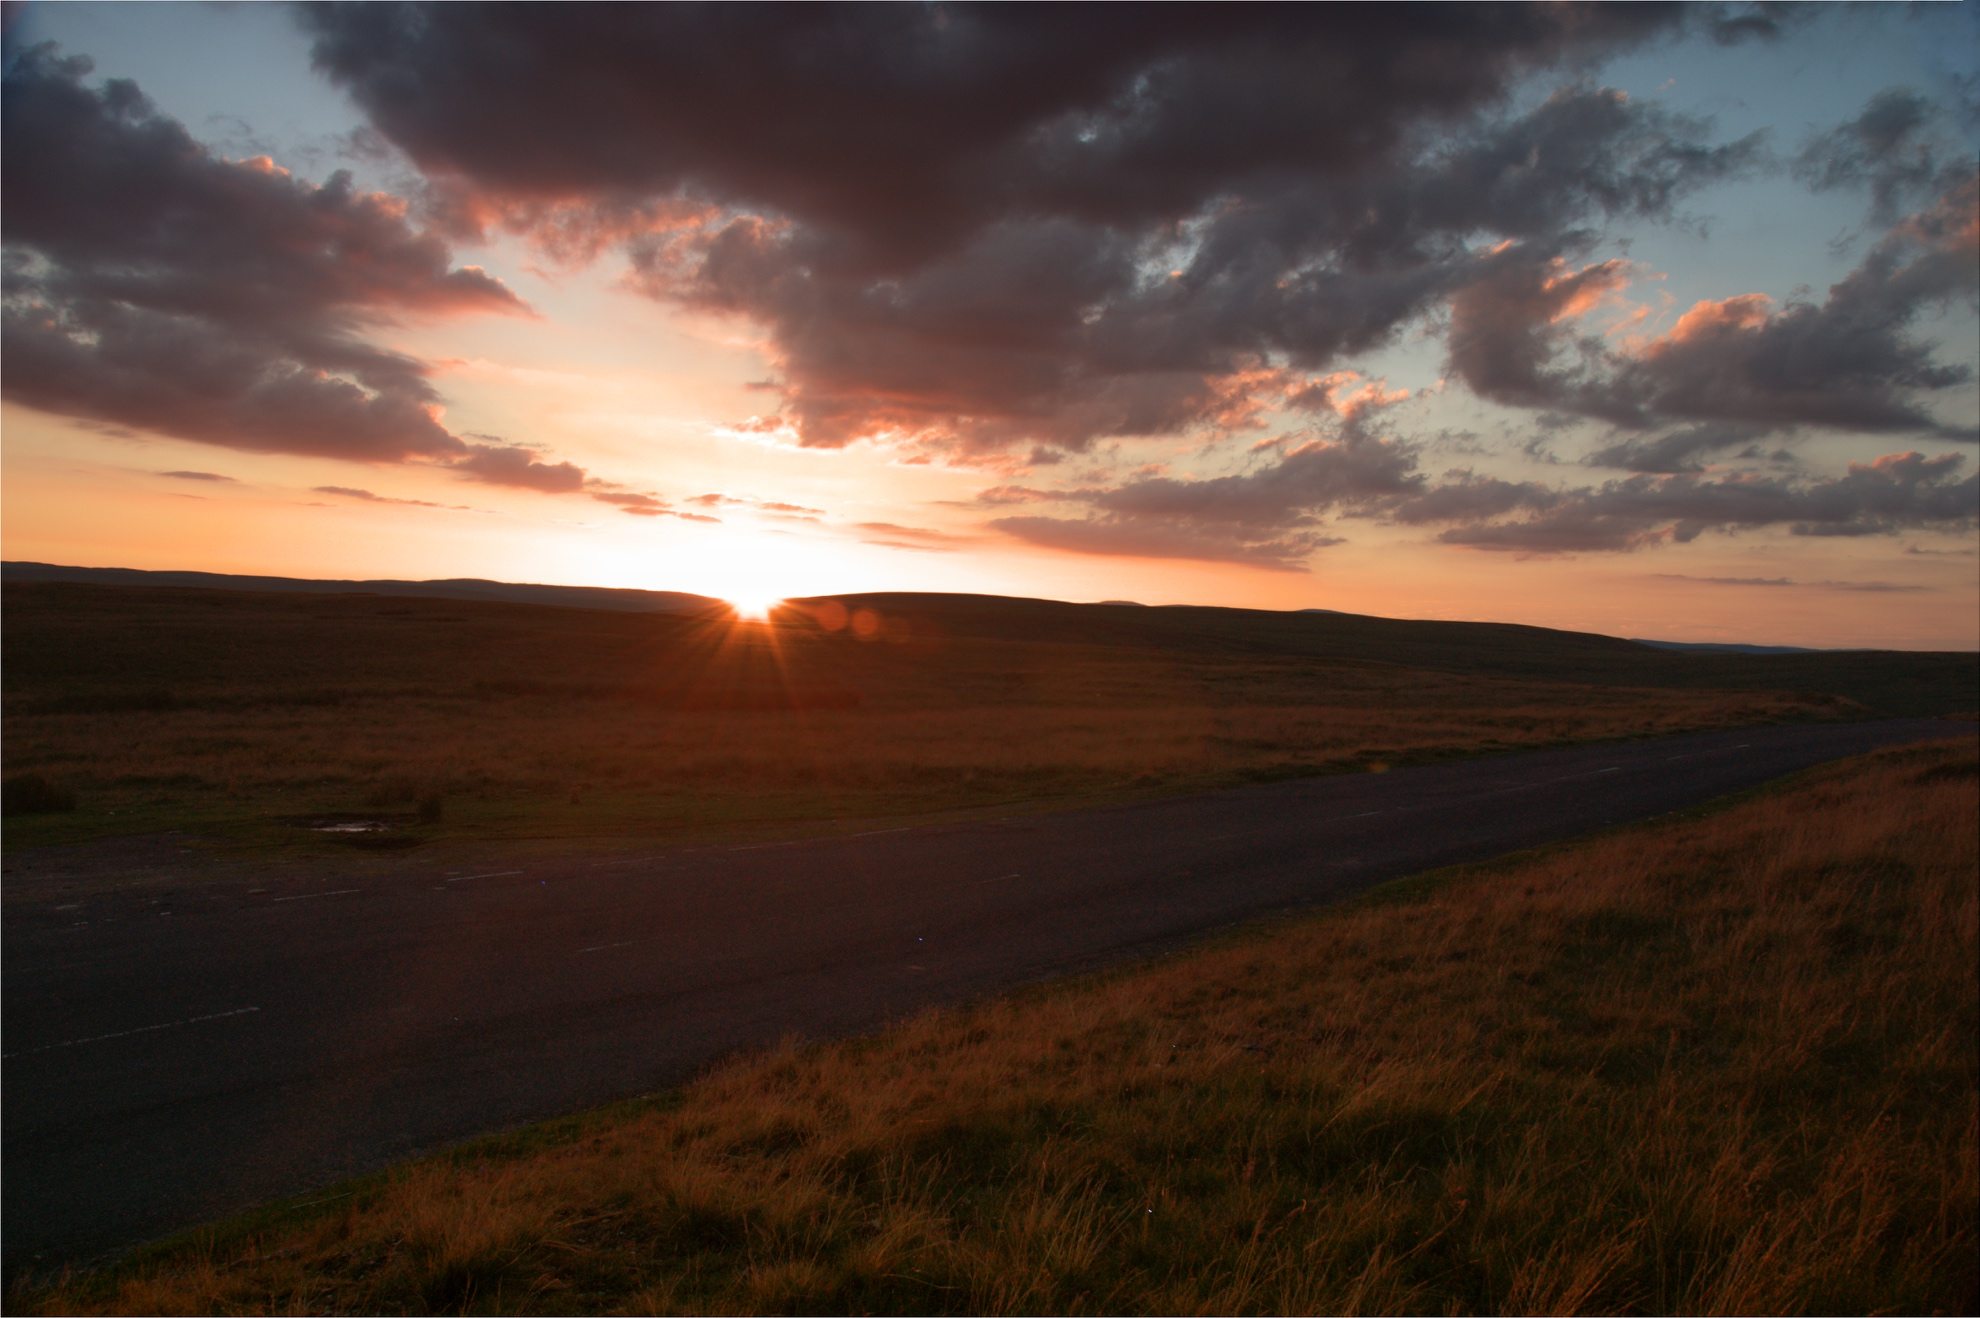
An evening on May Hill, Herefordshire
May Hill is located between Gloucester and Ross on Wye, Herefordshire and is protected by the National Trust. You can drive pretty much within half a mile from the top and stroll up from the car park. I headed over to get some pictures of the sunset over the Brecon Beacons. On a clear day you can see the silhouettes of the big ridges such as Pen y Fan and Corn Du in the distance.
May Hill is one of my favourite places in Herefordshire to catch a spectacular sunset, the sun sets behind Hay Bluff in the summer months and you have a completely clear view of the whole spectacular show from the top of May Hill.
Below is a mixture of the photographs I took.


Where is May Hill?
May Hill is pretty easy to find, it's not far from Ross on Wye. I've marked on the map here where you can park and where the top of the hill is. You can walk up from here.
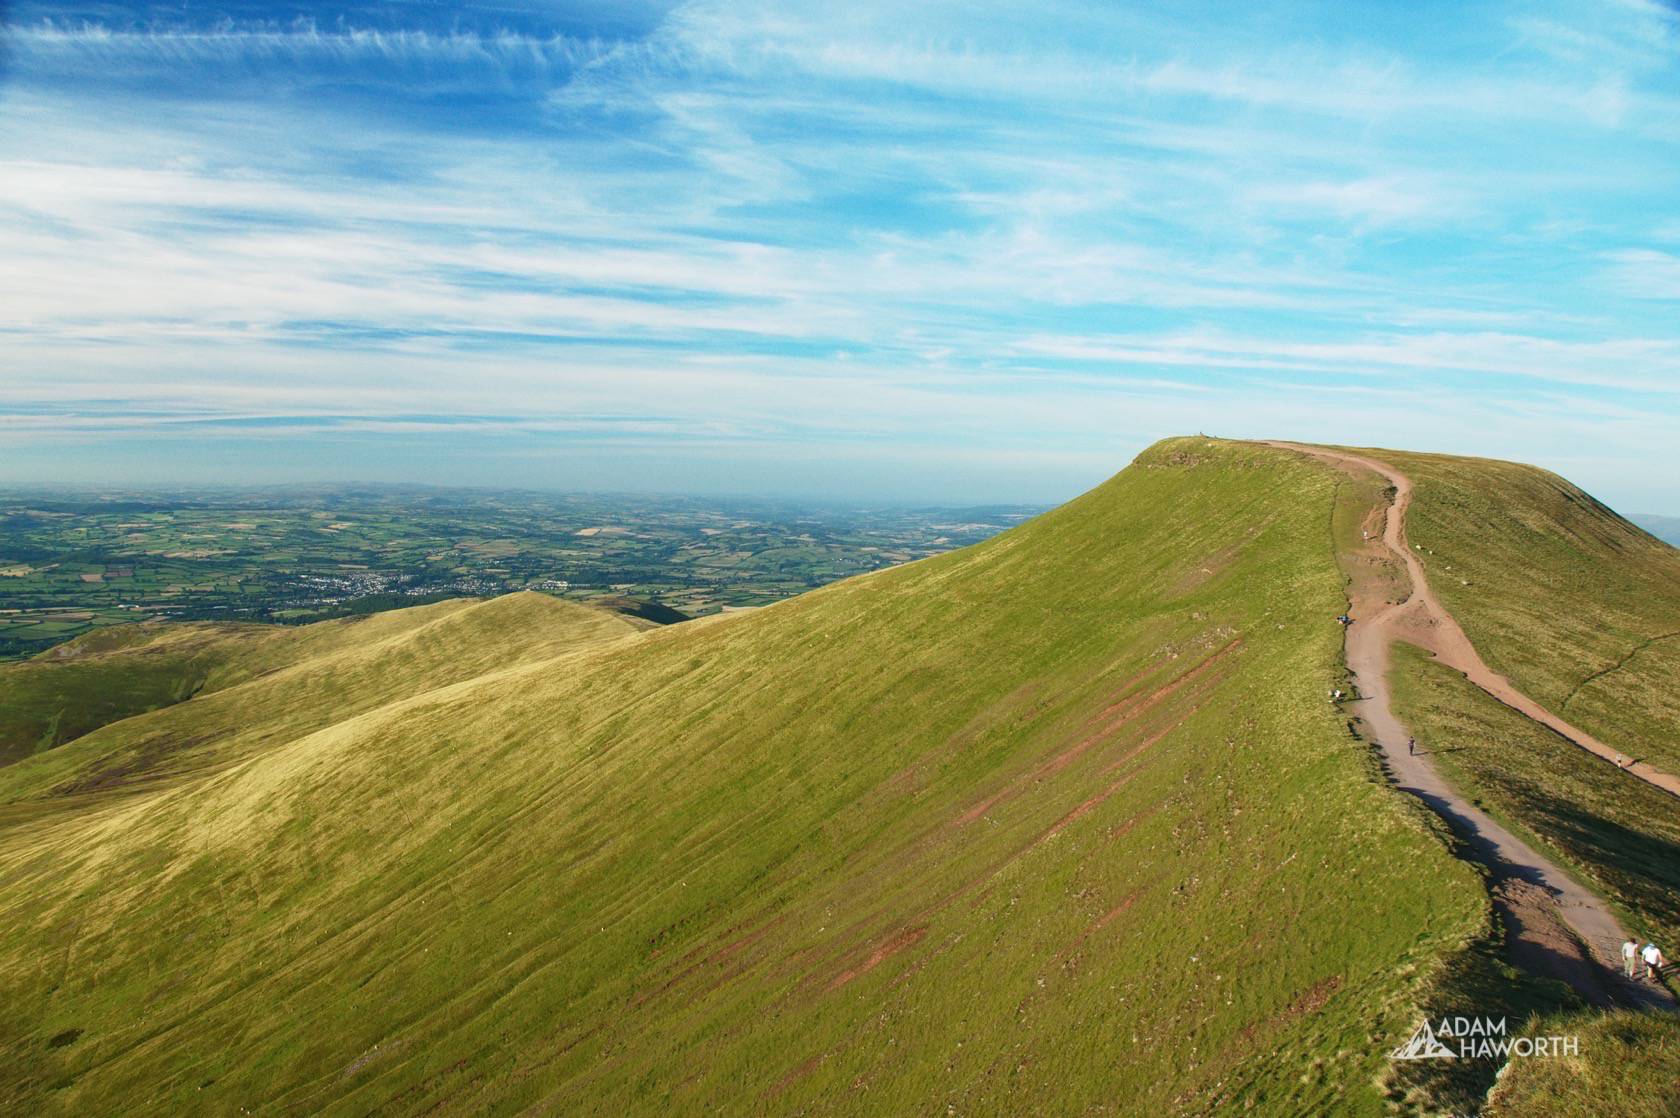
A summer's day in the Brecon Beacons
So it's mid-August and the weather is fantastic, where better to spend the day than on the mountains in the Brecon Beacons. I planned a pretty straightforward route and headed over to the Beacons with a friend around lunch, the weather was just amazing in all directions.
We did a short loop around Corn Du and Pen y Fan and headed back towards Torpantau. I've mapped out where to park at the bottom of this post if anyone fancies this route and the route is also available below
You can view the map on mapOmeter by clicking here.
A year with Apple Music and my thoughts
I've been thinking about writing a review on Apple music for a while because there are so many things about it that bug me. I figured I would give it a little longer before writing a full review and see if Apple updated the interface in the meantime.
Okay so they didn't update the interface so here are my thoughts on it. I'll start by saying that before moving to Apple Music, like most people, I was a Spotify user. I've used iTunes for years and have over 100gb of music updated with iTunes match so when Apple said they were coming out with a Spotify competitor I was pretty happy as I could once again have all my music in one place.
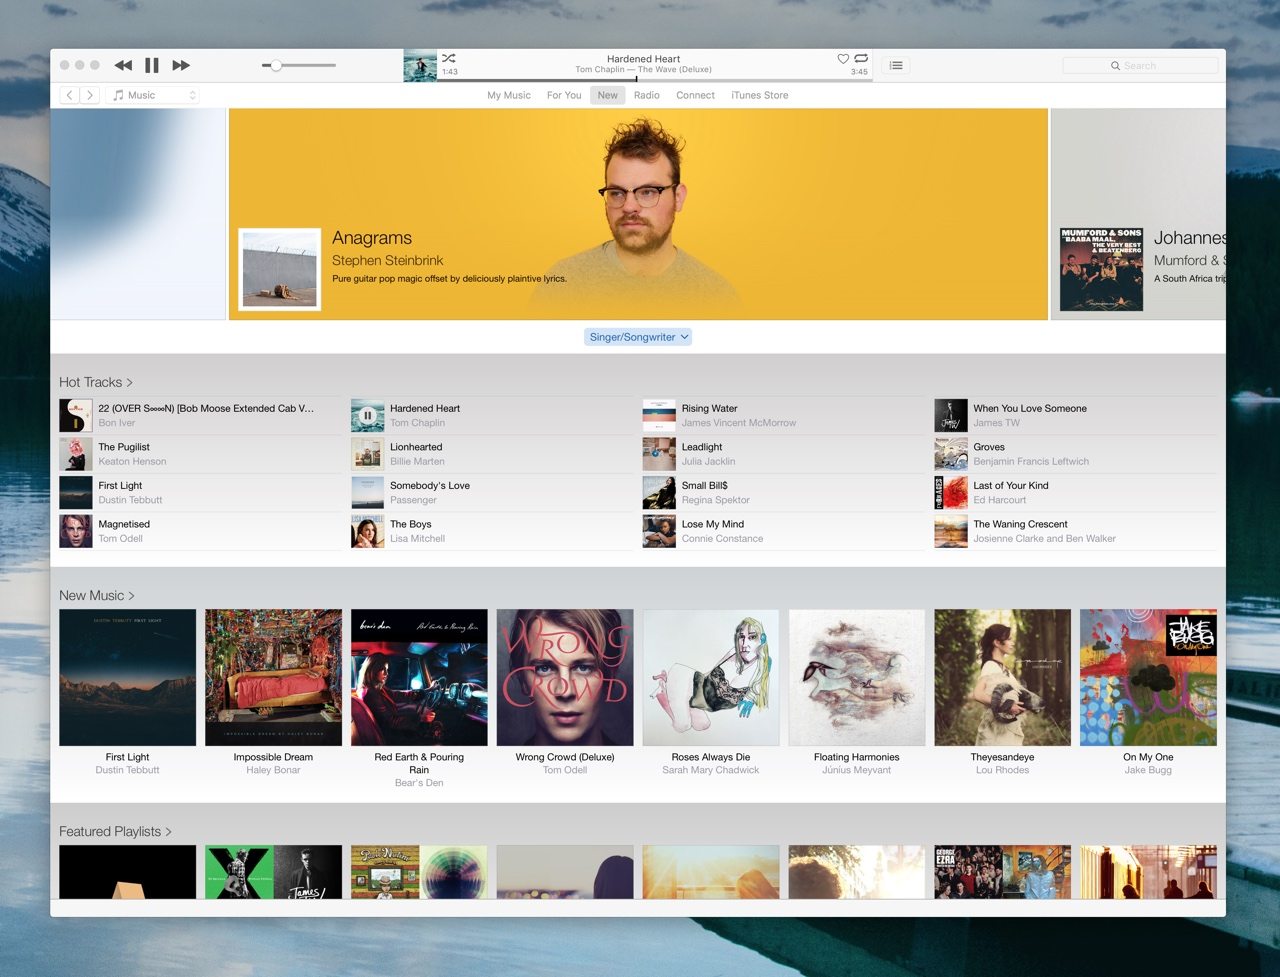
I like Apple Music, it has just about every record you can imagine but I find myself listening to the same 4 albums each month. Is this Apple's fault? I'd say yes because of their lack of playlists and poor selection on 'For you' leave you listening to the same thing. One of the best things about Spotify was the playlists, the endless playlists, each day I could pick a new playlist and I would rarely hear the same records more than twice. Maybe Apple Music has more playlists but I've have looked and can't find anymore than 20 for Singer/Songwriter genre. I've now got into the habit of going to 'New', selecting the singer songwriter genre and then going for hot tracks. This works pretty well but when you listen to music throughout the working day you soon end up listing the the same record over and over (currently listing to Rising Water for the 1000th time today).

For a company hell bent on excellent design how did they get the interface for Apple Music so wrong. There isn't anything intuitive about any of it. iTunes on its own is great, so why can't they keep it more inline or create a flow to finding new music. Why when you go to a genre do you have to go in another loop to select playlists for that genre. I also can't understand why they can't just incorporate the 'For You' and 'New' sections together, 'New' just seems to be aimed at teenage girls and rappers, so can't we have an algorithm that better detects your music preferences and give you some playlists based on your preference.
The 'For You' section is just a waste of space, it just recommends music you already have and then just recirculates it after a few weeks. How many times do I need to have Sia Collaborations or Ed Sheeran as a suggestion. Again if they can put 'For You' and 'New' in one section together it would leave space for a new section. Maybe call this section Discover, where you can find new artists based on your preferences.
Other small bits that irritate me, the current song info at the top, why can't you just click the artist name or album to then go to the entire alumn of artist. Instead you have to click the tiny three dots and then go through two menus to simply go to the artist's page.
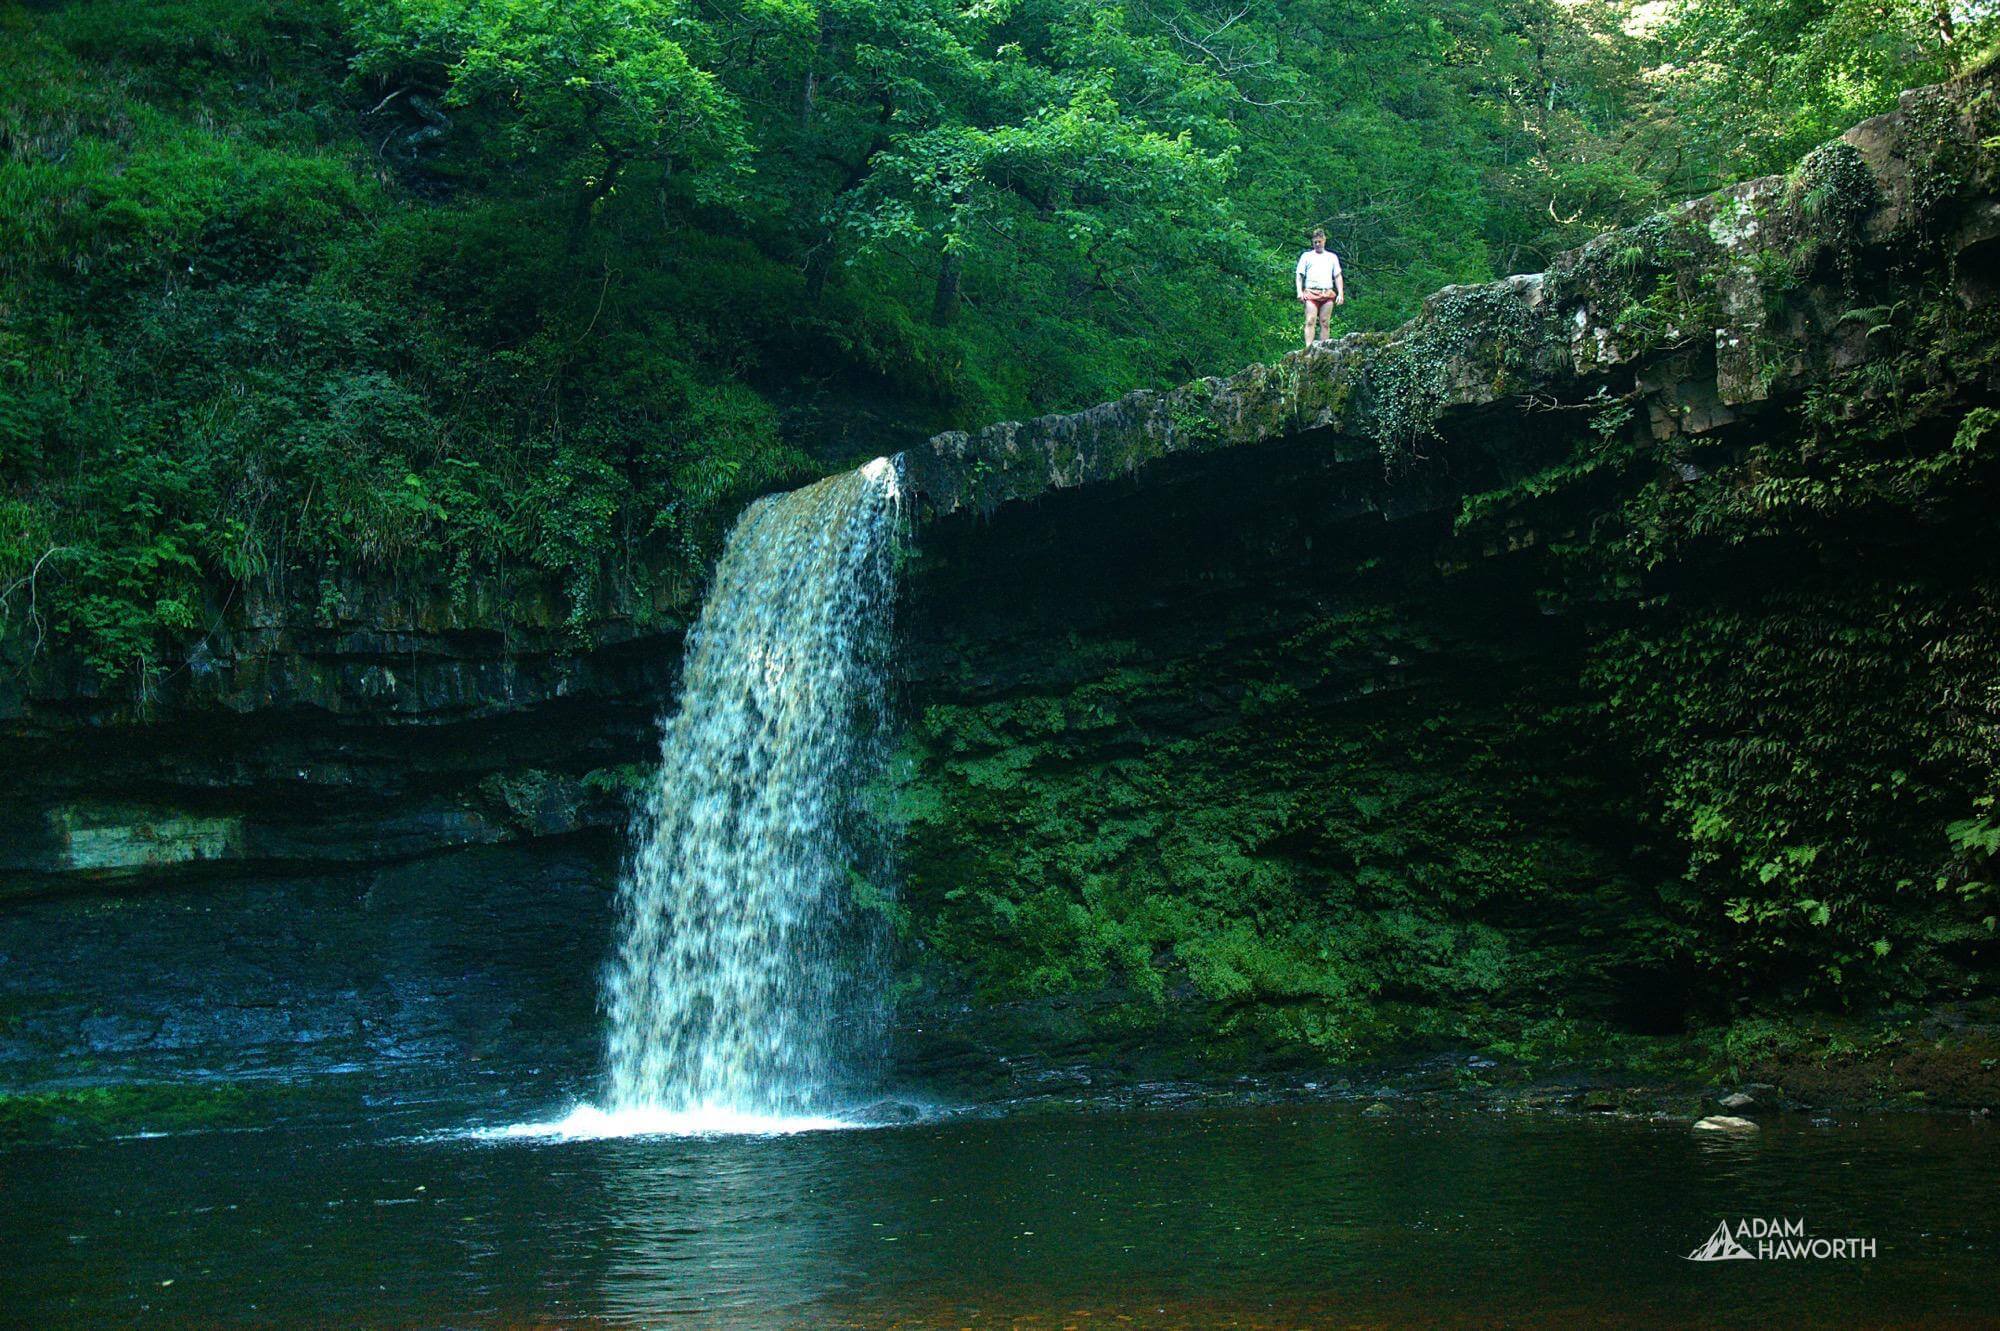
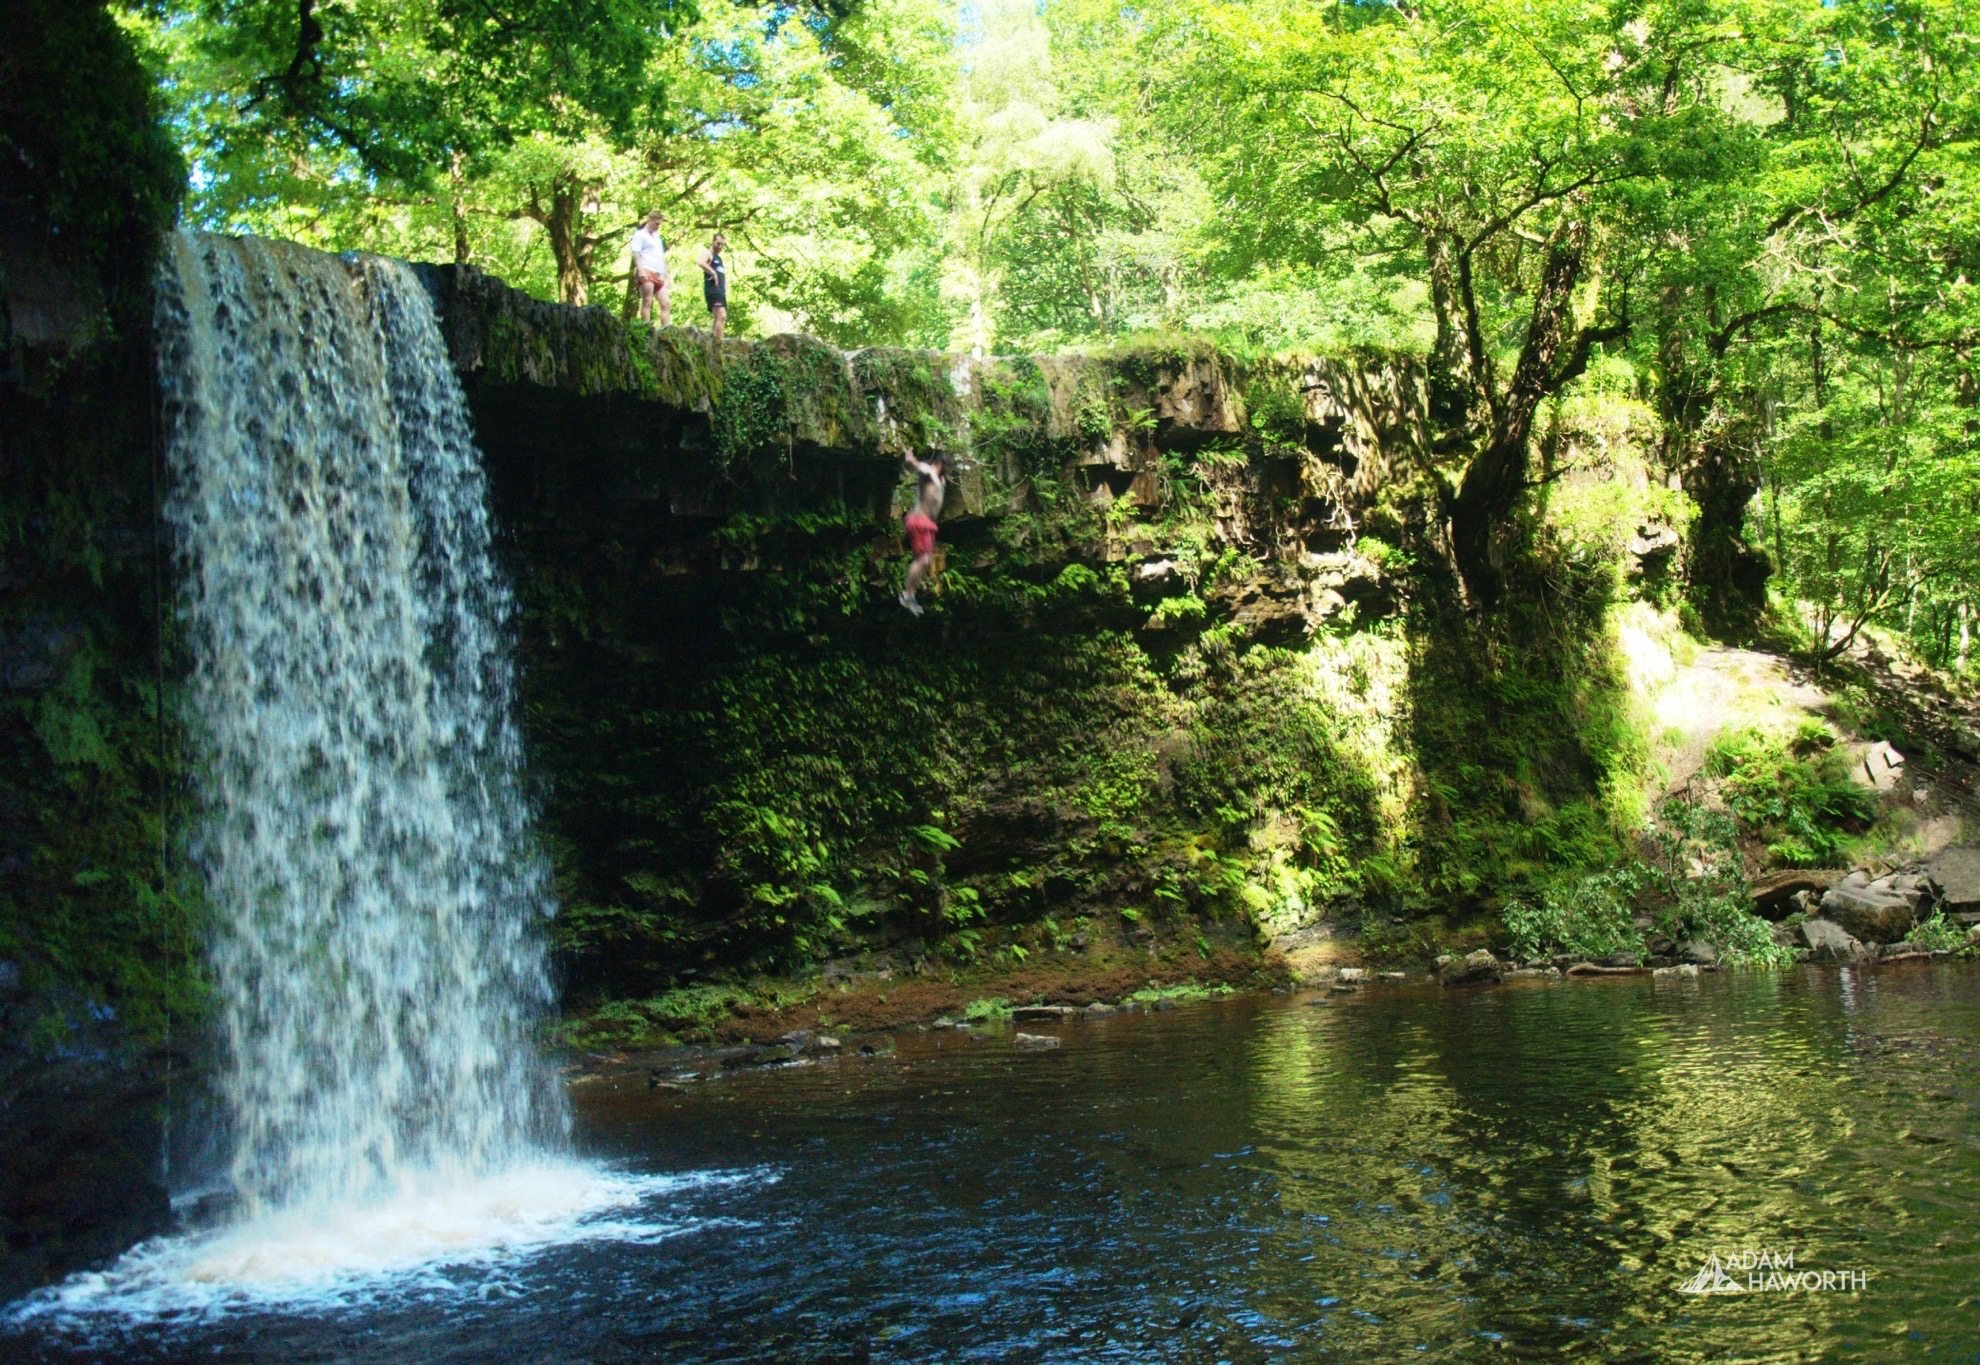
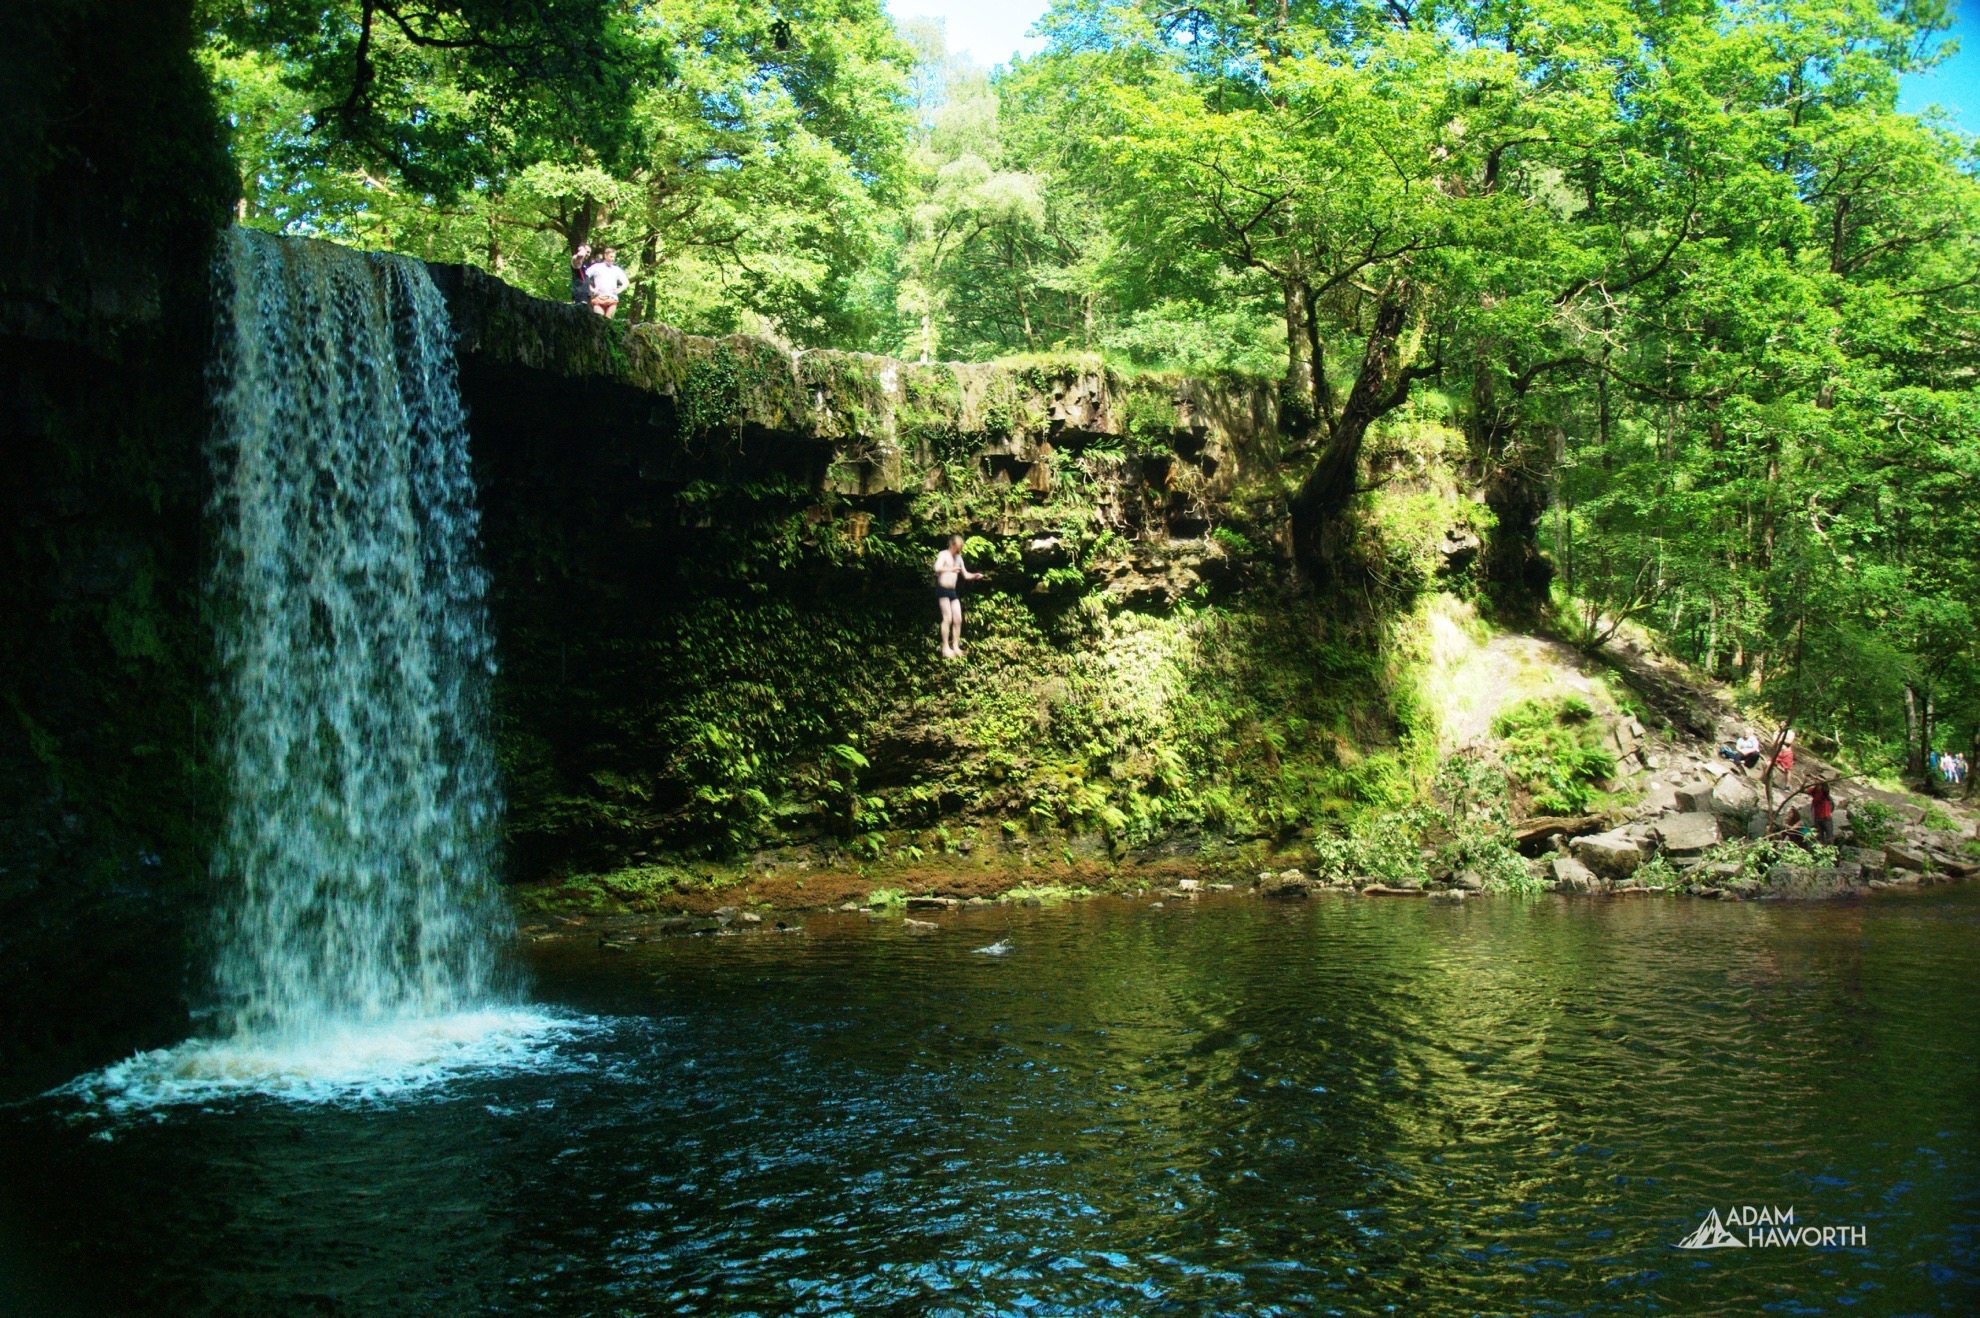
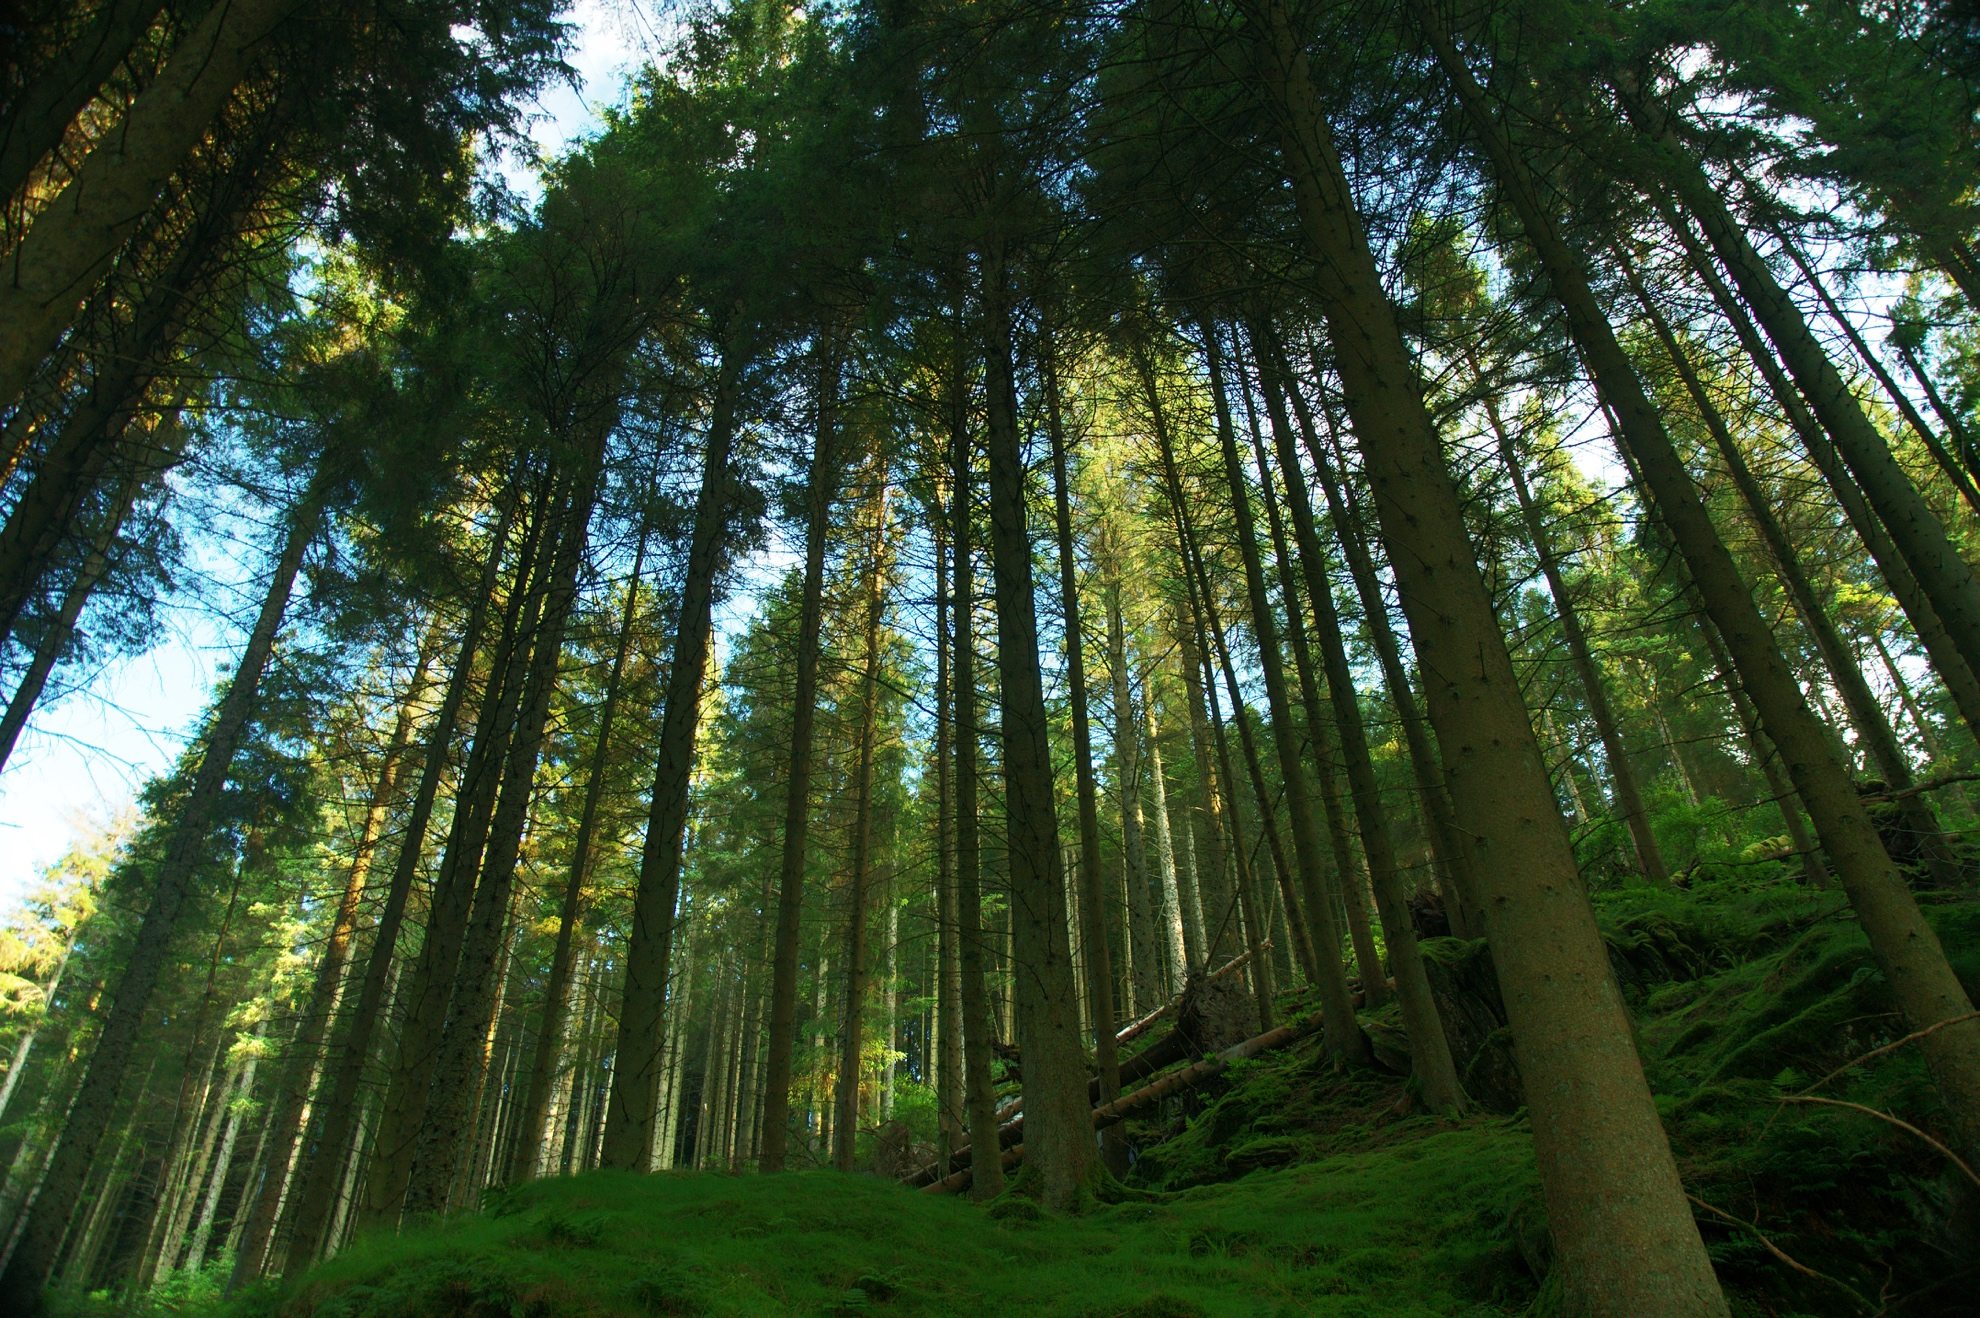
Summer Woodland and Waterfalls. Brecon Beacons, Waterfall Country
With a sudden feeling that summer is quickly passing by I decided to take a trip down to the Brecon Beacons Waterfall Country yesterday. It was a stunning day and with a load of rainfall last week I was hoping to get some good shots of the waterfalls. I picked up my Grandad who is 85 but still loves a good hike and we set off to South Wales.
Everyone seemed to be out in the Beacons, we passed Storey Arms Outdoor Education Centre there must have been over 100 cars parked all over the place. I guess Pen y Fan was busy on Saturday! As we go got close to the forest Fawr massif it was obvious the waterfalls would also be pretty busy.
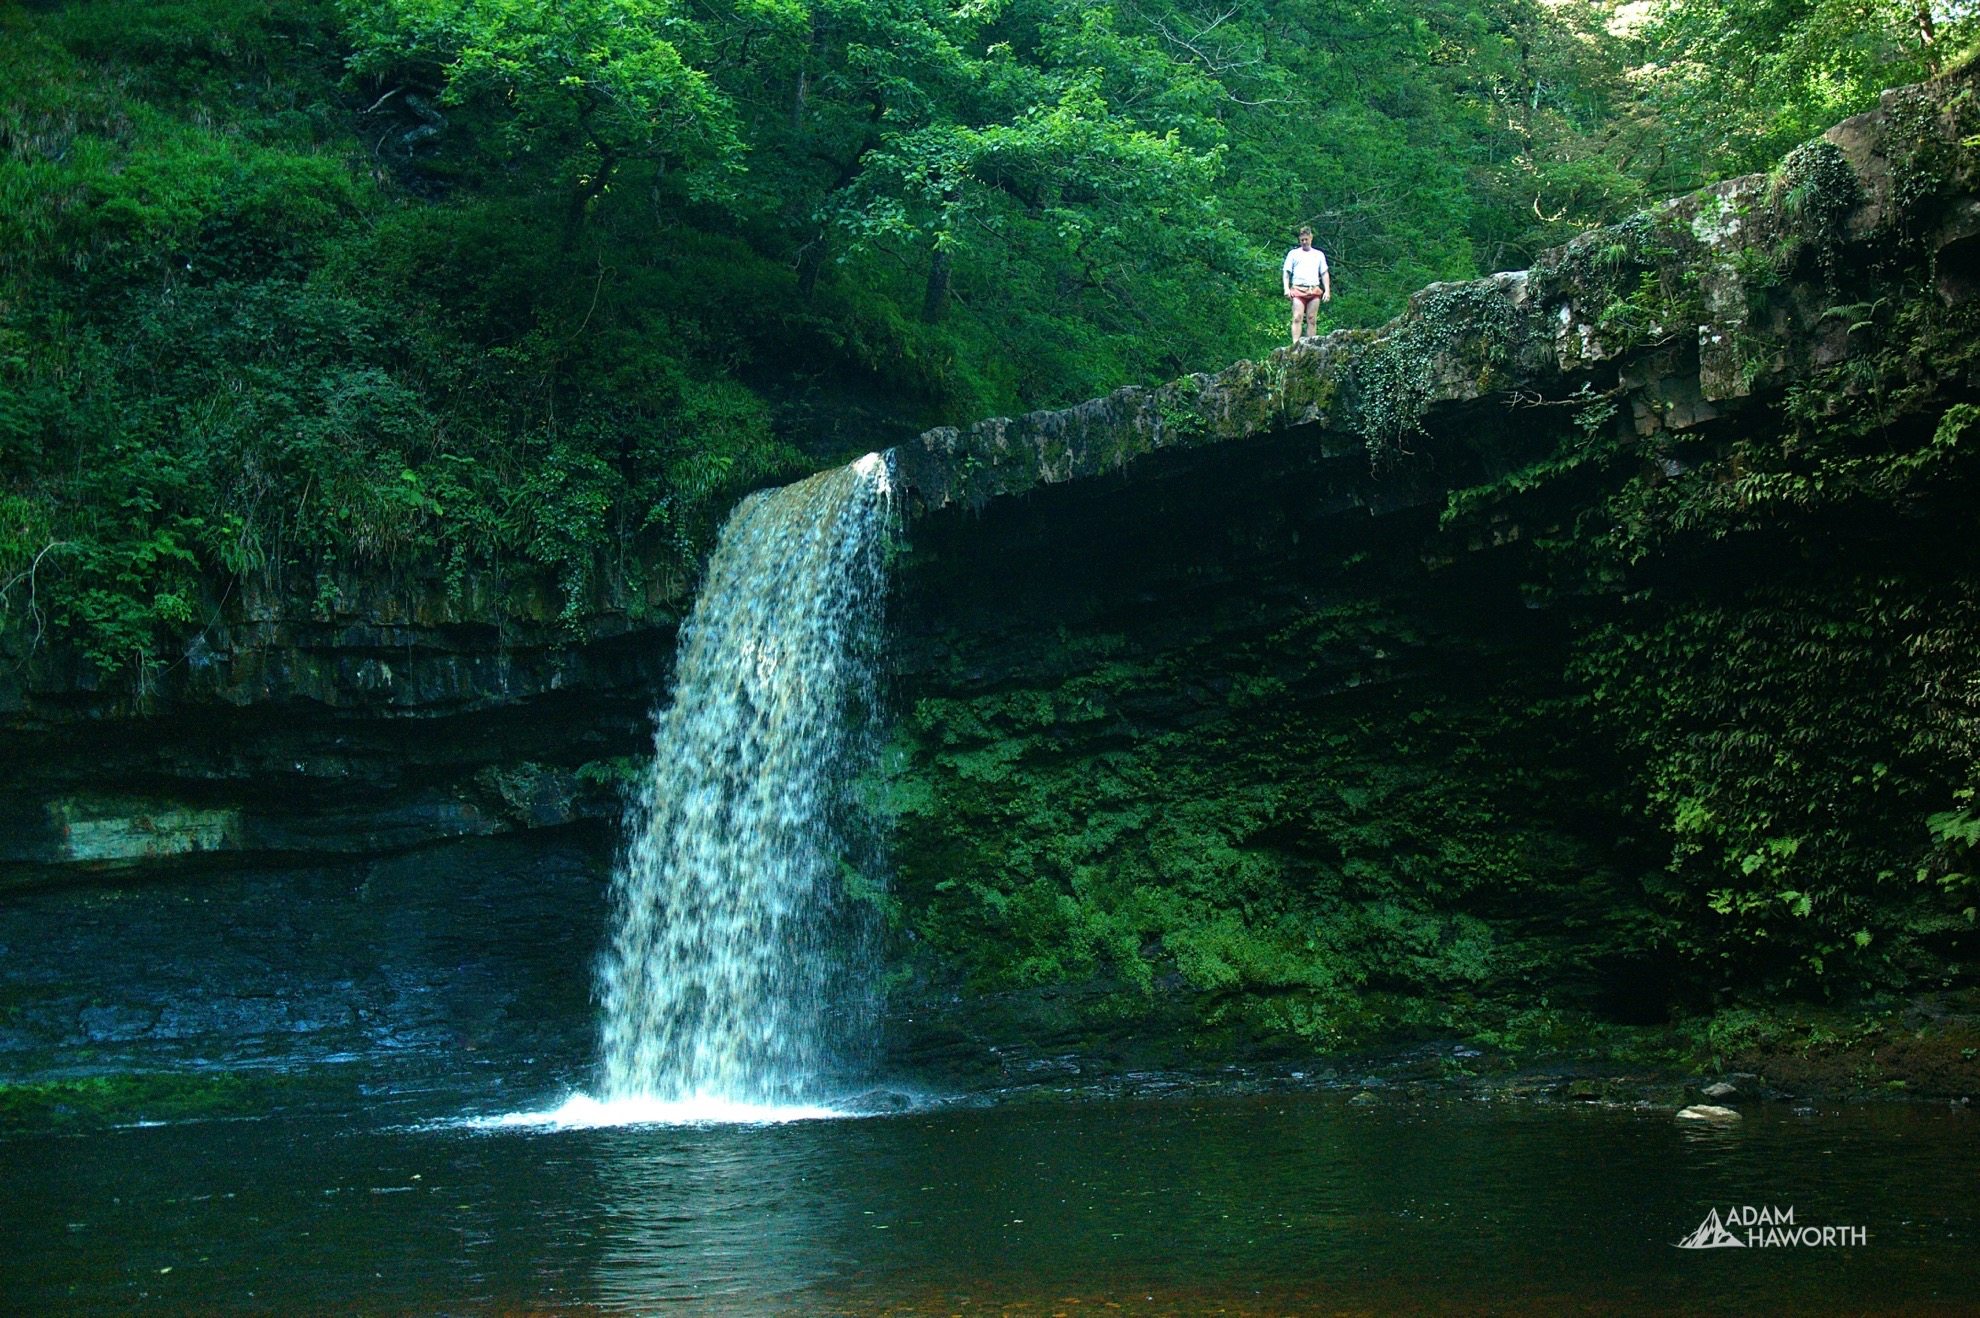
The Waterfall Country has got to be one of the best places in the Brecon Beacons to go for the day. It's pretty easy to access and just about anyone can make their way through the forest paths. You can take a pick at countless things to do from Caving to Kayaking or you can play it safe and just walk around the falls. I didn't think my Grandad at 85 would be doing much caving.
We walked through the forest to the Sgwd Gwladus waterfall. It was nice to see so many people out enjoying the weather and the falls. We stopped above the waterfall for some lunch then went to watch some people jump into the pool, which looked pretty awesome.

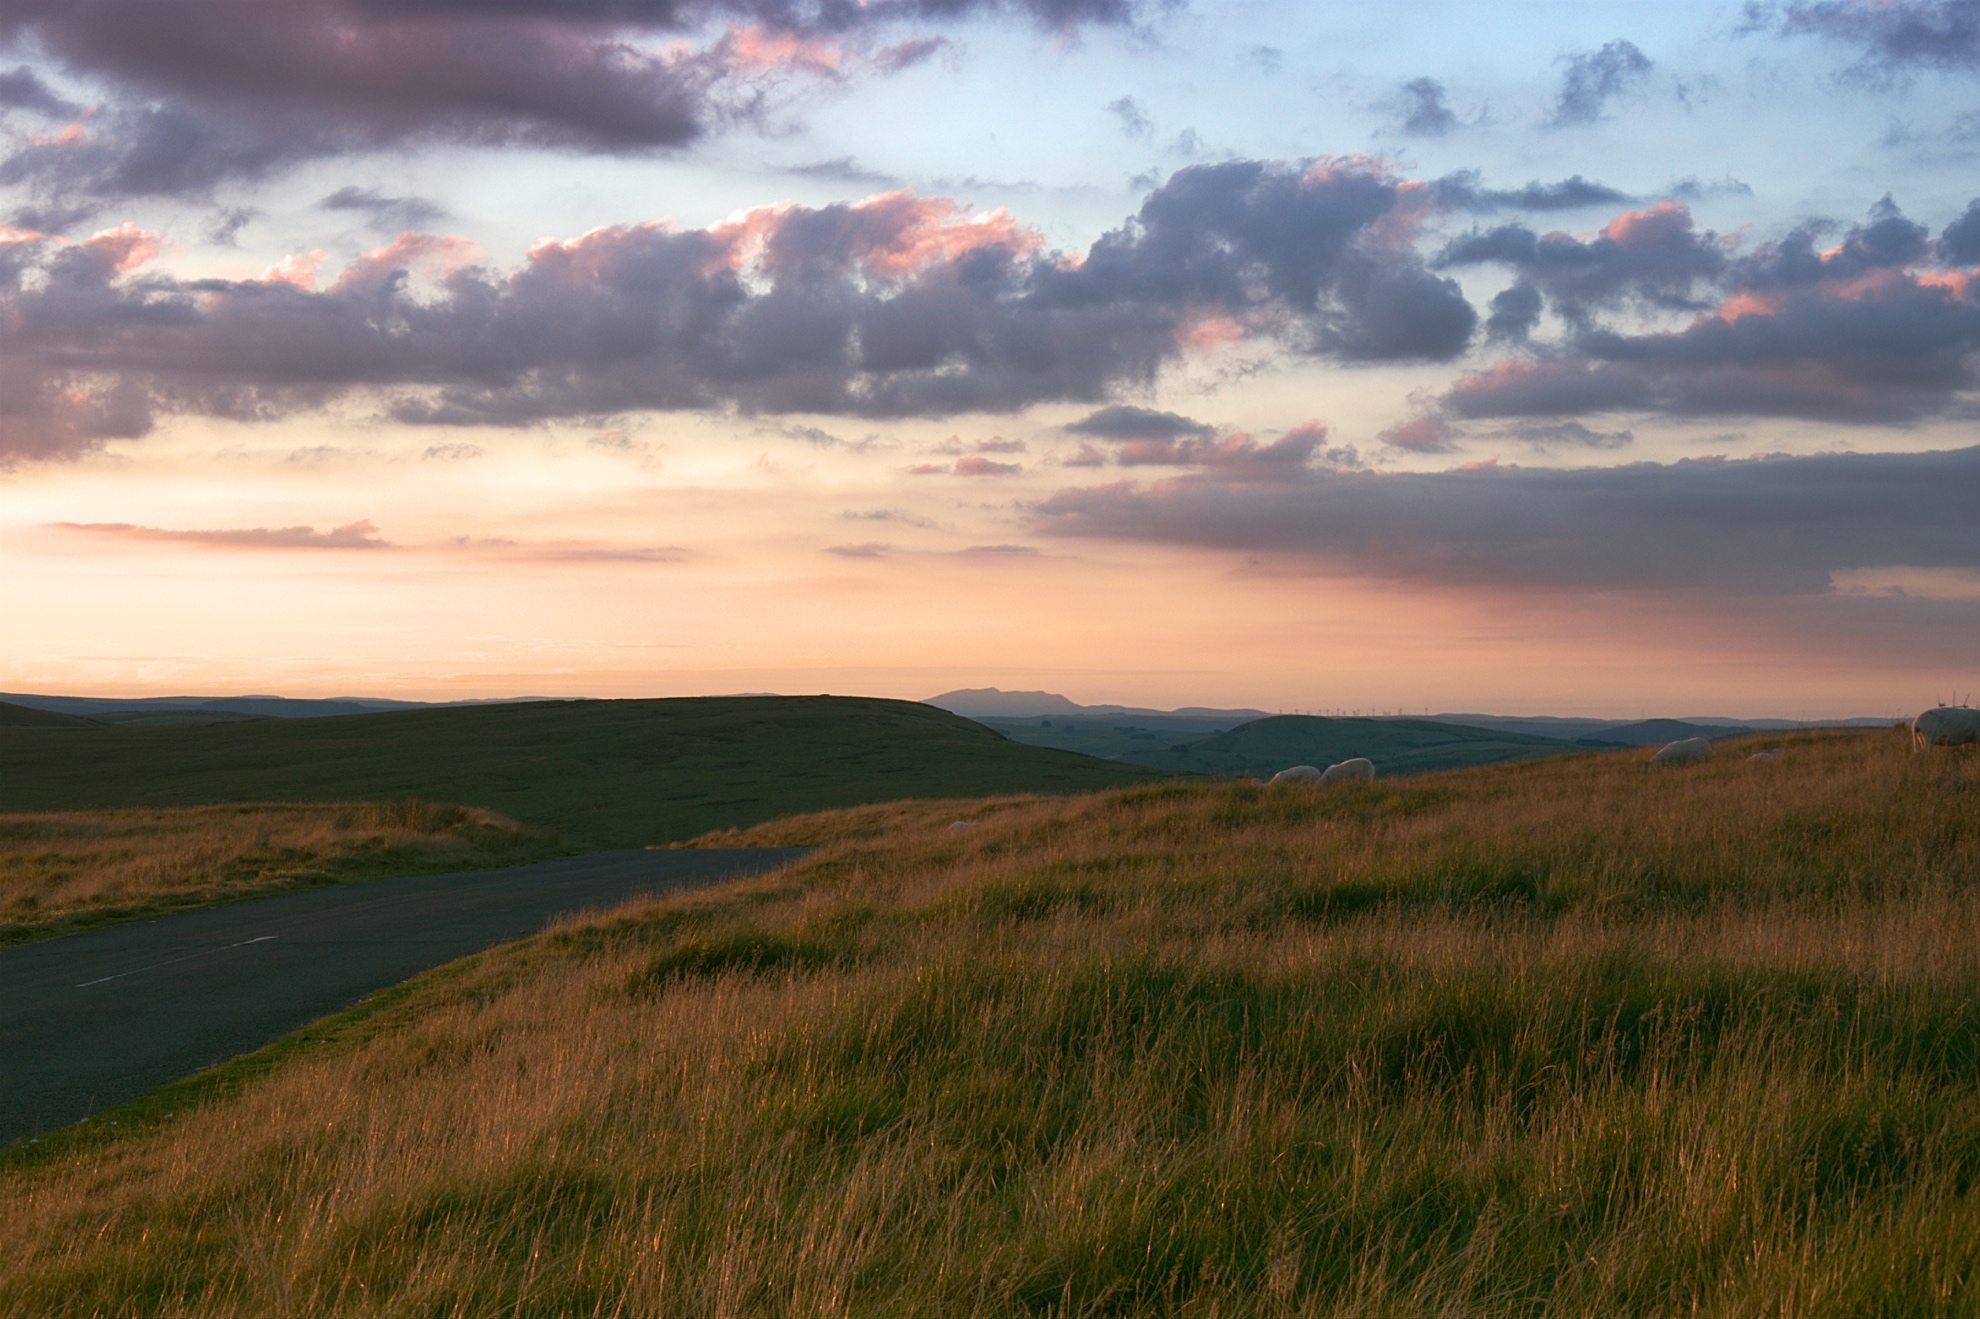
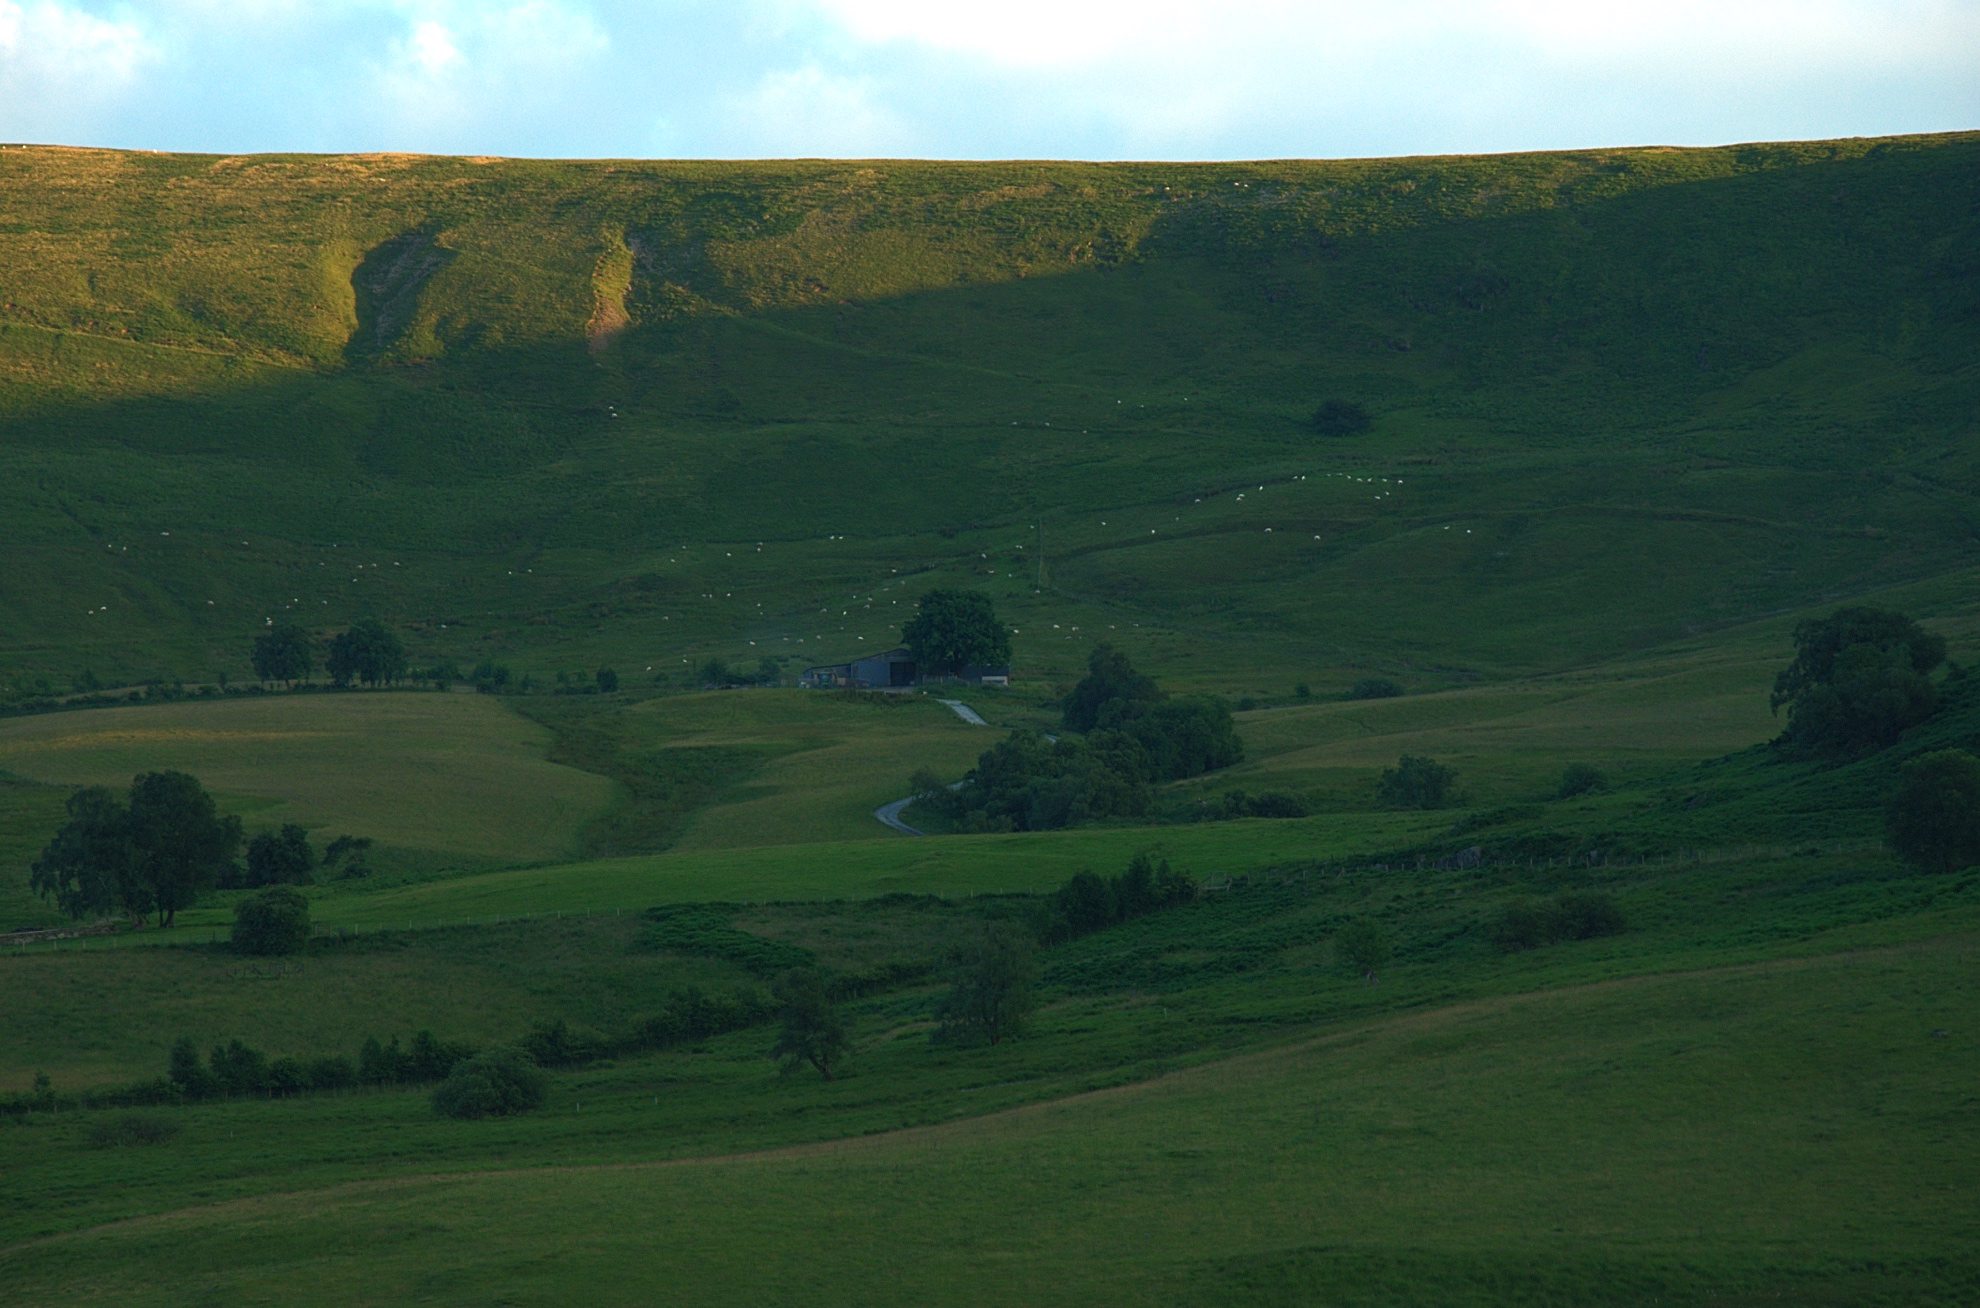
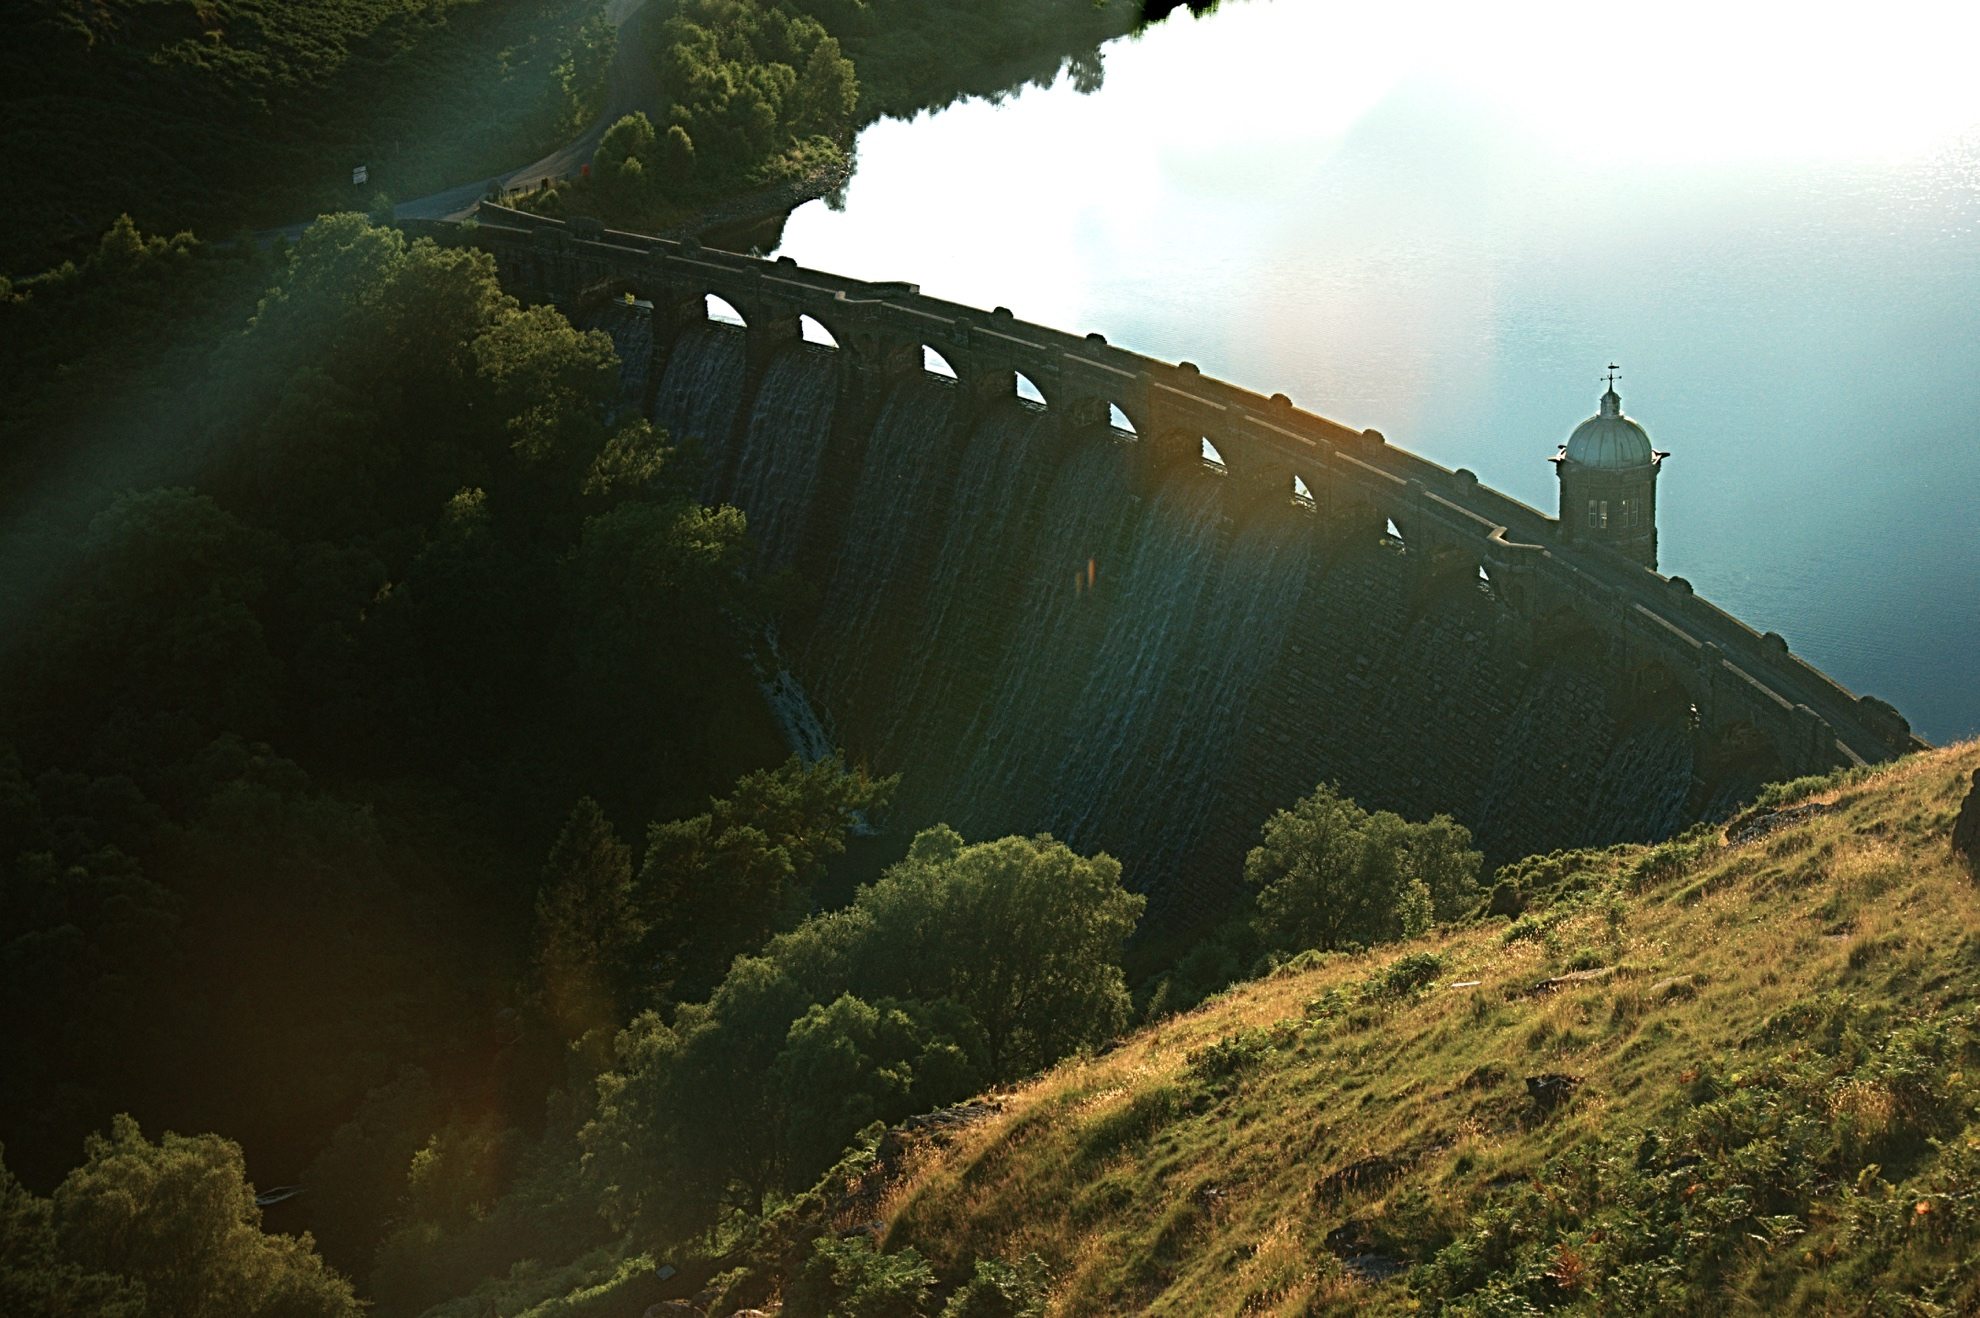
Summers Evening in Elan Valley, Rhayader
Elan Valley is a little gem hidden in the Welsh countryside and best known for its dams and reservoirs. It's a place that's pretty easy to get to and no matter which direct you come from, the drive is just spectacular.
Making the summer evening I thought I would take a drive over from Hereford, I planned on stopping to have a look at a few places I've driven past before but never had the time to explore. I ended up doing a loop from Rhayader, around Elan Valley and back to Rhayader. Along the way, I managed to get some stunning pictures of the sunset.
Below are a few of the images from the evening and I've put more on my Instagram account.
5 Travel Inspiring 5K Desktop wallpapers from Unsplash
Unsplash is one of my favourite resources for stock photography and the fact its free actually comes second to the fact the photography available is truly outstanding. You will find Unsplash photography on a lot of my projects from CloudCanvas to WP Helper. I also make use of Unsplash for other things such as keeping my desktops fresh with some inspirational wallpapers.
Since 2013 I started using 4k (retina) MacBook Pro 15", last year it got destroyed by a glass of water and decided to get an iMac while waiting for the insurance to send a replacement MacBook. I went for a 27" 5K iMac, it's a hell of a machine but has a habit of making even the best photography look blurred. So I've picked out 5 5K wallpapers that look as sharp as a needle on your high resolution displays as I know finding high res wallpapers can be a nightmare.
Preview the images below and click the download button here to get the zip file containing the orginal 5k versions of these images.